Tag Archives: Homestead Produce

Blackberry Syrup with Honey

image

So…we’re moving in just a couple of weeks. And we had a freezer full of food to eat up since we will be living in camping trailers and won’t have freezer space available to us (have you seen how small those freezers are?).

We had several bags of wild blackberries in the freezer from two summers ago. First of all, they just needed to be used. Because, you know, two summers ago!

Second of all, as I said, we don’t want to transport frozen food to Nevada. So we either needed to eat them or transform them into something that is doesn’t need to be refrigerated/frozen.

We had so many that we could eat cobbler several times a week from now till we leave. And as much as we all love cobbler, we’re just not that into desserts around here. We see them as a treat rather than a staple.

So a canned good of some sort was the order of the day.

image

I coulda made jam. But as much as we had would have probably made about 5 pints of jam. Way too much for us to go through. That would have lasted us years! We just don’t eat that much jam.

So I chose to make syrup. By straining out the pulp and seeds I knew I’d get a smaller volume of juice. Not only that, but one jar of syrup will be gone in just a couple of days. We don’t make pancakes all that often, but when we do, we open a jar of our delicious homemade fruit syurp, use it for the pancakes, and the remainder gets used in oatmeal till it’s gone a day or two later.

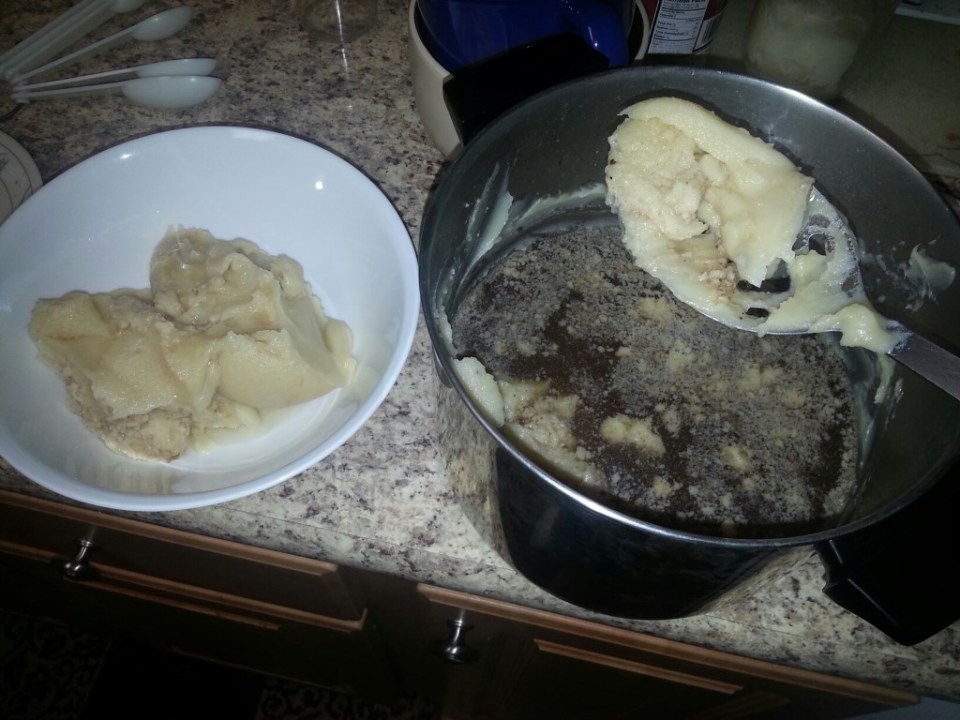
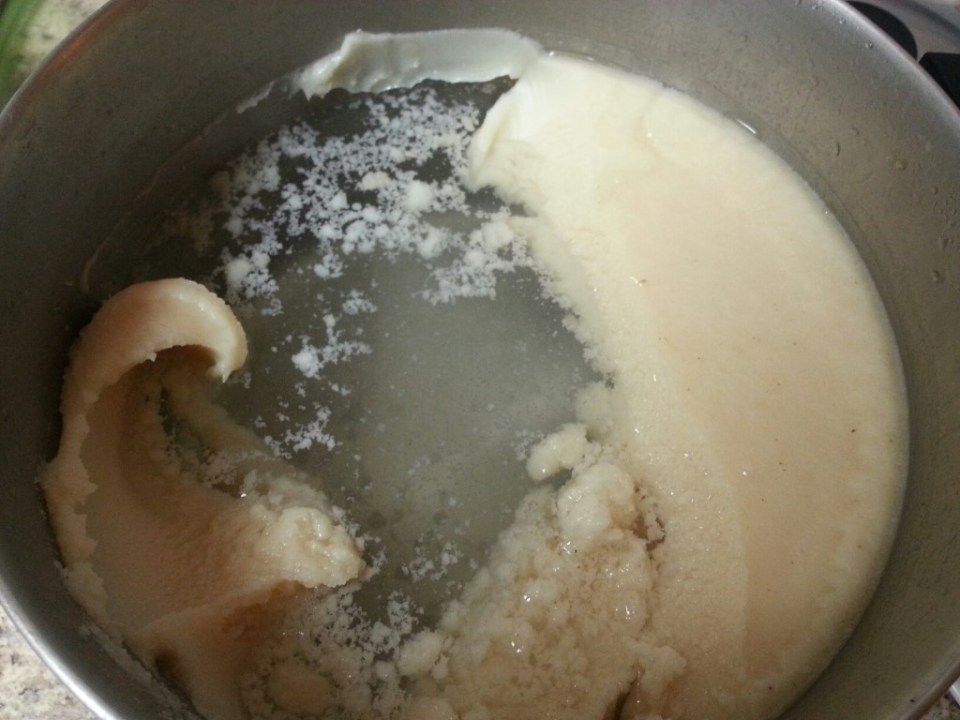
I started out with 10 cups of frozen blackberries. I put them in a pot with about 1 cup of water and heated them till boiling, then cooked them for about 5 minutes. I then took a potato masher and mushed them up to get out as much juice as possible.

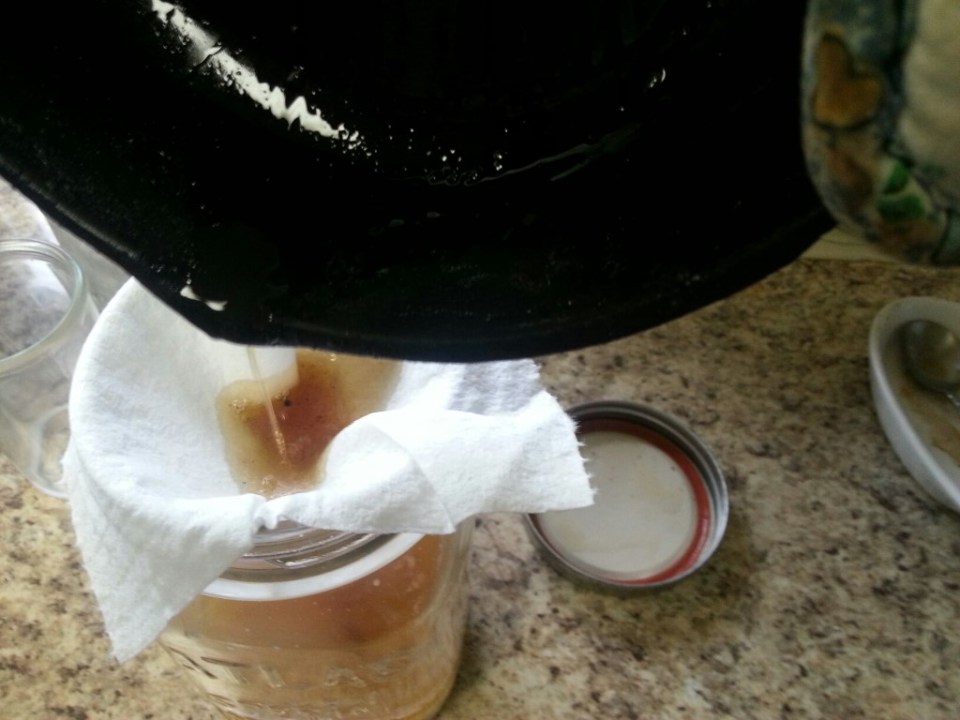
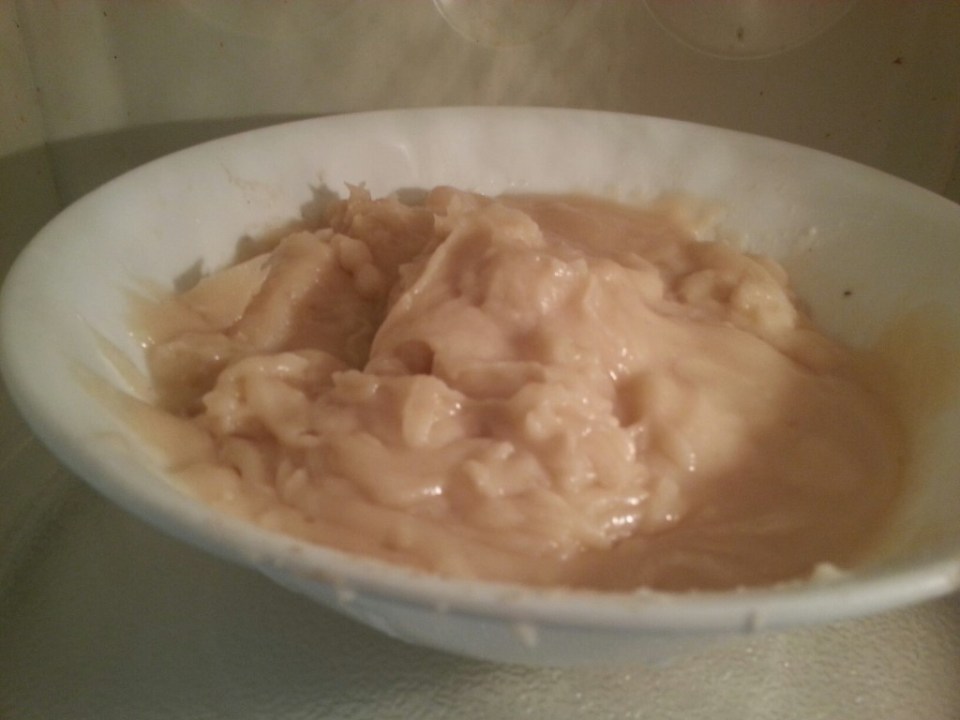
After that, I scooped them into some jelly bags to drain. You could use a piece of muslin or linen fabric, or several layers of cheescloth if you don’t have jelly bags.

I hung the jelly bags from a cabinet doorknob and let them drip into a bowl.

image

They drained like that for about an hour or so. I probably could have let them drain for several more hours and gotten more juice out of them, but I was in a hurry.

I ended up with 4 cups of juice. I added this and one 1 cup of honey to a pot on the stove and started heating it. I chose this amount of honey because that’s what tasted good to us. Feel free to adjust the amount to your liking. You can also use any other kind of sweetener you’d prefer.

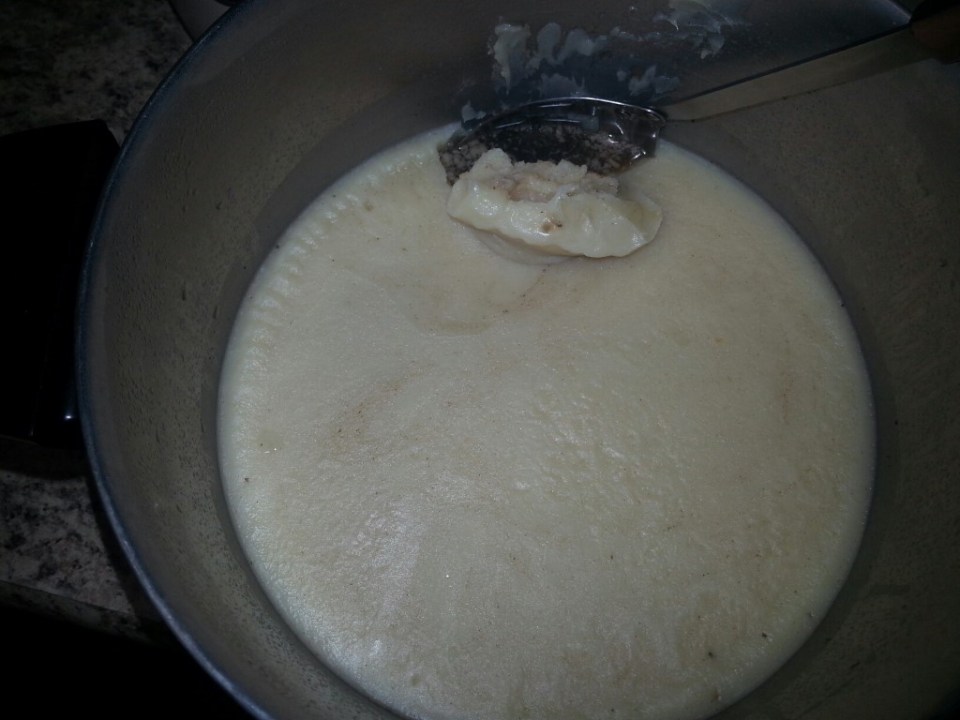
Once it was boiling, I sprinkled in about two tablespoons of no-sugar-needed pectin. I figured this would thicken it up into more of a syrup consistency without waiting for it to boil down on the stove. If you’d prefer not to use pectin, you can just let it simmer for a while on the stove, but be prepared to lose a bunch of volume. If you do use pectin, be careful not too add to much or you’ll end up with jelly!

Once it boiled good for a minute or so, I ladled it into prepared jars and processed it for 15 minutes in a boiling water bath. For detailed instructions on water bath canning, check out this site.

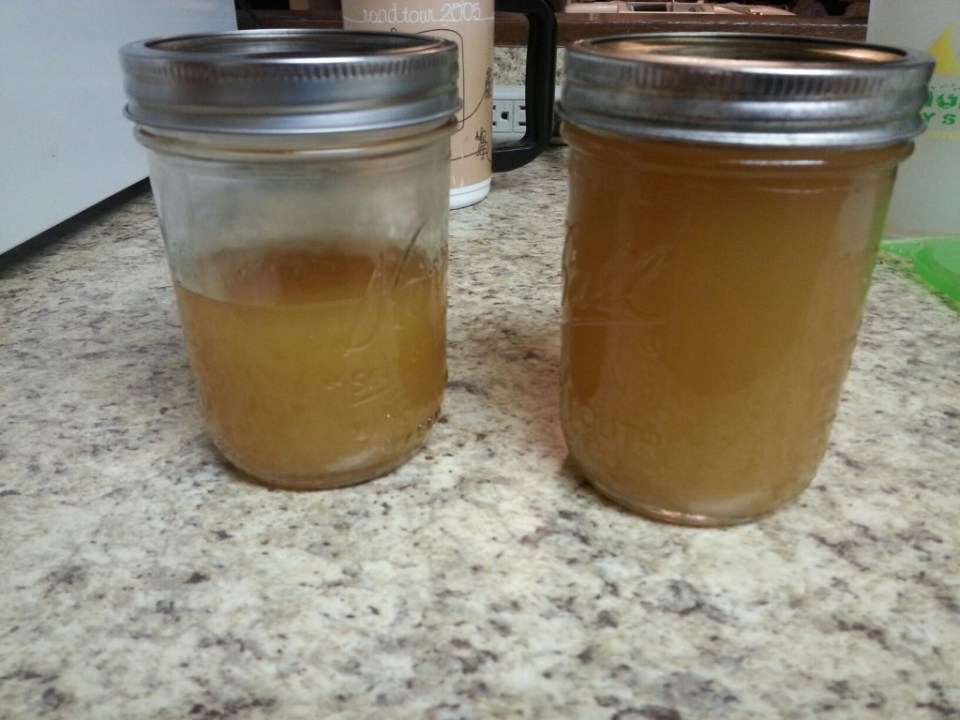
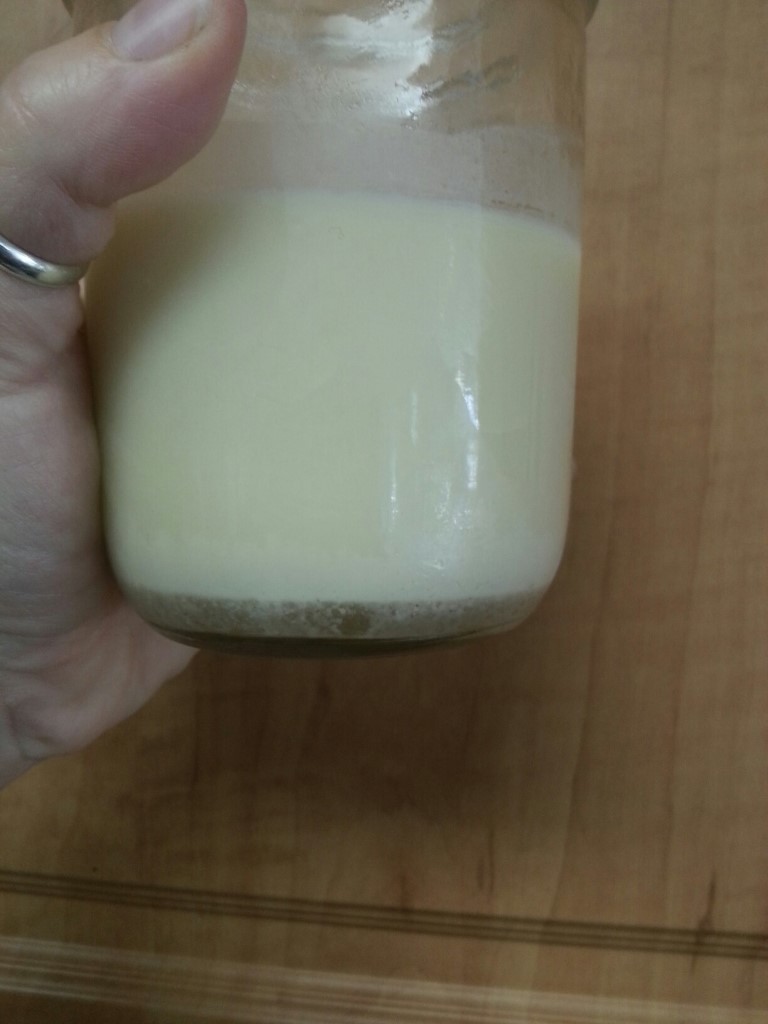
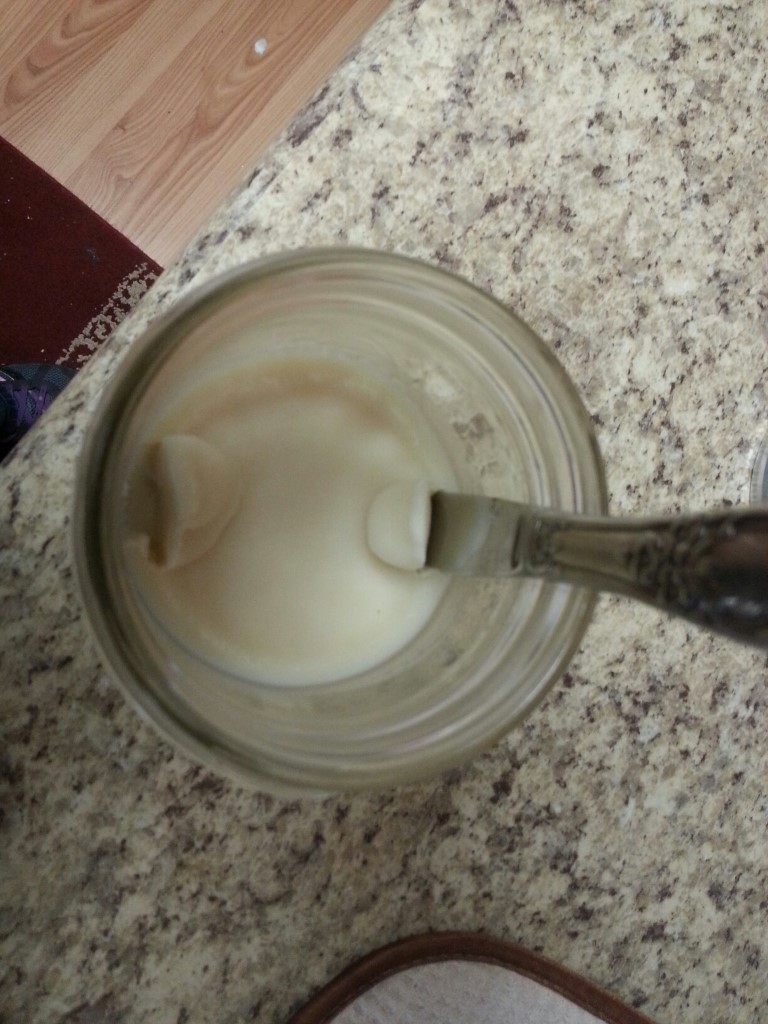
You can see from the following picture that the syrup is thick enough to coat the inside of the jar. Yummy!

image

I ended up with 5 cups of syrup in 4 jars (two 12oz jars and two 8oz jars).

Can’t wait to have some pancakes!

And yes, we left enough blackberries out to make a couple cobblers. 🙂

Maridy

“I lift up my eyes to the hills, where does my help come from? My help comes from the Lord, the maker of heaven and earth.” Psalm 121

Moving along

So this happened yesterday:

image

That’s my dad’s truck. Hooked to my in-law’s trailer. Gettin’ ready to haul it back to Nevada for us.

It’s one less thing we’ll have to worry about on the day of the Big Move.

In THREE WEEKS!!!

Ohmygosh! Three weeks from today we’re moving back to Nevada!

I’m not excited or anything. 😉

In the meantime, I’m finishing little projects here and there. The house is pretty much empty, so there’s really not much left to pack. But, we still had a large freezer full of food that we don’t want to cart back to NV with us.

Like blackberries from two summers ago!

image

So I made Blackberry Syrup. I think I’ll write a post on that. I only took the one picture above during the process, but it’s a simple enough process that it doesn’t require a lot of explaination.

Other than those little projects like cleaning out the freezer, we’re just soaking in the green beauty around us and biding our time.

image

A cool thing happend last week when my man and I went out for date night. We went to a movie theater we’d never been to before and had about a 30 minute wait. So we walked around to this beautiful lake that was right next to the shopping center where the theater was.

image

And got to watch a couple Bald Eagles flying around!

image

Right there in the middle of town. It was such a cool experience!

So, to re-cap: the trailer is on it’s way to Nevada, the house is nearly empty, and we are eagerly awaiting our move out date in just three weeks.

Yeah.

Not excited at all. 😉

Maridy

“I lift up my eyes to the hills, where does my help come from? My help comes from the Lord, the maker of heaven and earth.” Psalm 121

Bacon Lard

I’m nearly out of bacon lard and need to make some more, so I figured it was a opportune time to write a tutorial on just how I do that.

Just a word about using lard: if you are vegetarian or subscribe to the low-fat-everything-is-healthy-for-you way of eating, then this is not a post for you. If you’d like to learn more about the philosophy I believe when it comes to using saturated fats for our family’s diet, read this article, it sums up my beliefs quite well.

Now, I’ll be the first to say that the lard which comes from processed bacon is not the healthiest fat on the planet. But I use it because 1.) saturated fats are not the evil fats they have been made out to be, and 2.) (most importantly) it’s free! As with almost everything in this world, moderation is key. I suppose it would be more healthy if we used healthier bacon (yes, there is such a thing.) But we haven’t made that switch yet. One of these days…

So, what is bacon lard anyway, and how do you make it?

I’m so glad you asked. ‘Cause I’m gonna tell you. 🙂

Whenever you make bacon, there’s all that grease left over, right? I know some people dump that grease into a grease pot and leave it on the counter and use it just like that. But, my modern food handling mind just can’t get past that. And I know people who simply pour their bacon grease in a container and keep it in the fridge and use it as needed. I don’t like that either because then you have all those little burned bits of bacon fond mixed in with the grease and an overpowering bacon flavor. I know, I know, there are those of you asking, “What’s wrong with that???”(My Hubby is included in your ranks, for sure!) But depending on what I’m using it for, I don’t want it to taste so much like bacon. And those little burned bits just make the grease look “dirty”. Turning your bacon grease into bacon “lard” makes it nice and clean and less bacony in flavor. It is a long, but very simple process. Most of the time you’re not doing anything but waiting for the grease to harden.

Ok, you you’ve just made your bacon and you want to clean the pan. What do you do with the grease? Well, you simply pour it into a container and put it in the fridge.

But wait! Didn’t I just say I don’t like doing that? No, I said I don’t like using that grease as-is. I do something extra with the grease to make it more like lard.

First of all, I like to strain my grease through a paper towel as I put it in the jar.

20151007_105634_resized

This step is not totally necessary, but makes the cleaning process go faster.

Cleaning process? You “clean” your lard?

Yep. Yep I do.

20151007_105726_resized

Anyway, once your container is full (or nearly so – this make take a while depending on how often you eat bacon), simply melt your grease…

20151113_105316_resized

Yes, that’s bacon grease – with all the dirty bits still inside.

…I use the microwave.

Then you add the grease and about the same amount of water into a pot and put it on the stove to boil.

20151113_110332_resized

Once it just starts to boil, turn it off and set it aside. You can put in some cold water to help it cool off faster. As I’m sure you know, oil and water do not mix. The lard (oil) will float to the top of the water, and the impurities which were in the grease (the dirty bits) will sink or be washed out by the water.

The next step is where the length comes in. You have to let this oil and water concoction cool enough that the fat will solidify. If the temps are cold enough outside, I often secure the lid on the pot, and put it outside in the cold. This makes the process go faster. However, if the temps outside are too high, I let it cool to room temperature, then stick it in the fridge, usually overnight.

Once the fat has solidified, scoop it out with a slotted spoon and put it into a bowl.

20151113_214701_resized

scoopable-solid again

20151113_214751_resized

Look how dirty the water is

Once you get all the chunks of fat out (I use a small mesh strainer to get all the little bits), you’ll be left with dirty water which you can pour down the drain.

I usually “wash” the grease a couple more times by following the above steps, until the water is clear underneath the solidified fat.

20151114_181548_resized

Clear water

But you could certainly skip the subsequent washings if you wanted. I find that by filtering the grease through a paper towel first, it takes fewer “washings” to get the lard as clean as I like it.

Once it’s as clean as you want it, you scoop the grease into a bowl with a slotted spoon or mesh strainer (try to let as much water drip from it as possible).

20151114_182121_resized

Clean lard

Melt the lard just until pourable and pour into mason jars*.

20151114_182937_resized

Notice the color change from the first time I microwaved it near the top of the post.

I suppose there’s probably some way to process this so that it is shelf stable. But I have never researched it. I just stick it in the fridge once it’s cooled off a bit (or freezer if I have extra).

Note: once it has solidified, you might find that there is some water in the bottom of the jar.

20151121_121609_resized

If this happens, slide a knife along the glass into the lard in two spots on opposite sides of each other. Then pour the water out one of the holes (the other hole is to allow air into the bottom cavity so the water flows easier.)

20151121_121643_resized

If you prefer, you can heat the grease again so it melts and fills the holes back in.

*I always use wide mouth pint jars because they are the perfect size for our favorite spatula to fit in to scoop out a bit of lard (not an affiliate link – we just really like the style. In fact, we happened to find some at the dollar store!).

So there you have it. Now that your bacon grease has become lard, you can use it in much the same way you do regular lard. I do find it still has a bit of a bacon flavor/odor, but it is only objectionable to use it in things that are naturally bland themselves. I have even made soap with it!

I always feel so frugal when I use my bacon lard. I mean, it is basically free since you’re gonna eat the bacon anyway, right? So now you have something useful to do with the left over grease.

Preserving the harvest

There is a house in our neighborhood which is vacant and for sale. In the back yard stands two apple trees and five (yes 5!) plum trees.

image

Last year I got permission from the owner/tenant to pick their apples since it was obvious by the number of apples on the ground that they were not going to be doing anything with them.

This year I called the realtor and he gave us permission to take all the fruit we want.

Yay!

So I’ve been supplying us with plums to snack on for a couple weeks now. And I’ve had a basket of apples sitting in the corner waiting for me to do something with them.

Then two days ago a friend gave me some cucumbers and zucchini that she had left over after making all the pickles and relish she wanted.

image

So today, I sat down with my recipe books and a pad of paper and made some lists.

Apples : make into cider
Cucumbers: pickle them
Zucchini: shred and freeze
Plums: unknown (I don’t care for plum jam/jelly. What else is there to do with plums?)

As you can see, I had some research to do. I finally decided to make plum butter amd a plum bbq sauce. But first we gotta go pick the plums!

Fist on the agenda for the day was to make the pickles since they are best when the cukes are fresh and they were already 4 das old.

image

I’m not going to give a tutorial on how to make pickles. There are already a million of them out there, and I followed the instructions from the Ball Blue Book (one of my go-to canning guides). The only thing I changed is that I left out the sugar. I mean, really. Dill pickles do not need sugar!

However I did want to mention one tidbit that might be handy. The instructions say to tie the spices in a bag. I’ve heard that you can use a tea bag (the kind you buy empty and put loose leaf tea in to steep). But I don’t have any of those lying around, besides, I don’t like to use disposable if I can help it. You can tie the spices up in a square of cheesecloth or fabric, but that just seems awkward. What I’ve done for years now is use panty hose.

image

Yep, I purchased a cheap pair specifically for this purpose so they had never been worn. I gave them a good washing. Snipped off the foot portion and tied a knot in the end. Then I just fill the tube with the spices and knot the other end.

image

Because the fabric is so stretchy, when it is time to clean, it is a simple task to unknot it, turn it inside out over the compost bucket, and then rinse and wash. And since it is nylon, it dries almost instantly, too.

So once I had the pickles all canned, it was time to deal with the apples. The Hubby and Princess Girl helped cut them up. Because they were so wormy we only got about half of each apple for the pot. The wormy parts went into a bucket to be fed to the chickens. No waste that way.

image

I put them on the stove to cook a bit and while they were heating, Princess Girl and I attacked the zucchini.

image

image

I shredded, she packed. We put approximately two cups into each bag since that’s what most of my recipies tend to call for.

We did not blanch the zucchini. I have seen directions that call for it, but in my experience, it has never made a difference in the end product.

I got called away to help Mom with some stuff and when I came back I found that the apples on the stove had cooked down to apple sauce!

image

I realized I had cooked them too long to make cider, so I changed my plans and decided to make apple butter instead. Unfortunately, all the peels were still in there. I know some people cook their apple butter with the peels on and they eventually break down into the sauce, but I believe that lends a bitter taste to the sauce and resulting butter. So, I strained out the peels.

image

(Gotta teach Princess Girl how to take clearer pictures!)

I spooned the peely sauce into a mesh strainer and by tapping the strainer “ears” on the rim of the bowl and stirring the sauce in the strainer, I got most of the sauce separated from the peels.

image

Another of Princess Girl's photos

Even though the apples were not real sweet, the sauce is some of the best I’ve made. I think that is because usually I use the Victorio strainer and it mashes the peels up and strains them out. And while the peels don’t end up in the final product, I think some of their flavor does.

image

Princess Girl told me I have to keep this picture and post it. 🙂

At any rate, I got all the peels strained out of the sauce (more food for the chickens!) And ended up with 10 cups of sauce which I put in the slow cooker with some cinnamon and clove. I will let it cook over night.

image

I have to buy some honey tomorrow to use as the sweetener since we don’t have enough at the moment.

image

Princess Girl helped me finish up the zucchini and get the bags ready for the freezer.

image

Twelve pints of pickles canned, 6 bags of zucchini in the freezer, and apple butter cooking in the slow cooker. I’d say it was a productive day.

And tomorrow we go pick apples and plums.

I love harvest season and knowing that I am providing healthy food for my family. And it’s especially great when I get that food for free!

Maridy

“I lift up my eyes to the hills, where does my help come from? My help comes from the Lord, the maker of heaven and earth.” Psalm 121

Summer Doings

I know I’ve been horrible at posting for months.

So, what have we been up to this summer?

Take a look and see!

We went camping:

We traveled to Nevada to work, see family, and spend time on the Homestead (click or hover over pictures to see captions):

We worked on house plans:Exterior views

And found a building almost the exact size of the one we are going to build:20150610_155031
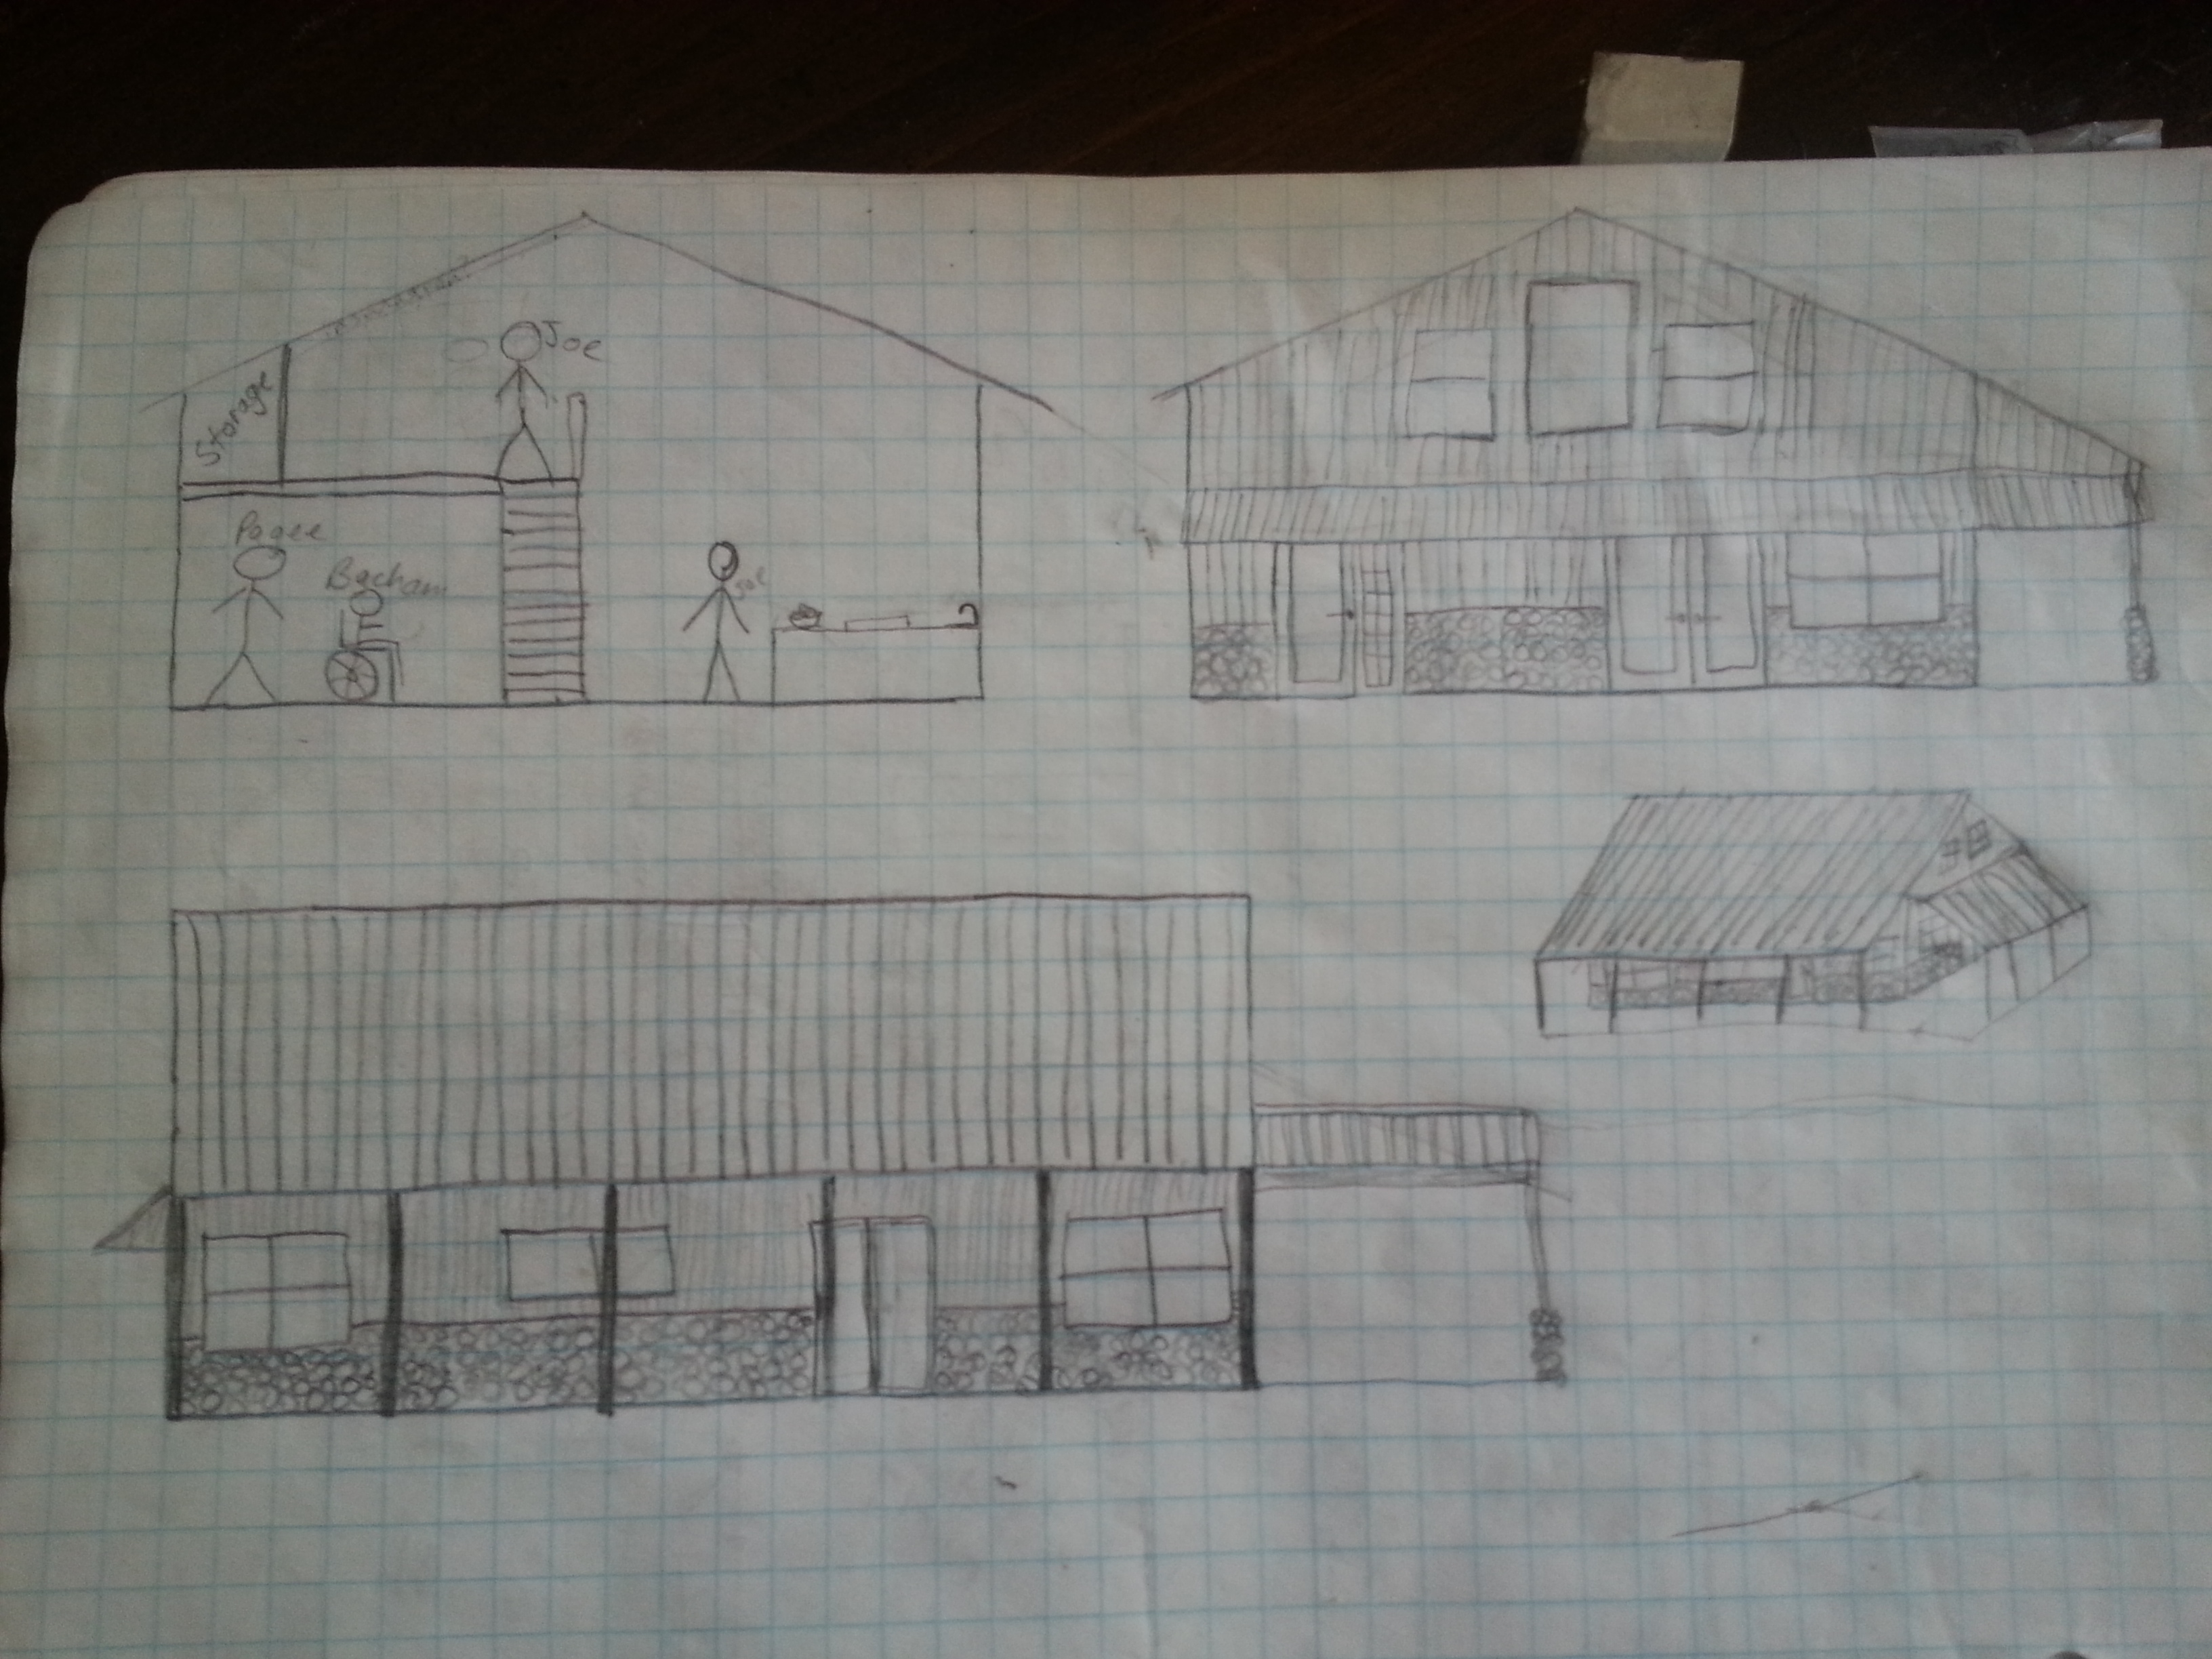
It’s cool (and helpful) to see the dimensions in real life rather than on paper.

We harvested cherries from our very own cherry tree:

Dad and Flower Girl planted the garden.20150609_161319

Princess Girl and her BFF ran a lemonade stand and made quite a lot of money!20150613_170558

One of my sisters came to visit and we made raspberry jam after picking the raspberries from her extended family’s farm!20150701_103628

We had some weird stuff happen in the chicken coop:20150702_102452

We were messy like a typical 2 and a half year old (there’s STILL specks of paint in the bathroom from this!):20150702_153057

We had our first tomato (and a couple more since then). Mmmmmm….

20150703_134143

We played with sparklers to celebrate the 4th of July:

We traveled back to Nevada once again, then to Missouri for a family reunion (click or hover for captions).

We did other typical summer type stuff (click or hover for captions):

And we traveled back to Nevada once again so I can work –  (click or hover for captions).

So, you know. We’ve kept busy.

🙂

Fresh salad!

Fresh salad, straight from our garden/yard. Yum! I needed to thin out the lettuce from the small garden, I picked some of the over-wintered-but-not-doing-so-well spinach from the big garden, and I found some dandelion greens in the yard. I had a head of purchased iceburg in the fridge and add to all that some borage flowers which just started blooming and you have a gorgeous salad almost too pretty to eat. Almost, but not quite. 🙂

20150409_175350

I love that dandelions are considered a weed, yet they are edible and good for you. And the borage is a volunteer which comes back every year.

Edit: For the health of you and your family, be sure if you are harvesting any wild edibles that they come from a trusted source not treated with any harsh chemicals! We don’t use any herbicides or pesticides or even any fertilizer on our lawn, so I know the dandelions are safe to eat.

The city…grrr (And a garden update)

City living can get me down sometimes. Sure, there’s beauty here. I run across it all around. Like this lovely little scene just down the street.

20150319_181253

Looks like a beautiful spot to explore and maybe have a picnic. Until you look to the side. And see this.

20150319_181323

I understand why they have to set boundaries and protect the natural places. But the limits can be stifling to this country girl. So, I come home to my little garden and try to shut out the sounds of the city and dream of the day we’ll be back at Castle Rock.

And speaking of my garden, here’s some recent pictures. It’s just about time to start thinning the radishes and lettuce. I actually picked and ate a couple of the lettuce seedlings which had somehow* gotten planted amongst some of the carrots. It was a delicious foretaste of the salads we’ll be eating in just a little while.

*somehow – like maybe because a two year old was helping me plant? 😉

20150321_180652 20150321_180707 20150321_180717

Seeing my little garden and how well it’s coming along helps me to better endure our time here. Gives me a purpose outside the house. And will eventually give us healthy food to eat. A win-win situation.

Growth!

I have yet to write up a post about my garden plot and container garden plans, so I know I’m jumping the gun by showing you these pics, but I just can’t help myself. Is there anything as exciting to a gardener as the first sprouts?

image

image

image

image

Do you have anything growing where you’re at yet?

Maridy

“I lift up my eyes to the hills, where does my help come from? My help comes from the LORD, the maker of heaven and earth.” Ps 121:1-2

Misadventures of an Urban Homesteader

So, this is how my day started:

20150225_095822

“Taco” our 4 month old cockerel who is destined for the crockpot.

And this is how it ended:

20150225_174223

Yummy chicken tacos

You can guess what happened in the middle. Or can you…?

I started out the day expecting to slaughter a chicken, take some pictures, and load up a tutorial of sorts, What I ended up with is some important lessons in homesteading, preparedness, and emergency first aid. Yes, first aid. Now you might have an inkling that things did not go so well.

WARNING: THIS POST CONTAINS GRAPHIC PICTURES. IF YOU DO NOT WISH TO SEE THEM, DO NOT CONTINUE!

So, this morning, the rooster, affectionately named “Taco,” finally found his voice and gave several full fledged cocka-doodle-doo’s. We were able to sell his brothers through Craigslist, but this guy, for whatever reason did not sell. So, before we got a neighbor complaint and ended up with a fine from the city, we decided to turn him into his namesake.

I set the stock pot on the stove to boil and got to girls to tear some old phone book pages into a bag in a bucket (to soak up the blood during the butchering.)

20150225_095337

Then, I grabbed Taco and got prepared. 20150225_095836

20150225_100314

And this is where it all went wrong. Well, kinda.

I successfully detached the head, he started wiggling, like I knew he would, and I brought my other hand around to hold him still. The hand which had forgotten to let go of the very sharp knife.

Speed forward about an hour, and there I am at the Emergency Room.

20150225_104937

Hmmm… what’s under the gauze?


WARNING, THE NEXT PICTURE IS RATHER GRIZZLY!


20150225_110426

Yikes!

20150225_111410

The worst laceration I’ve ever had. Seven stitches. Oy!

20150225_112655

All bandaged and splinted up. The splint is so I don’t bend my hand and pull on the stitches.

So, what have I learned from all this?

First and foremost, DROP THE KNIFE! I should have immediately put the knife down as soon as the head was detached. This oversight comes from not thinking through the process well enough from beginning to end. It’s been a while since we’ve done this and it would have been good to walk through the entire process in my mind first. Think it through. This goes for any new thing you are attempting. Not everything will have Emergency Room potential, but even just mitigating mistakes and re-do’s will be worth the time it takes to think things through in the first place. And, of course, avoiding a trip to the ER is preferable in all situations.

Secondly, have a wound care nurse on hand in the event of an emergency. If you don’t have a nurse hanging around (because, who does?), at least know updated first aid practices. Yes, we did have a nurse in the house, she was here tending to my mother-in-law. But the Hubby and I did all the right things and knew all the information. Don’t panic, apply immediate pressure, rinse the wound if it got dirty, cover the wound, don’t take bandages off to peek, wrap the area applying pressure, and seek immediate professional care. I took a 1st Aid course less than a year ago and was rather gratified that I knew what to do (once I got over the shock of it happening). I don’t know many people who would dispute that knowing first aid is a good thing. But when you are a homesteader, I believe it is even more important. The potential for accidents is exponentially greater the more you get up off your couch – you know, when you do all your homesteading chores. And, if you are aiming for self-sufficiency, knowing how to do as much as you can is important, as is knowing when you need to head to the ER and when super glue or steri-strips will do the job. Obviously today necessitated a trip to the ER.

Third, while I was rather proud of myself that I had the correct knowledge in my head to take care of myself, all the knowledge in the world isn’t going to help me treat myself if I don’t have the correct supplies or can’t find them. It was brought to light that we don’t have a good first aid kit put together. We have most of the things we need, but they are scattered in different areas of the house and vehicles. Could we have improvised? Certainly. Should we have needed to? No.

And that brings up my 4th point. Every adult and child old enough living in the house needs know where the first aid kit is and how to use it. This is another area that I am lacking in. Sure, I have the knowledge, but if Hubby is the one who knows where all the supplies are and he’s not available, then what? And Princess Girl is old enough now that she needs to know 1st aid for herself. What if something happens and the adults are incapacitated? Or, as in the case of a bad laceration such as mine, it’s hard to do what needs to be done with only one hand. Sure, I can direct if I’m able, but having a helper with the knowledge is preferable, and Princess Girl could be that helper if she was trained.

Lastly, don’t be surprised when you pencil things out and raising your own food is more expensive than buying the cheap stuff from the store. We fed “Taco” for nearly three and a half months. We got one good meal and some leftovers out of him, plus his bones will go into the next batch of bone broth I make. It doesn’t add up financially. Add in ER costs and those were some of the most expensive tacos I’ve ever eaten! But the monetary costs aren’t important. Sure, it’s prudent to cut costs and save money where you can and not get in over your head financially, but I truly believe this way of life is good, it’s valuable, with benefits far above what the markings on a piece of paper can tell you. As embarrassing as it was too have to tell my story over and over at the ER, there is a part of me that is proud that I sustained this injury from something as uncommon and awesome as slaughtering my own “farm raised” chicken. I’ve heard other homesteaders say that one of the things they love about this way of life is that they can tell the story of their food. Boy, do I have a story to tell! And I’ll have the scar to prove it.

Well, I think that’s it. This has been a long post to type with one hand. 🙂 In fact, I’m finishing this up the next morning because I got too tired last night. And guess what I had in my scrambled eggs this morning. That’s right, left over taco meat. It was yummy.

A Busy, Everyday Day

Today was one of those days that just feel good at the end of it, ya know? It was just an everyday type of day. Nothing extra special, but I feel like I accomplished something -several things actually – and used my time wisely and had some fun.

image

First, as we were getting dressed this morning, we saw that the water district guys had started the flushing we had seen signs about. Since the hydrant is right outside our house, we got a front row view. And Princess Girl got an impromptu lesson in how the city water system works. She came up with about 10 questions to ask and the men very patiently answered them and even offered information freely. Plus, the girls got to play in the water. Win, win. But it did bring to mind the fact that we don’t really have the right systems in place for a water emergency. What if, during their flushing and testing, something came up and we couldn’t use the water coming out of our pipes? Not likely, but what if? We don’t have nearly enough water stored for a family of 6. Good food for thought.

image

Our homeschooling day continued with some online research for her Geography lesson. Princess Girl’s daddy got a look at her outfit and thought she was being silly to be wearing her butterfly wings and bee dress while doing her school work. I love that while homeschooling, she CAN. No uniforms here.

image

Half way through the day I got some Apple Butter cooking in the crockpot. It’s the absolutely easiest way to cook it. It only requires stirring every once in a while. However, I had forgotten about doing it, so I really got it started too late. Here it is after 9pm and I’m looking at at least another hour or cooking, then the canning process. It’s gonna be a late night. 🙂

image

I spent some time getting some jams together for a friend. She is buying them for her coworkers for Christmas. I also boxed up a few things I sold on Ebay and need to mail tomorrow. I ran a few errands and made potato soup for dinner.

image

Then I decided it was time to introduce you all to the newest members of our ever growing family. So I went out to the garage and got some pics of our six chicks.

image

We don’t know what breeds they are. They all come from the same nest of eggs, but the friends who they belonged to said it was a hidden nest and could have had eggs from several hens. They didn’t even know they had a broody hen until they saw the babies a couple weeks ago.

image

They have a very mixed flock and don’t even know exactly what breeds they have. But they knew they didn’t want 6 more chickens. They mentioned it to us and we told them we could take the chicks off their hands if we could borrow their chick nursery setup since we don’t have any equipment and no money to buy even the basics, what with the holidays fast approaching. They said sure and even bought us a new heat lamp!

image

So, now we have 6 chicks in a cage inside a box out in the garage. It’s so cold in the garage that I’ve been checking on them roughly 20 times a day (maybe a slight exaggeration). I even dreamed about them last night. But with the heat lamp, they are staying warm enough. Actually, my fear would be that they would get too warm, since there’s not much room in their little cage to get away from the heat lamp if they get hot. But they are happy and doing well.

image

We brought a few of them in the house to play with this evening. I am always amazed at how gentle Flower Girl is with helpless creatures. She just about mauls Scooter when they play (and Scooter loves it all!), but she seems to know instictively to be careful with the chicks. So adorable.

image

This one is so cute. It’s the only dark one. Any guesses as to what breed it might be?

image

It looks like it will be a speckled brown when it gets fully feathered.

image

How about this one? Pretty much pure blonde.

image

Silly girl! (And well behaved chick 😉 )

image

I love this picture. The chick had just pooped on her. 😉

So, yeah, we hadn’t planned on getting chicks this winter, we were going to wait till Spring, like normal people. But like so many things in our lives lately, it didn’t go exactly as we planned. And I’m good with that.

And yes, of course we are well aware that some or all of these could be roosters. We are hoping not of course, but if we do get some males, we know what to do with them.

image

Alright, it’s getting late and I have some Apple Butter to can. Guess I’d better go. I hope you have had a wonderful Autumn day.

Maridy

“I lift up my eyes to the hills, where does my help come from? My help comes from the LORD, the maker of heaven and earth.” Ps 121:1-2