Tag Archives: skills

2019 Broody Hen Hatch Watch: Day 1

May 19, 2019

You may remember last summer when we tried to have some of our broody hens hatch some eggs for us. (You can read those posts here.)

We tried six times and only ended up with 2 chicks (both roosters, of course!). Sadly, after some research, I think a couple of those failures were from us handling and moving the eggs after day 17, which is when the eggs should be left alone until hatching. So we might had inadvertently cause some of the in-egg deaths. I’m crushed. 😟

But, we are trying again, and we know better this time.

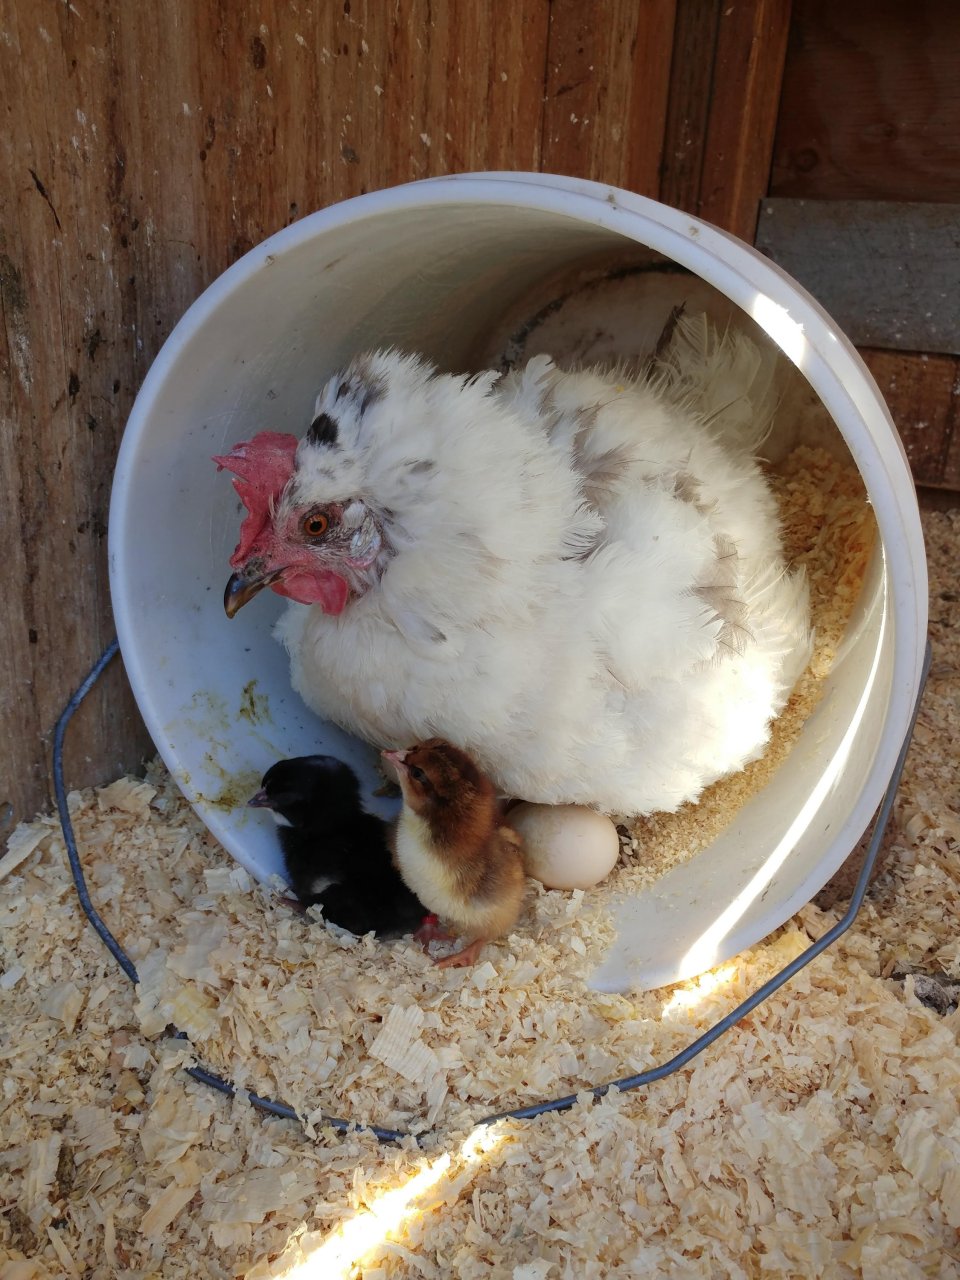
One of our Austra-Whites, Bluebell, went broody last week. She was the mama that raised store bought chicks for us in 2017. Her sister, another Austra-White named Speckles, was the hen who successfully hatched the two chicks last summer.

Our 2018 chicks – a Black Sex-link male, and a Speckled Sussex male who is now one of our breeding roosters.

We never had any success in hatching with the three Welsummers or the Golden-laced Wyandotte who went broody, so when Bluebell decided to be broody again this year, I was happy. I know she is a reliable brooder and a good mama.

So, here we go.

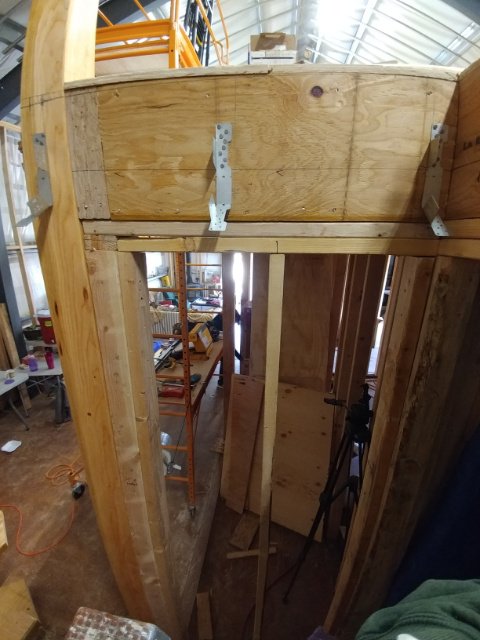
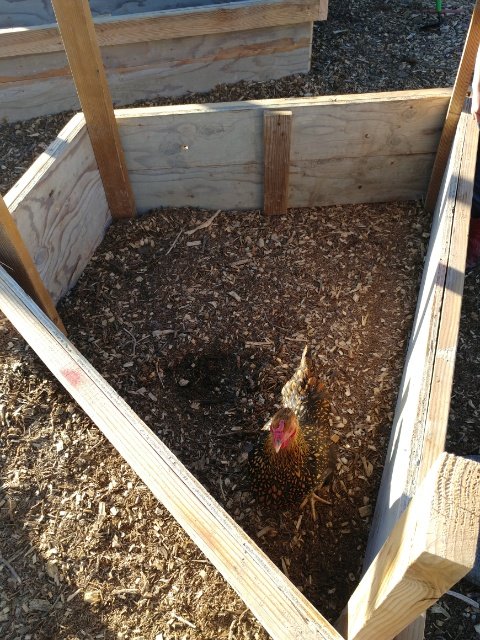
We moved her to the brooder coop nest box, blocked off from the 8 week old chicks who are using the rest of the coop.

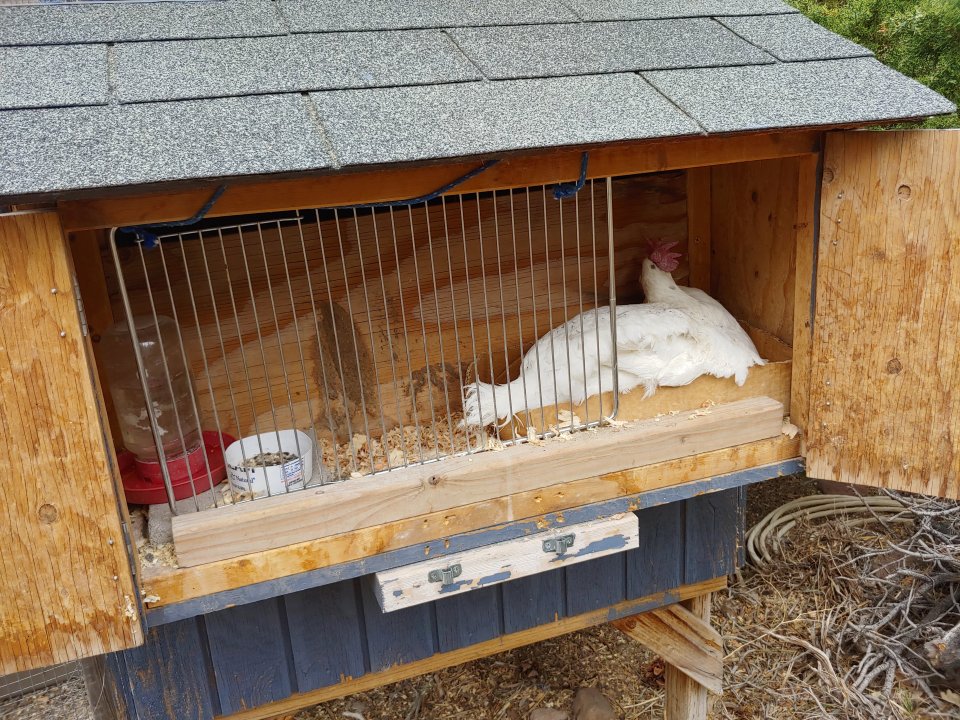
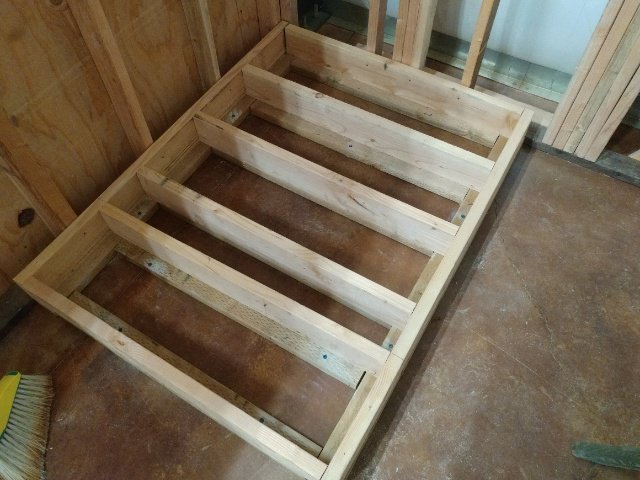
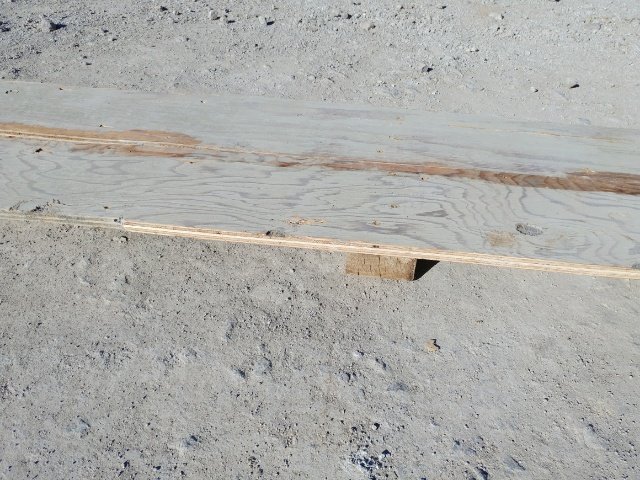
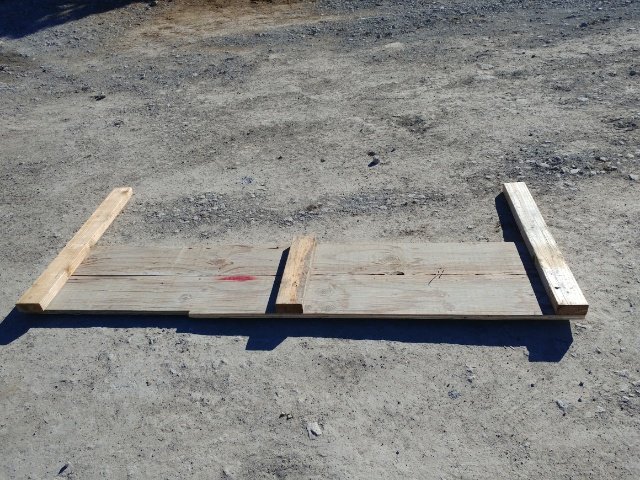
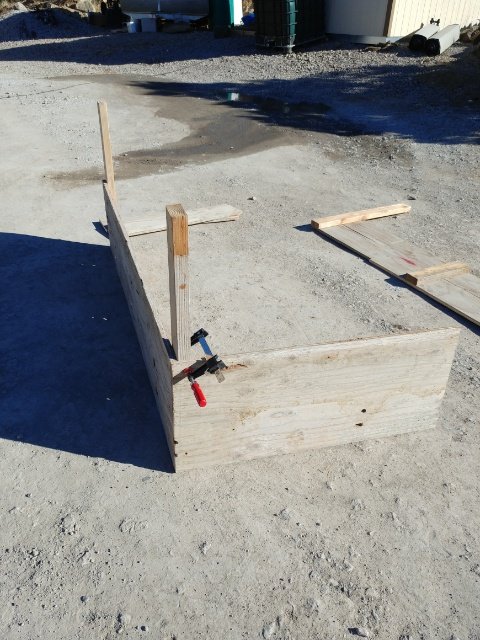
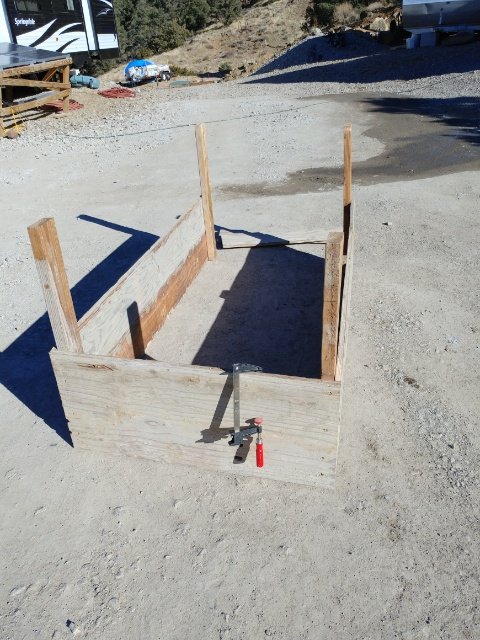
Our brooder box setup. Just shut the right door to keep the hen in, and the left one is opened or closed as needed for security or ventilation and to access food and water.

She was sitting on golf balls for a few days in order to adjust to the move before we gave her eggs.

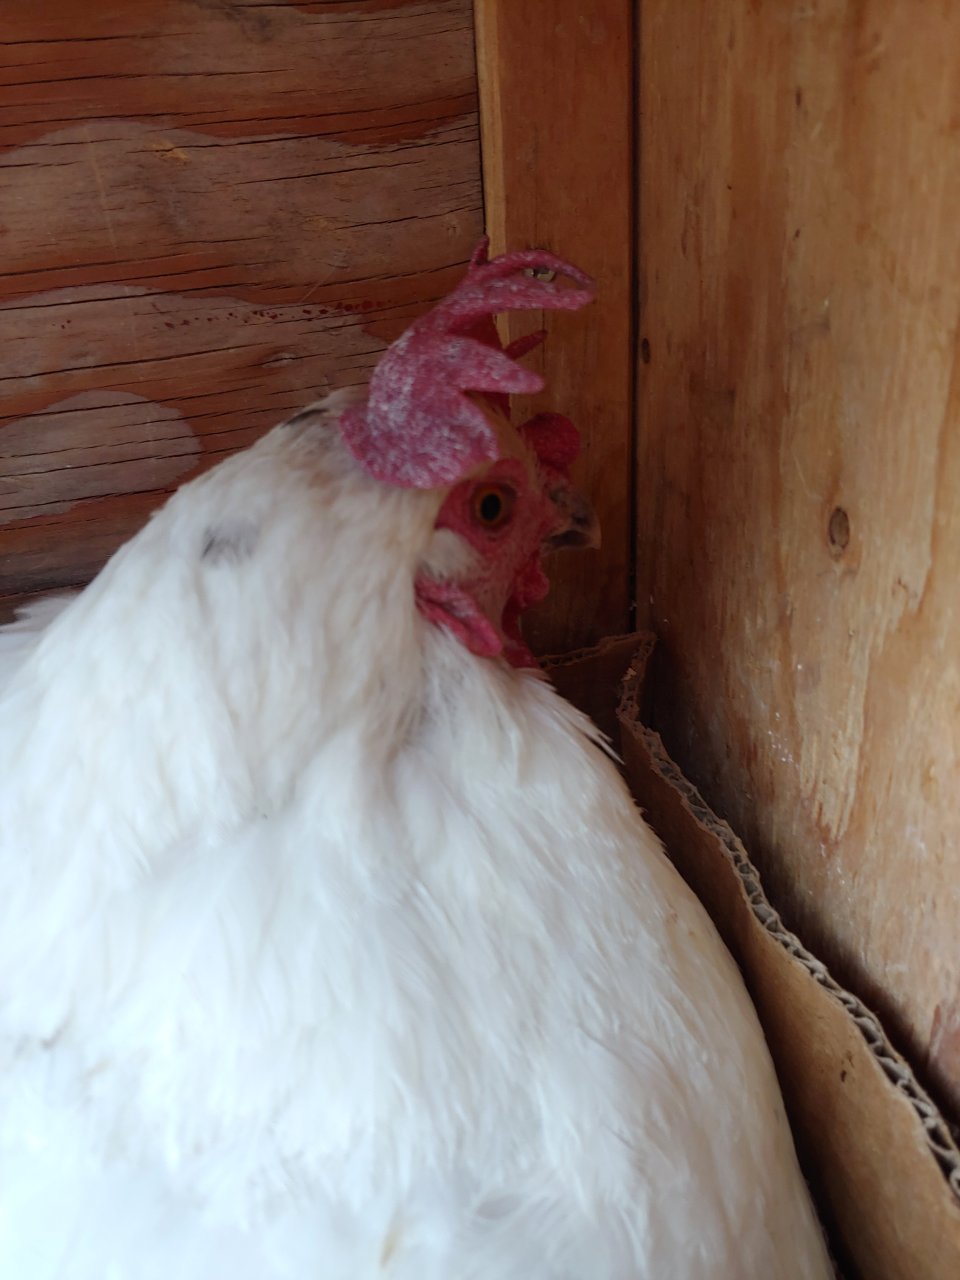
Classic broody hen stink-eye

But after one night she had settled right in. So I figured it was safe to put eggs under her.

The next day (that was yesterday) we swapped out 9 golf balls for a dozen eggs we had been collecting from our breeding group from several days.

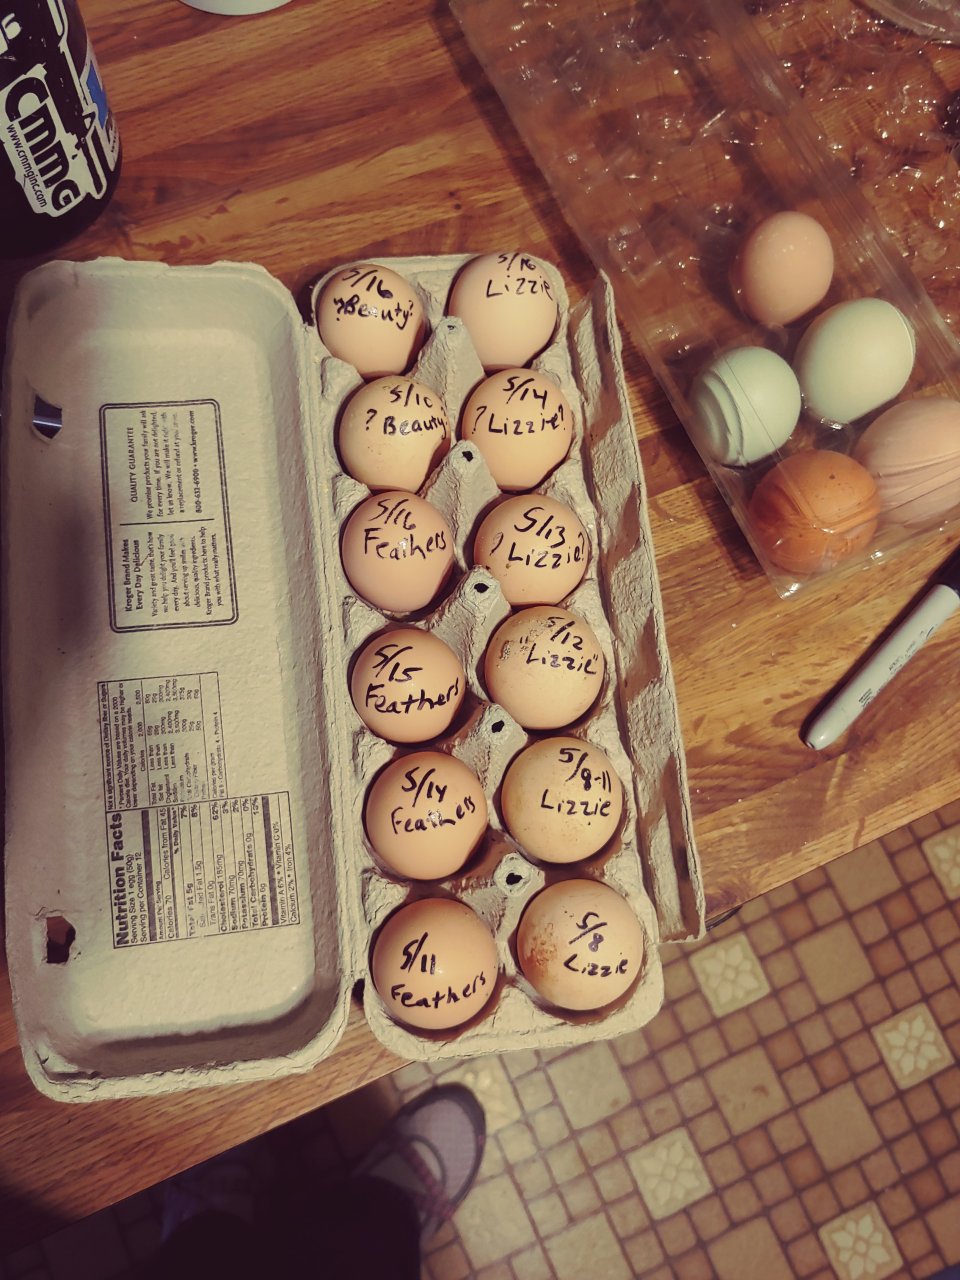
I’m pretty sure all the ones on the right are from our Speckled Sussex hen, Lizzie. She lays very light tan eggs, and usually it’s pretty easy to tell hers from the eggs that Feathers lays. But sometimes it wasn’t quite as obvious. Most of the ones on the left are from Feathers who is a Plymoth Barred Rock. They are both in with a Speckled Sussex rooster, Nigel. So Lizzie’s chicks will be pure breed Speckled Sussex. Feathers’ will be Black Sex-links, which means we will be able to tell immediately at hatching if they are male or female. And then there are a couple that I think are from our other Speckled Sussex in our other flock, which means they would also be pure breed. However, they could be from our Black Australorp, or our Golden Laced Wyandotte in that flock as well. In which case, the chicks would just be normal ol’ farmyard hybrids. Nothing special other than the fact that they would probably still lay some great eggs.

Hey, we should come up with a name for our sex-link hybrids. Every hatchery calls theirs something different dependant on the breeds of the parents. Black sex-links are almost always a Rhode Island Red or New Hampshire Red rooster and a Barred Rock hen and the offspring is almost always called a Black Star or Black Rock. Red/Gold sex-links have a much larger variety of breeds as parents, thus have many different “brand” names: Red Star, ISA Brown, Cinnamon Queen, Golden Comet, etc. Hmmmm…, Something to think about.

At any rate, we’ll hopefully have some Speckled Sussex and some sex-link and a couple mystery chicks hatching out in about 3 weeks. I will candle the eggs in about 12 days (I’m not confident in my abilities to candle on day 7) and their projected Hatch Date is June 8th.

I am sooo hoping this works this time. We really want an easy and natural way to replenish our flocks in order to be as sustainable as possible. If we can reliably hatch chicks, we wouldn’t have to purchase new ones, and we could sell some to offset costs.

I’ll keep you updated as we progress.

And this time, no moving of the eggs in the last 4-5 days!

Helping hands

When we first started this journey of building our house (actually started construction), our girls were 11 and 4 years old. We wanted them to be involved as much as they could be in the actual building process.

Princess Girl (being older) quickly showed that she could be a good helper with many of the tasks that abound while building. She was an extra set of hands for many projects. And now that she has 2 years of experience under her belt, she can do most of the jobs her daddy and I can.

Princess Girl using the chop saw to cut metal.

But not only that, she often gets the homemaking jobs of cleaning the trailer, washing dishes, and doing laundry that keep our family running while Mom (ie me) is busy schooling Flower Girl (who is now in Kindergarten), and building our house. She truly is a huge help and a blessing.

But what do you do with a 4 or 5 or 6, or even a 7 or 8 year old?

Well, first of all, have them around. Don’t ship them off to the babysitters. Let them play nearby. Let them see you working and let them be familiar with the goings-on at a construction site – providing they can do so in a safe manner, of course.

Many an hour spent playing in piles of dirt while we worked nearby

One of her favorite things is to climb around inside the walls.

Most owner-builders work at a slower pace with fewer people than a professional construction crew, making it safer for kiddos to be around. Even then though, safety rules need to be in place and strictly enforced. Even the smallest infraction must be caught and dealt with. And of course, there are times when it is just best if the kids are not around. But we have found those instances to be few and far between.

Playing with “blocks”

Watching us finish the stairs

But how do you get them actually involved with the family project of building your own home?

The answer in a word: patience

It takes a lot of patience.

Little people are slower. They make lots of mistakes. They don’t understand. But it is so worth it to see the joy on their faces when they “helped”.

It mainly means slowing down enough to find jobs that they can do.

Flower Girl – barely 5 years old

Age 4

And it means taking the time to help them along the way.

Recently, Flower Girl and I took on the task of building a wall in the house.

Just her and I.

But what was a six year old really capable of?

Well, she moved the lumber around.

She measured and marked the studs.

She swept up the sawdust after I did the cutting (and if we’d had the chop saw set up, she would have helped with the cutting, too.)

She clamped things together when needed (and sometimes when not needed 🙄)

She put screws in and backed them out as needed.

And she helped tell me when boards were level/plumb.

Overall, how did it go?

Did she slow me down?

Of course she did.

Was it harder building that wall with her “help”?

You betcha.

Was it worth taking the time to do it with her?

ABSOLUTELY!

OUR wall

We believe that by involving our children in all aspects of our lives on the homestead, and especially the building of our house, we are giving them something important. They are learning many important skills that they just wouldn’t anywhere else. And it’s important to us that when they look back on this time of their lives that they can say “we built a house”, not “my parents built a house”.

It takes a lot of patience and effort to get the little ones involvef. But it is so worth it!

We are building this house!

House Update: we have stairs!!

We got a huge step forward on the house accomplished last month (pun totally intended! 😁)

We got our stairs built!

But, if you’ll remember, the last time I updated about the house, we were working on the hat channel on the ceiling.

We got most of the hat channel on the south side of the house (the side above the second floor), and then realized we needed to build the other end wall before we could finish that.

But, we also decided that we wanted to get the stairs in to make working on the second story that much easier for us since the ladder was getting old real quick!

But in order to get the stairs in, we needed to put the hat channel on the ceiling of the north side of the house since once the stairs were in, it would make that task infinitely more difficult since we wouldn’t be able to use the scaffold effectively in that area.

Dominoes.

So, we worked on the ceiling above the dining room area.

And, as usually happens, once we start a project, we like to see it through. So even though we could have stopped after the first ⅓ of the roof, we decided to keep on going.

The upper half of the hat channel all the way across the north side of the ceiling.

Princess Girl learned how to use the chop saw to cut the hat channel to length.

Sometimes you just have to get in there!

Yep, working in the walls. 😁

A good friend came to help out and we put her to work helping me with the hat channel.

In between working on the hat channel, we started the prep work for the stairs. Since the stringers needed to be made out of expensive LVL engineered lumber, we decided to buy a cheaper piece of wood to “practice” our stair-making technique.

Neither one of us have any prior stair-making experience, so we did quite a bit of research prior to starting.

We bought a special layout tool off of Amazon (not an affiliate link, nor are we receiving any kind of benefit from sharing – we just happened to use it and like it.) The website affiliated with the layout tool also had a stair calculator so you could plug in your measurements and it gave you a printout to follow.

It was super easy to use (though we did have to watch the video tutorial a couple times to make sure we were beginning and ending correctly). It gave us the confidence to know that our measurements were accurate and precise.

So we cut out one stair stringer out of the cheaper board and are ever so glad that we did. We discovered that we needed to change a few things around and change a measurement or two.

That stringer was not complete waste though. We can cut it shorter and use in various other locations around the homestead. So for now, it’s living in the garage.

So now we were confident about how to build the the stringers, but we needed to put in a post.

Way back when we were laying out the foundation, I made a mistake on the placement of a shearwall. It is 8 inches out of place from what the plans call for. Not too much of a big deal. It just means the bedroom is wider and the dining room is narrower. But that also means the staircase is narrower. Too narrow actually. Building codes state that staircases have to be a minimum of 36inches wide. Because of the mistake in the placement of the wall, our available space was only 35″. Oops.

Had we realized our mistake when laying out all the other walls, we would have just made the pantry wall that the stairs tie into a bit longer. Problem solved.

But, of course, we didn’t realize the problem until ALL the downstairs walls were built and we were working on the flooring for the second floor.

So after quite a bit of brainstorming, we came up with a solution that we actually really like. We decided to add a post to extend the wall where the stairs attach and we are going to leave it exposed. It’s more work, time, and money, but in the end, we are really going to love the exposed posts in our kitchen. And I say posts – plural – because the way we have to tie in the pony wall on the upper floor (because of our mistake) necessitates a post on each end.

So, anyway, we purchased a 16ft long 6×6 and then Hubs and Princess Girl got busy making it purty.

After sanding, Hubs put boiled linseed oil on it.

We just love the way that the BLO makes the grain “pop” and gives the wood a warm glow.

Then we attached it to the wall with ½” lag bolts.

Once we had a full width wall to attach the stairs to, we purchased our LVL boards and got to work cutting the three stringers.

I was the one to use the circular saw because I have a steadier hand than the hubs. Probably from all the sewing I’ve done in my life. 😊

And Hubs is slow and meticulous when it comes to hand work (he’s much more patient than I), so he did a great job getting the little corner bits that the circular saw couldn’t get.

It’s a messy job, but someone has to do it.

And just like that, the stringers were made and ready to be installed.

But first, we had to build the landing.

And put on the Simpson stair hanger ties.

You can see in this picture how much the wall is extended with the post. The very left hand stair hanger bracket is actually on the post itself.

And then came the fun part. Installing the stair stringers. Princess Girl and I worked together on that project while Hubs was at work.

Princess Girl learning to use the palm nailer.

Where has a palm nailer been all my life? It makes nailing in tight spaces so much easier!

Those stairs aren’t going anywhere!

Ah, the fun of climbing the “stairs” for the first time!

When Hubby got home, he was very excited to see our progress. He and Princess Girl got to work ripping down leftover ¾” plywood to use as the riser boards…

And I cut down all the stair treads to the appropriate length.

Then the most exciting part…putting on the risers and treads!

And just like that, we have stairs!

This was one of those projects in this house that, like getting the interior walls up, really changed the form and function, the whole look and feel, of the house. We were giddy with excitement for days afterward. And even now, I get a deep sense of satisfaction whenever I run up and down those steps.

I am rather proud of us.

House update: Septic Phase 2

Finally, I feel like we’re making progress! In fact, I have so much to share, I’m putting it in several blog posts to keep it all straight. 😁

So, last I left off, we we’re just starting on our leach field. I naively stated that “by the end of the week” we hoped to have a completed system.

Ha!

It wasn’t that was hit any unexpected problems. It was more that the problems we did face we’re harder to overcome than we expected. Namely, we had no dirt with which to backfill the leach lines. It was mostly just rocks. So, we had to purchase and haul in dirt. Again.

But I’m getting ahead of myself.

First thing we had to do was dig the trench for the sewer pipe from the already buried septic tank, down the hill to where the leach lines were going to go.

Blessedly, Pops was on hand to dig once more.

My mom came to help, too!

We only ran into one huge Boulder which we just couldn’t budge with the small excavator we rented. But, a friend had a jackhammer that worked to get the boulder out of the way.

Our excavation crew. We are blessed with great friends who come to help us out.

Completed pipe from the septic tank down to the distribution box.

While we were working on the pipe, Pops was digging the trenches for the leach chambers. So once we got the pipe laid, it was time to bring down the chambers and start laying those.

We chose this system because the trenches only need to be 3 feet deep and no gravel is needed. And it’s very easy to put together. And handle. And transport. Etc, etc, etc.

Pajii finds a bit of shade inside a septic chamber 🤣

Leveling the ground in preparation for another chamber.

Making sure the previous chamber is level.

Prepping the ground for yet another chamber.

Once the chamber is in place, dirt is shoveled in on the sides to hold it in place. That’s where we ran into issues. We had trouble finding enough rock-free dirt to cover the chambers.

Digging the third and final trench.

Sometimes, the big tools had to come out to make the chambers level.

Pajii once again inside one of the septic chambers. 🤣

Each leach line was 80 feet long.

We got all three lines laid and partially buried, then had our inspection. Which we passed, no problem!

Here you see the leach field in relation to the house. What you can’t tell is just how steep that hill is.

Now it was time to backfill.

But again, how to get the backfill material from the trailer to the pipe when you’re dealing with steep, rocky terrain?

Buckets. Lots and lots (and lots and lots) of buckets full of sand.

If I never have to move sand by bucket again, I’ll be happy. 😉

Once we had a good layer of sand on top of the chamber, we could then push the native dirt (full of rocks) back over the top.

Goofball!

The hubby and I got real good at handling the mini-ex.

Aaaaand we’re done!

And that’s it. A completed septic system. It felt so good to know that we have another huge portion of our build completely done.

So now we have a fully functional septic system. But of course, nothing is hooked up to it. We have dumped the trailer sewer tanks in there a couple times since it’s been done, and that’s been great. Not having to go into town to empty those is a blessing indeed.

But let me tell you, that first toilet flush in our new house is going to be magical.

Once we finished the septic system, we turned our focus to the inside of the house. Primarily, the floors. But that is another post. I want to get this one sent off into cyber space and get back to working on the house rather than writing about it.

Yes you can!

My hubby snapped a photo of me and it got me thinking.

(Ok, ok, so it’s slightly staged, but only because the shadows were creating problems.)

People, women in particular, sometimes tell me how amazing it is that I am the primary one building our house. It is usually followed up with a wistful, “I could never do that.”

I wish people, women in particular, would stop doing that. No, not telling me I’m awesome. You can keep doing that. (Kidding! I’m kidding!)

But seriously, Ladies (and guys, too, it if applies), stop selling yourself short. You could do this, if you really wanted to! You can learn to do anything you want to. Yes, it may be completely out of your skill set. For now. You may not be physically able to do it. Right now. But you can learn, and you can get in shape.

Now, I totally understand that there are some people for whom building a house with their own hands truly would be impossible. I have paraplegic brothers. I had several mentally disabled foster siblings while growing up. I have friends with severe chronic illnesses. Etc, etc, etc. I get it. But guess what, those are not the people bemoaning that they are incapable of doing the things I do.

Far and away, the women who have uttered to me, “I could never do that” are in fact fully capable of doing everything that I do. They just don’t know it.

Why do we sell ourselves short? Why do we buy into the lie that there are certain things we can’t, or shouldn’t, do? Why does anyone believe that there are things in life that are just too hard, to far out of their reach, or off limits?

It’s sad really. To see people settle for less than their dreams, just because they don’t believe they can ever achieve them.

Sure, I was taught how to build a house when I was a teenager and that gave me a foundation to believe that I can build my own house. I had that advantage, and I’m thankful for it. But you know what I never in my life had any experience with? Gardening and canning. I was not around it growing up at all, and in my teen years and early adulthood I couldn’t keep any green thing alive. But I had a dream to produce and preserve my own food. So I learned how. I never once thought that I wouldn’t be able to do it. In my mind, it was just a matter of learning new skills.

So maybe you don’t really even want to know how to build a house. That’s totally fine. It’s not everyone’s cup of tea. But don’t buy into the lie that you wouldn’t be able to do it if you really wanted to. Don’t spend your life wistfully saying, “I wish I could….” fill in the blank.

I guess that’s probably what it really comes down to. Desire. Do you really, truly want it – whatever “it” is? Then go out and get it!

You can do it!

Homestead Update: still waiting, but being productive

I didn’t realize it had been so long since I last did an update on the house progress until I posted about Pajii’s new garden beds and saw the half-sided house in the background.

So yeah, this picture was taken on January 26th. We haven’t seen our contractor since that day. Our house sits there, half sided, getting snowed on. We finally gave up on being able to get ahold of him and have found a new contactor to finish the job. They will start as soon as they can fit us into their schedule.

In the mean time, we’ve been keeping pretty busy around the homestead with other projects that needed doing.

We were blessed with unseasonably warm and dry weather for most of January and February.

Picnic lunch in the February sunshine

School outside in February?

We decided to take a Saturday and finish the concrete patio outside our completed well shed (I’m putting together a post on that, I promise). The existing concrete was leftovers from when we poured our house footers. We were hoping we’d have enough left over from the house slab pour, but the calculations on that were perfect. Not short, but no leftovers either. So we had to go buy bags of concrete to finish the well shed slab job.

Prepping the 4’x7′ section

IT’S ALIVE!!! This concrete mixer was my dad’s and has been sitting on this piece of land, completely unprotected, for at least 12 years. And it still worked!

Concrete work is dirty work.

We mixed 3 bags of concrete at a time in the mixer, then poured it into a bucket to schlep it into place.

It was actually really easy to move the concrete around such a small area with the bucket.

You can see the chicken wire we put down as an added strengthener. Every so often, we’d reach down and pull the wire up so it was floating in the slab rather than pressed down to the ground.

While Hubs mixed up another batch of concrete in the mixer, Pajii and I would scree the freshly poured stuff so it stayed level with our existing slab and the forms we built out of 2×4’s.

The finished slab. It makes getting into the well shed so much easier!

Another project we worked on was some driveway maintenance. We had put in a culvert last fall and it needed a bit of upkeep.

Adding and compacting more dirt over top of the culvert.

Hubby cleaning out some collected sediment inside the culvert.

There were a few gardening type things to do as well. Since I don’t plan to start a garden this year for myself, it was great to get some dirt under my fingernails, so to speak.

Spreading pine needles collected from our church’s landscaping. This area will eventually be our fenced in garden with raised beds, but right now it is a parking area. We thought it best to use decomposable material rather than gravel to combat the mud in this area. Besides, the pine needles were free and we were saving our church some money since they didn’t have to haul it all to the dump.

I had some flower bulbs I needed to get in the ground. So I made a couple new areas for flowers along the pathway going from the upper level down to the house pad.

This area eventually became a perennial flower bed. Once the spring bulbs come up, we’ll plant some more summer type perennials in this bed, too.

And, since I had gone a little crazy buying flower bulbs last fall, we had plenty left over to plant in other places as well, such as around our cherry trees.

Oh, and we finally finished the stairway that leads from the upper level down to the house pad.

These stairs are made from railroad ties that have been sitting on this property for over a decade.

And, if you’ll remember the panels that blew off the side of the hill?

We finally got them back up to the pad. All 29 of them.

Even Flower Girl was able to help once the panels were at the top of the hill. The panels are heavy for a 5 year old, but she’s strong and has a will to help.

This girl, even with a gimpy knee, was amazing in getting all those panels back to the top.

So even though we haven’t been able to work on the house, we have not been idle this winter. January and February we’re filled with a lot of time outside.

And then March blew in and winter finally settled in.

So, we’re back to being stuck inside and working on other projects.

But Spring is just around the corner. And our new contractor said it shouldn’t take much more than a week to finish the siding and roofing once they get started. Rest assured we’ll be shouting from the mountainside when that blessed event finally happens.

In the meantime, keep warm and busy friends.

Garden beds

In February, we had a run of really nice weather and it got us itching for spring. Pajii in particular is really missing being able to garden. His garden up in Oregon, though small, was prolific and beautiful.

Pajii’s garden in Oregon – 2014

So, since we couldn’t work on the house (still waiting on our contractor to finish the walls and roof), and we had such nice weather, I decided to knock together some raised garden beds for Pajii to work in come spring.

I decided to use our wood left overs from the concrete forms for the house foundation.

This is only some of the wood we reclaimed from our forms for the foundation.

I measured and cut and organized and got all the pieces sized and ready to assemble.

A lot of the 3/4″ scrap plywood was 8 or 16 inches wide. This made it easy to figure out how tall I wanted the beds to be.

I started by attaching my side panels to the corner 2×4 posts which I cut to be twice the height of the panel. Since I wanted to use as much of the smaller wood scraps as possible and leave larger pieces for future projects, I had to make a couple 16″ panels out of two 8″ panels as you can see in the following pictures.

Attaching a panel to the corner post

I used 1⅝” deck screws to attach the 3/4” plywood to the 2×4 posts.

Joining two 8″ panels together to make a 16″ panel.

One side ready for assembly

Once I had all four sides ready for assembly, I started screwing them together.

Clamps are your friend when working solo.

One box almost finished.

This box is almost finished. Just needs some strengthening 2×4’s around the top edge.

One of the boxes we made a trapezoid (an isosceles trapezoid to be precise 😉) to work in with the shape of the garden a bit better. You can see in the pic below where Princess Girl is helping me put on the strengthening rim boards around the top of the box. I used 3″ deck screws too attach these boards to the corner posts.

Finally got some human help. 😁

We also attached the plywood to the rim boards with 1⅝” deck screws.

Princess Girl gets some more screw gun practice.

Pajii and the Princess with a finished box.

Time to move.

Once we got the boxes put into place, Flower Girl’s chicken, Leilani, had to come check them out.

All 4 boxes in position.

We made 4 boxes total. Three of them are 3ft by 6ft and the fourth one is a trapezoid that is 5ft x 3ft x 2ft, if that makes sense. All of the boxes are 16 inches tall with 32 inch corner posts. The corner posts are taller in order to easily attach clear plastic to make a cold frame in early spring, or more likely, netting to keep the squirrels and other pests out.

I really like how these boxes turned out. I love that everything used to make them, including the screws, is reclaimed materials that were used to make the foundation of our house.

We have not filled them with soil yet since winter returned just a couple of days after we finished them. Soon, though, we’ll go get some soil and not too long after that, Pajii will be able to keep busy growing us some fresh veggies. I can’t wait!

Culling old chickens

So, I know you’re anxious to know about the slab, but that’s for another post. Sorry, you’ll have to wait another day or two.

For now, I want to share with you a task that we had to take care of that had nothing to do with the house build.

You may remember that back in April, we acquired a flock of about 20 old hens from some friends of ours. We were told they were roughly 5 years old. We did not expect many eggs out of them, but for several months during the summer we got about 10-12 eggs out of them every day so we were happy. Then the end of summer came and between the diminished daylight and the molting and the fact that they were old and that they kept eating their eggs, we didn’t get very many eggs out of them. For the last month or two, we’ve only gotten an egg or so a week. Very frustrating. So, we decided it was time for them to go.

Warning: this is a Homesteading blog about homesteaderly things and one of the things we do on this homestead is produce our own meat. The following pictures may not be suitable for all viewers. While I will not be posting “how-to” pics, or ones that are too bloody, some people may not like seeing dead chickens. I respect your decision to click away if you’d rather not see anything objectionable.

For those of you who are ok with that sort of thing, read on.

As I said above, this is not a how-to type post. There are plenty of those out there, and I especially found the one by The Prairie Homestead and the video by Joel Salatin she linked to at the end of her post to be useful.

This is more of a “this is how we spent our day” post. Actually, how we spent a day and a half, even into this evening as the canner is busily boiling away as I type this.

.

Hubs was the main chicken dispatcher.

He was also the main feather plucker.

My brother and sis-in-law joined is to help with the task.

Sis-in-law ended up doing most of the cleaning.

Flower Girl was rather eager to help with the whole process.

She thought that the tiny egg yolks we found inside some of the hens were really cool.

One of the hens was obviously still producing some eggs as we found different size yolks.

Nearly 12 year old Princess Girl was not nearly as interested in getting her hands dirty as her little sister, but she did process one chicken completely from catching it in the run to putting the cut-up meat into the jars.

I’m so proud of her. And when she wasn’t helping with the actual processing, she was a great gopher, as we all had dirty hands, she’d be the one to run and get stuff for us.

She also took a lot of these pictures since my hands were perpetually covered in ick or water.

This chicken wing looks like an octopus tentacle!

Since these chickens we’re so old, we knew that their meat would be pretty darn tough.

By canning the meat, it is pressure cooked as it is canned. This high pressure cooking/canning for over an hour makes the meat nice and tender.

And yes, I’m canning after dark.

These are great for use in soups or as chicken salad, etc. And I’m so excited that we were able to put these chickens to good use since they had become useless in the egg production category. It feels great to be able to produce some of our own food again. I’ve missed that since we moved back to Nevada and spent so much of our time building the homestead living systems.

We’ll, that’s it for the day. I’ll update in a day or two about our slab, I promise.

House update: exterior backfill and slab footer leveling

We got the outside of the footers backfilled. Which also means we got our garage pad excavated since that’s where the dirt for the backfill came from.

Before we backfilled, however, we had to put rigid insulation around the footers. This helps to insulate the pad so that the house is easier to heat. We chose to go with extruded polystyrene (xps) since it seemed more durable to us. Also, our plans say it has to be at least R-7 and this 2 inch xps foam is R-10 and was easier to find at our local big box hardware store than the right kind of expanded polystyrene (eps). 

We also spent a couple days ripping our form bords down to the right height and reattaching them so that they become the forms for the finished slab. I like that we were able to reuse materials. In addition to the wood, we had put all the forms together with screws, which means we were able to save those when we took the footer forms apart and use them again. Once the slab is poured, these forms will come down and one more row of insulation will go down, then we’ll backfill the rest of the way. And I am sure all this wood will find it’s use on the homestead.

We rented an excavator that Pops operated for us. He’s a wizard in that thing! But then, that’s what he did for a living for 30+ years.

Excavating the garage pad (and getting us fill dirt)

The Hubs and I took turns operating the little bobcat we also rented. Would have been nice to have something a bit bigger, but that’s all that was available on short notice. We used that to move the dirt around the house.

Almost done with the exterior backfill

And since we had the machine there, we decided to finally move the huge boulders into their permanent positions. 

These gigantic boulders came out of the hillside when we excavated for our well. We knew they would come in handy for landscaping and retaining. So that’s exactly how we used them.

Play boulders


The new garage pad with big boulders as a retaining wall

Just a couple days after finishing the backfill, we took off on a big family vacation that has been in the works for two years. 

The Castle Rock Family at Mt Rushmore

We got back from vacation this past weekend, and now it’s back to work!

First thing our hired hand and I did this morning in was some rebar work that needed to be finished. It was one of those jobs that would have been easy to forget.

Then we worked on leveling up the forms. They were pretty close to level, but needed a bit of adjusting here and there.

The first thing we did was go around with a transit level and measuring rod and see where the forms were high or low. Princess Girl and Pajii helped out today as well.

A transit level is basically a swiveling scope mounted on a tri-pod. You make sure it is perfectly level by using the adjusters, then site through it to a measuring rod or tape measure.

The site through the transit

Once we figured out the measurement that was most common, we called that measurement “grade” and brought everything else up or down to meet it. 

Sometimes we had to detach the form from the supports and pry the form up a bit and re-attach. But for the most part, we had to get some spots down a bit. Because there was not enough wiggle room in the system to push the boards down, I came up with the idea to plane down the high spots. We would find two “grade” spots not too far from each other, put a chalk line on it, then use the electric planer to take off the excess down to the mark.

Princess girl was in charge of the camera for a bit – obviously!

It worked great!

Planing down the high spots


That’s all we did today. Tomorrow I am going to order some fill dirt and we’ll start backfilling the interior on Friday (gotta work my summer job on Thursday). Tomorrow we also have some more bracing to do on the forms now that they are level. Don’t want those suckers to move a millimeter!

Then, over the weekend, we start trenching for interior footers and plumbing! This progress is so exciting!

House update – footers poured!

I haven’t written much lately because I feel like there’s not much to update you on. We’ve been working a lot the last several weeks to get our forms ready for concrete, but you couldn’t​ really see the progress. Besides that, I’ve been exhausted working all day in the heat. On top of that, I’ve had to work my regular summer job here and there, and have had a couple of migraines. All that together, and nothing got written here on the blog (though I do a better job updating Instagram and Facebook). However, we did pass our first inspection no problem (yay!) And then had to wait a week for schedules to line up. But we finally got a permanent part of the house built today! We got our footers poured!

It was an exciting day, let me tell you! This is the first thing we’ve done so far that is actually a part of the house. 

And I feel rather validated, because not only did the inspector not have a single issue with the work we had done building the forms, he said it looked good, and several of the concrete guys we’ve had out lately to give us bids have said that the forms looked amazing. 

And they performed marvelously today as we pumped the concrete into them.

And it’s all due to this guys right here:

Gary is a family friend who is a retired contractor and has volunteered hours and hours to help us get this far on the house. He is generous, loving, knowledgeable, and helpful. We could not have done nearly as well or as quickly as we have without his expertise and willingness to help us out.

And he’s not just a supervisor type guy either. He is right there in the mix, getting his hands dirty with the rest of us.

Today we had a large crew here helping. Not only was it Gary and the Hubs and I, but we had Princess Girl, our highered hand (a young friend who’s working for us for the summer), a brother-in-law of sorts, and a couple the dads. In fact, the Dads put together the forms for the patio we poured out of the left over concrete.

Everyone had a job and did it well. There were times of rushed activity, and times of standing around not doing much.

All told, it took about 4 hours to do both the footers and the little patio.

Its been amazing hour much help our hired hand has been. And Princess Girl is learning fast and is able to help with more and more.

At the end of the day, it was amazing to just sit and take it all in. To reminisce about all the work that’s gone into the project thus far. To be proud of what our hard work has accomplished. And to realize that this is just the beginning.

Actually that last part scares me a bit. 

Ok. A lot.

We’ve worked so hard already. And we are just getting started. We have so far to go.

But I know we’ll get there. In God’s timing, and in His will.

And when it’s all built, and we are sitting there of an evening, admiring the work of our hands, we’ll know it was all worth it.

And in the mean time, we just do the next step. Which tonight is wetting down the ground inside the footers so that it will settle and compact.

And now we’re off to bed. Its been a big day.