Tag Archives: Natural

2019 Broody Hen Watch: Days 20/21- HATCH DAY! (And Day 12 for the 2nd group)

They hatched!

They hatched!

Well, 5 of them did anyway. 5 out of 9 is not the best ratio, but it’s better than last year’s hatch ratio. (2/7)

So we checked on the eggs on the morning of Day 20 (June 7th). And we found a pip!

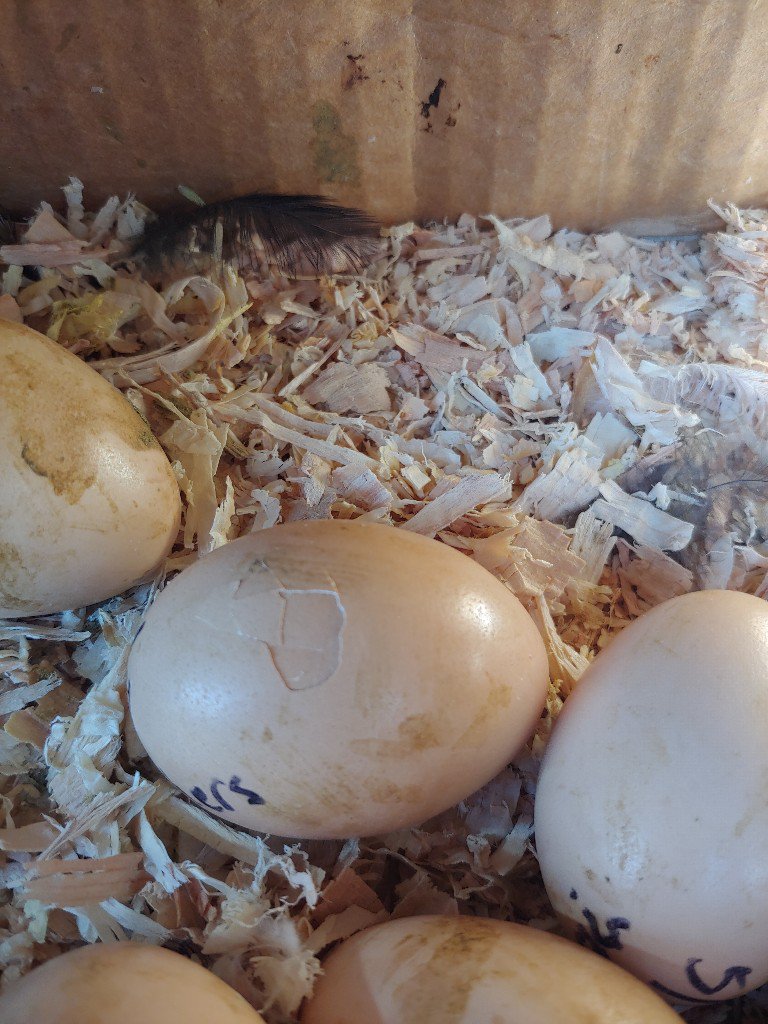
That meant that there was a chick pecking it’s way out from the inside!

We also found one half hatched and slightly squished. I thought it was dead, so I picked it up and removed it from it’s shell to see if I could tell what kind it was when I felt it move in my hand! It wasn’t doing well at all though, so we brought it inside and tried to warm it up and nurse it to health.

But, sadly, it passed away.

But it wasn’t long until the one that had pipped earlier had hatched.

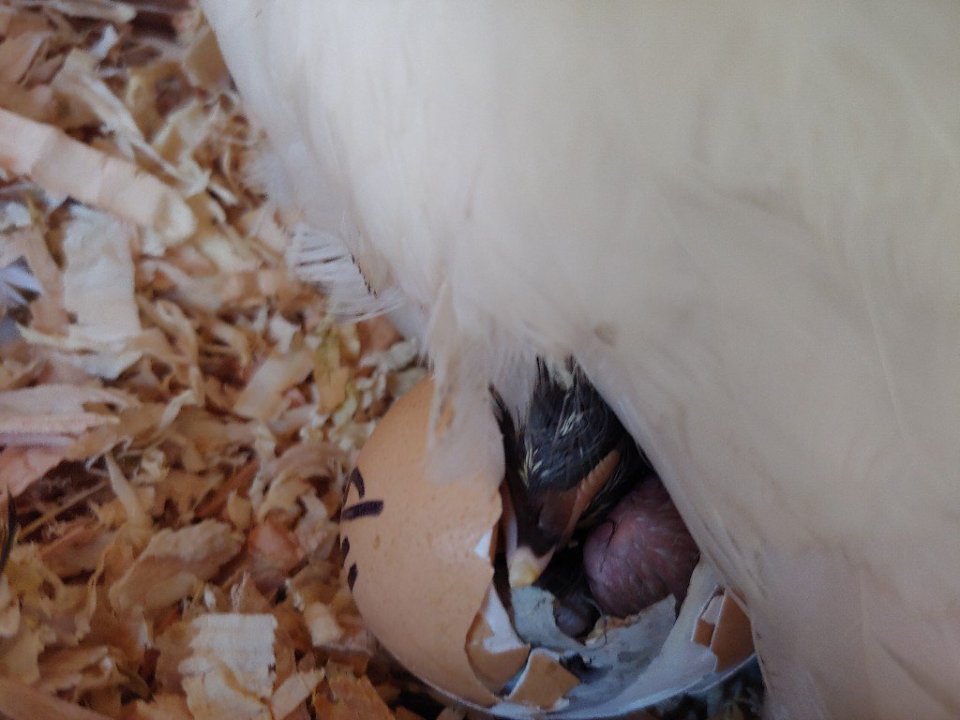
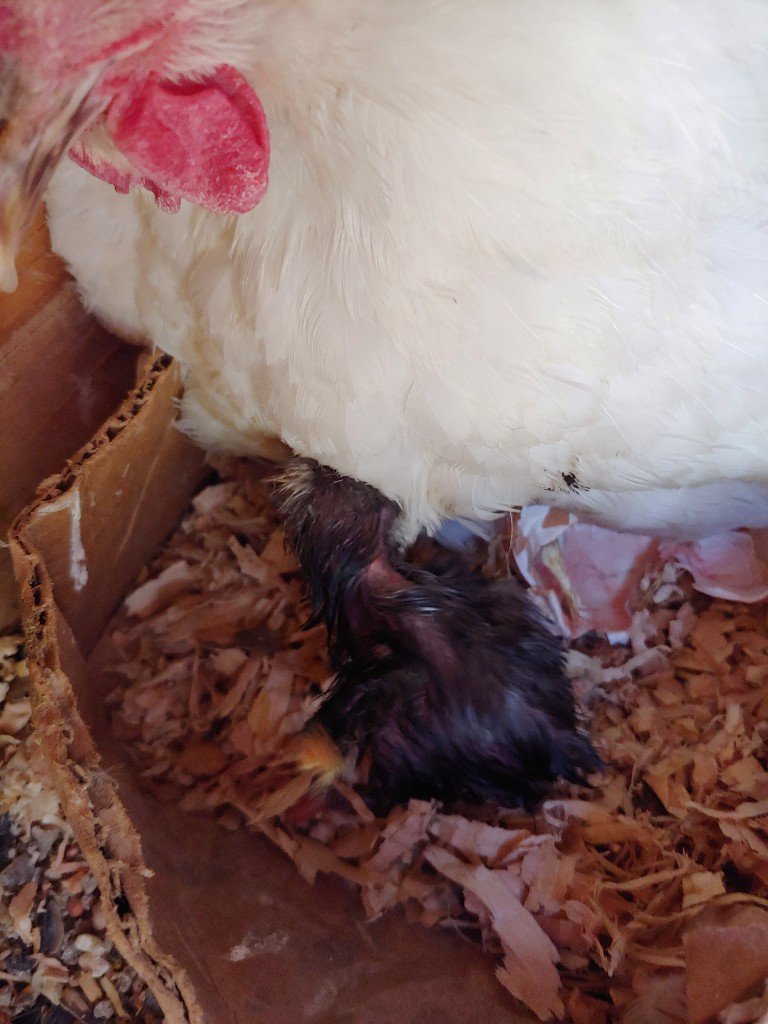
And, another was right there with it.

Still slightly wet

All told, we had three hatch on Day 20 and two more hatch the next day. There were 4 fully formed chicks in eggs that did not make it for some reason.😢

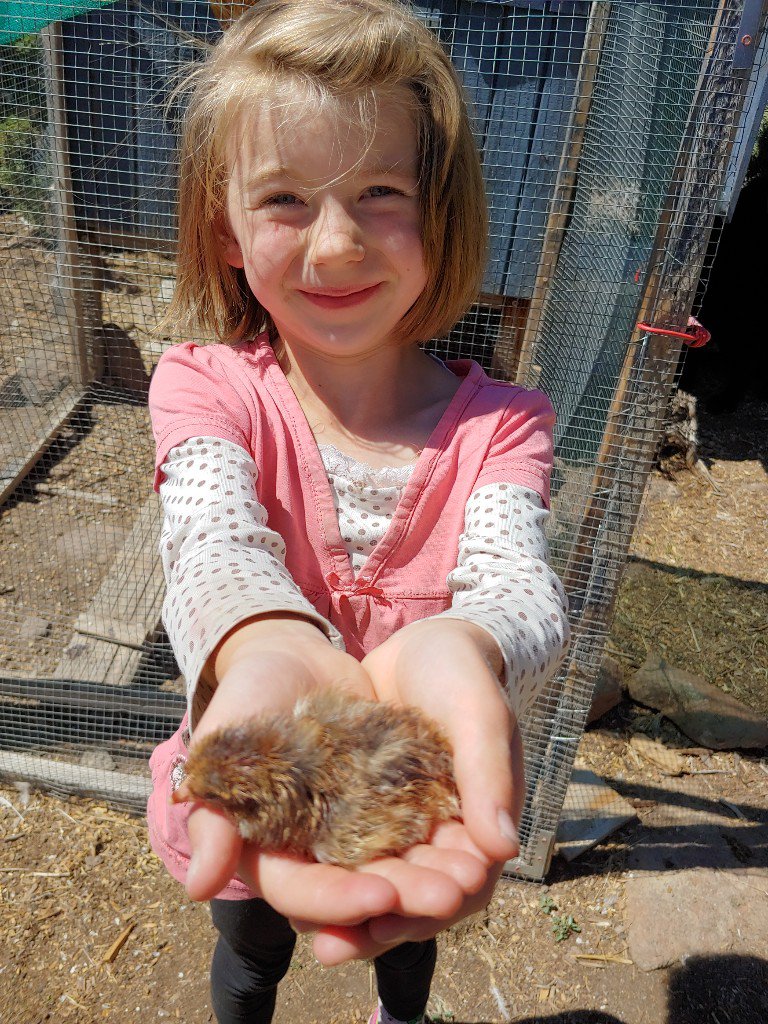
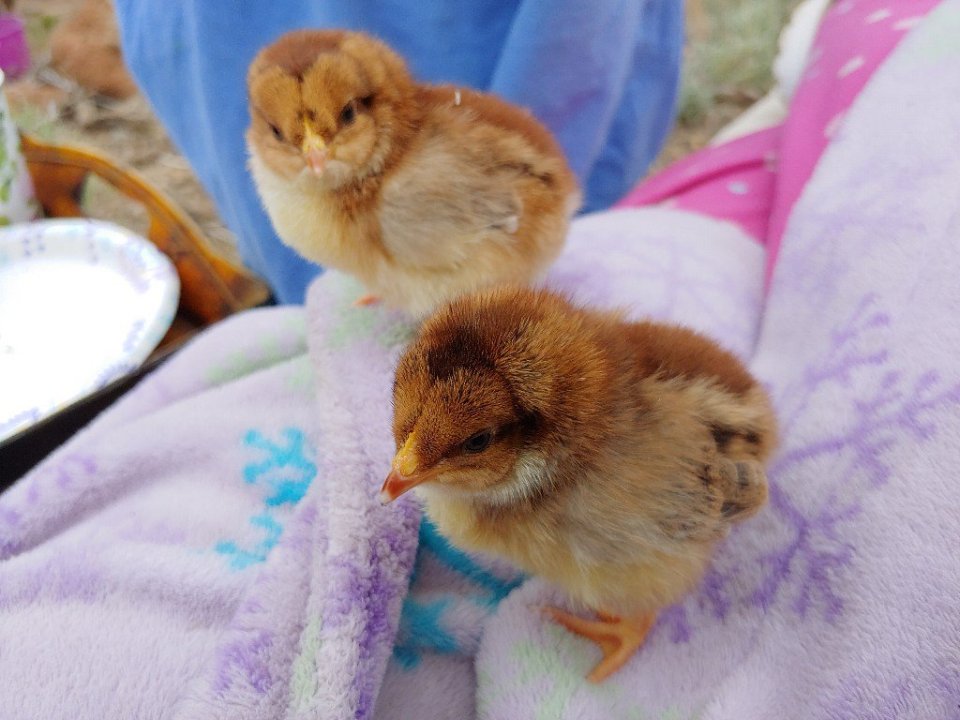
Of the five that hatched, three are sex-link hybrids and are all boys. Of course! 🙄 The other two are pure breed Speckled Sussex and we won’t know for several more weeks of they are male or female.

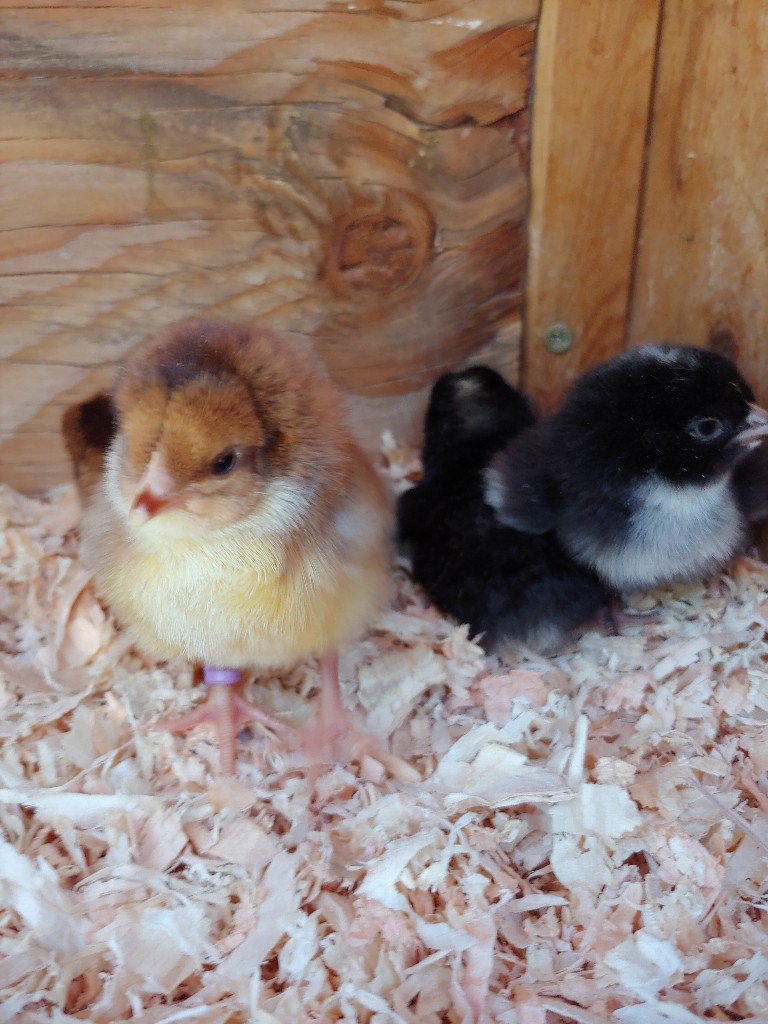
White spots mean boys

Overall, I’m fairly pleased that we got 5 chicks out of this hatch. I still would like to figure out what’s going on that we don’t get a better hatching success rate. I am leaning toward the idea that it might have something to do with our very low humidity here in the high desert. But five is better than none, or even just one or two, so I’m counting my blessings. I just really hope that at least one of those Speckled Sussex chicks is a girl!

—————————————————

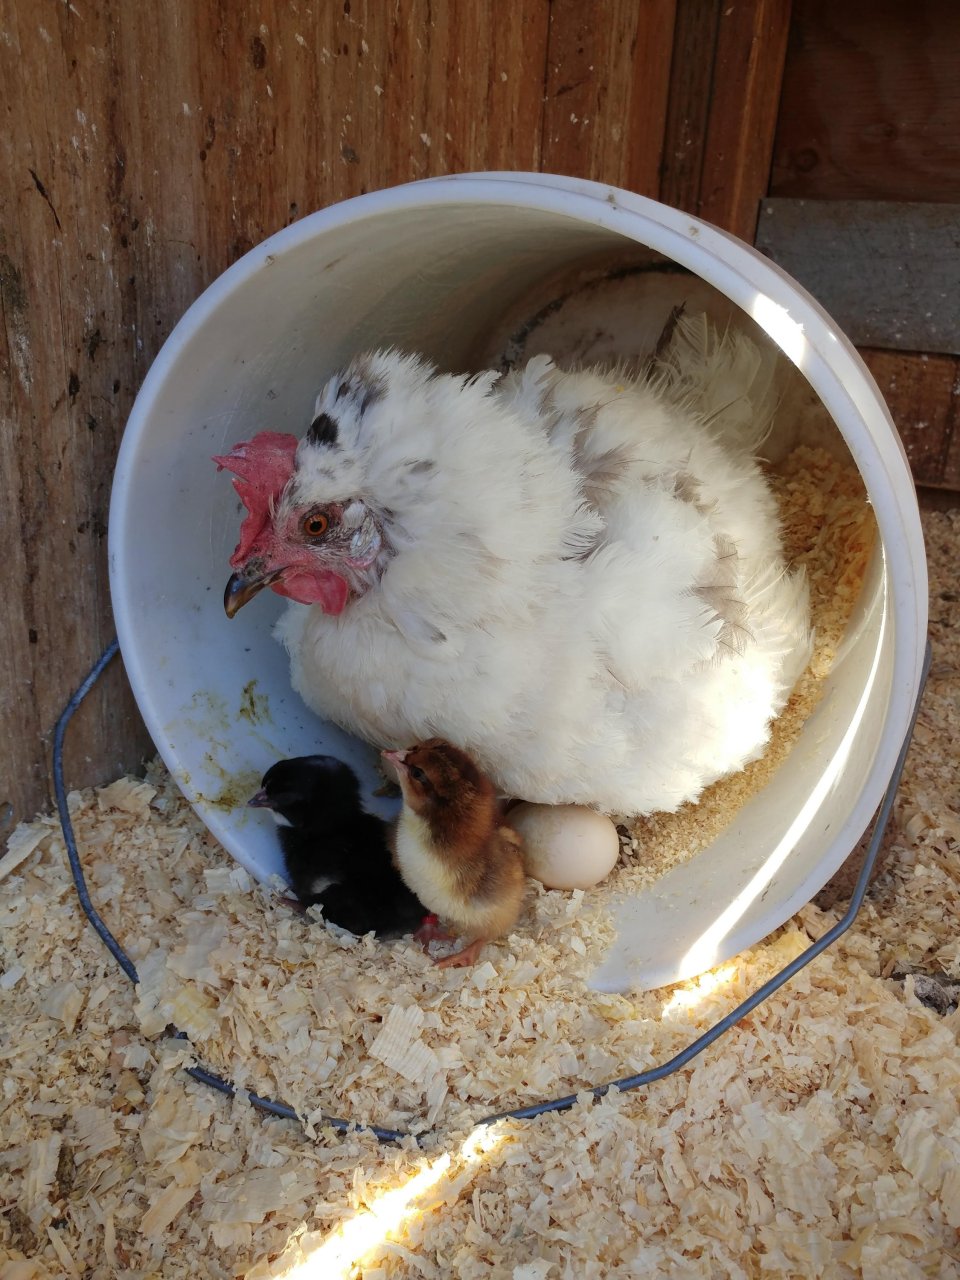
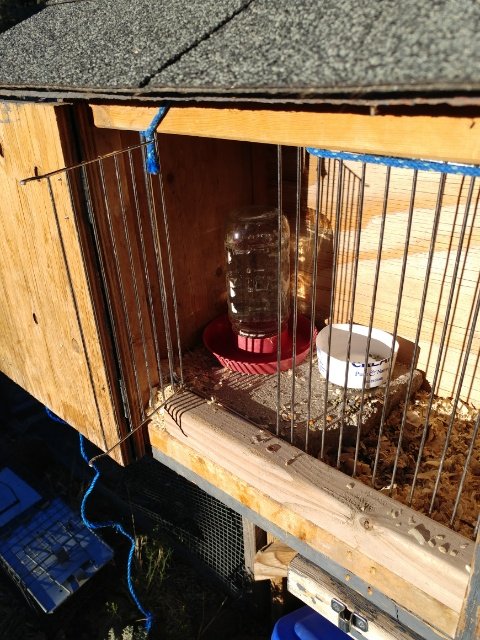
On June 9th (Day 12), we candled the eggs from our other broody hen.

There were 11 eggs remaining (one went missing) and it was very obvious which eggs were developing and which were not. There were a couple eggs that were just not fertilized. As I thought, Uno the rooster just couldn’t get around to all the ladies all the time.
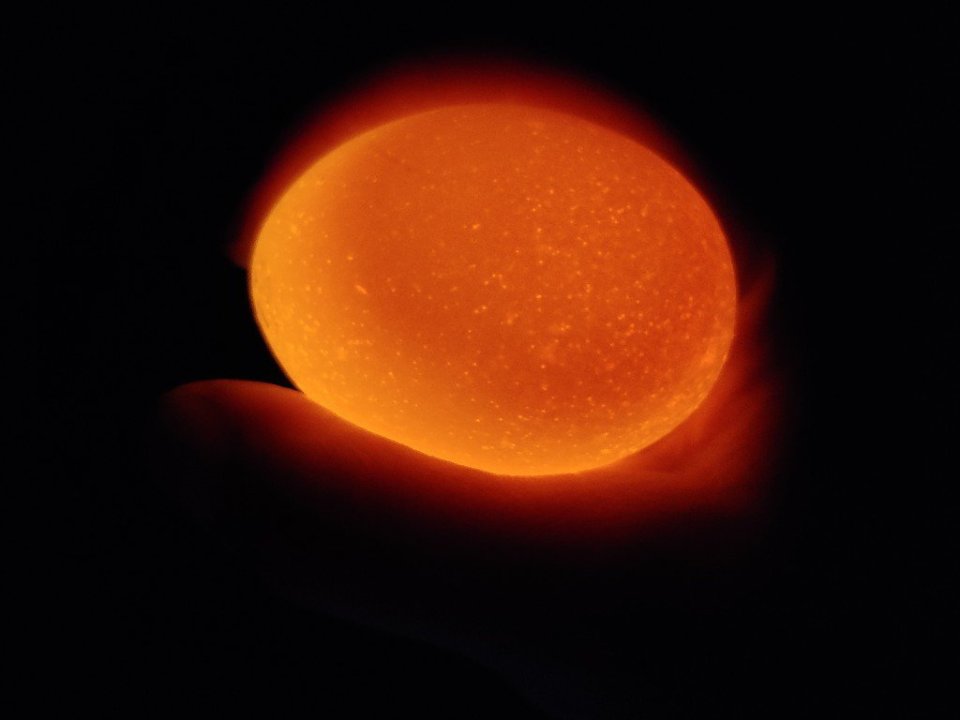
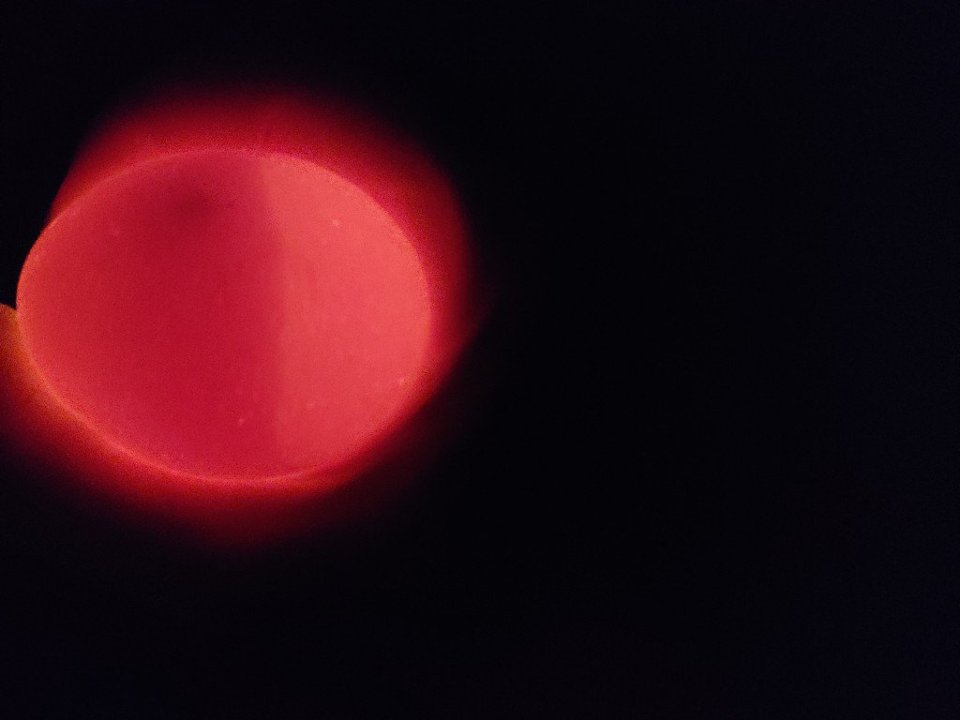
Unfertile egg.

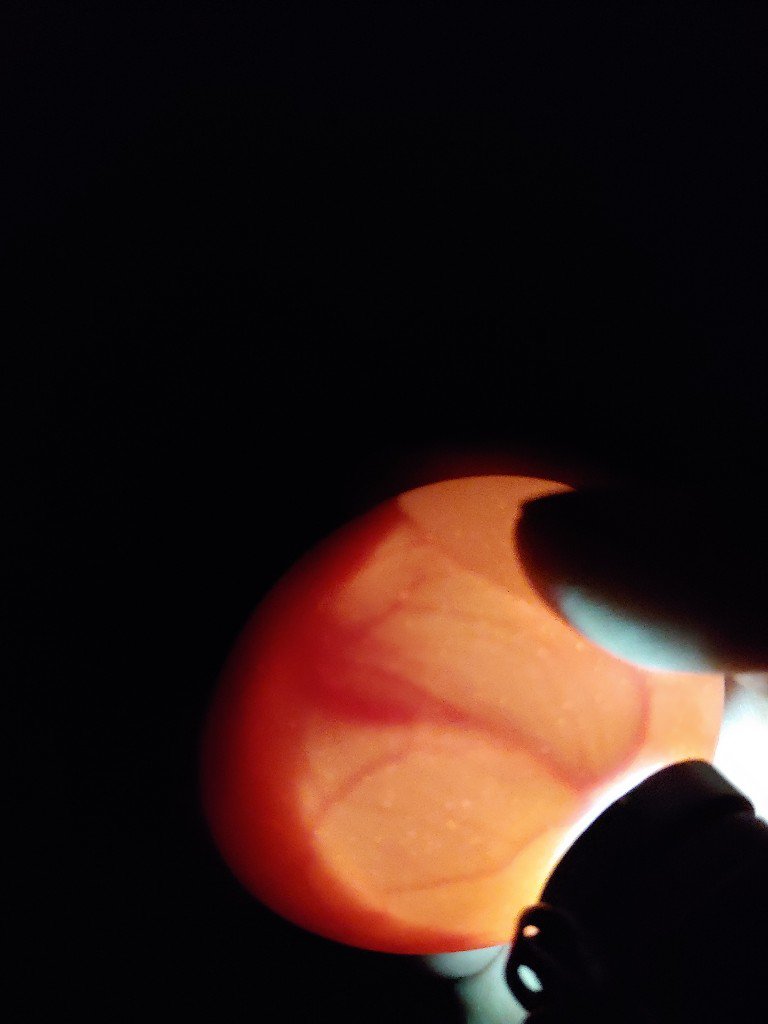
There were also some that had developed a bit but then died of for unknown reasons.

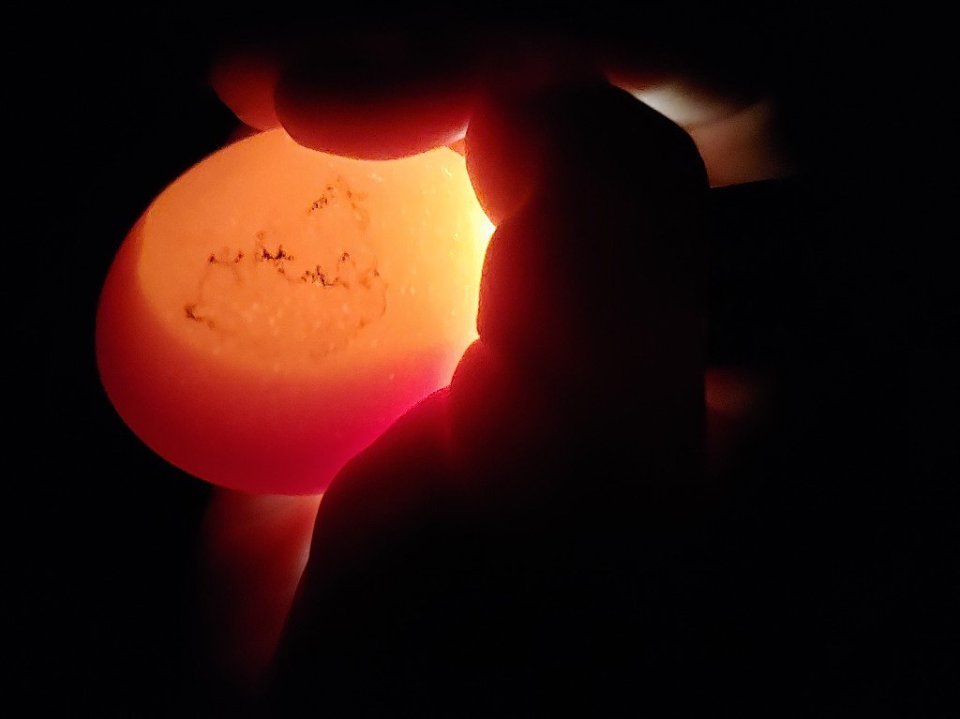
Blood in the fluid, no visible veins

If it had been day 5 or so, I would have said this one looked normal. But at day 12, it should look quite different, as you’ll see in a moment.

The black spot at the top was a developing embryo in the very beginning stages when it died.

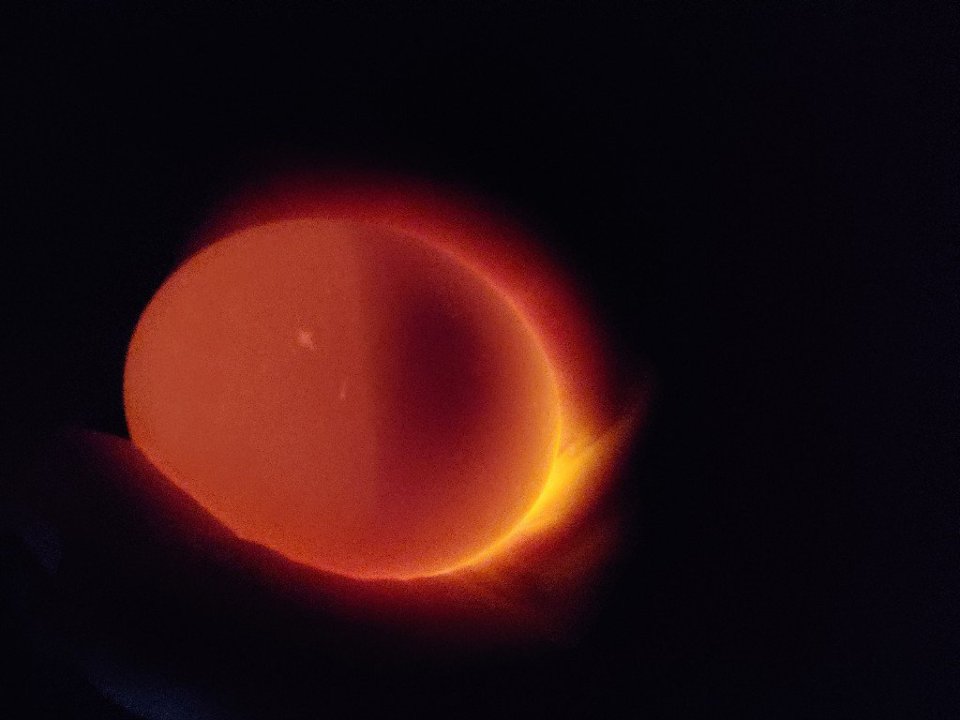
There were 5 eggs that looked like the following pictures. Notice the obvious veins/blood vessels.

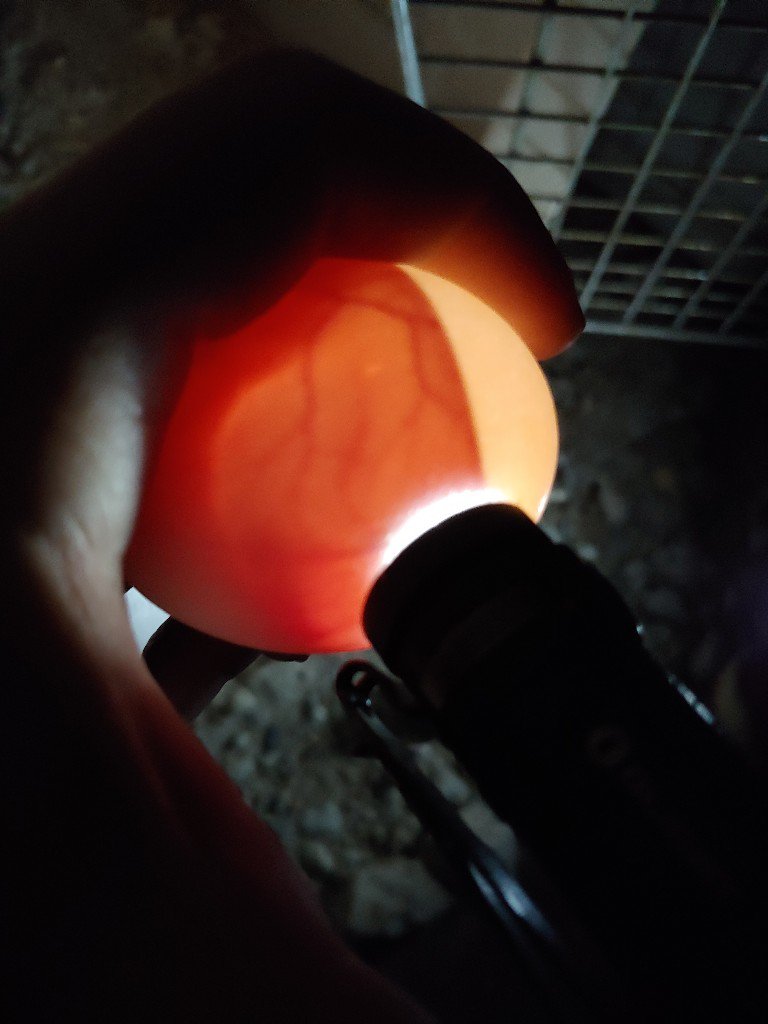
Because these eggs had white shells, the blood vessels were very easy to see with the light. We could even see the movement of the fluid inside as the chick moved around! Check out the video below!

That was an awesome experience!

A day or two after candling, another of the eggs got broken, so we are down to 4. But Welly is being a good broody Mama, so we are hopeful to get some chicks out of theses ones, too.

Her hatch date is tomorrow!

2019 Broody Hen Hatch Watch: Day 1

May 19, 2019

You may remember last summer when we tried to have some of our broody hens hatch some eggs for us. (You can read those posts here.)

We tried six times and only ended up with 2 chicks (both roosters, of course!). Sadly, after some research, I think a couple of those failures were from us handling and moving the eggs after day 17, which is when the eggs should be left alone until hatching. So we might had inadvertently cause some of the in-egg deaths. I’m crushed. 😟

But, we are trying again, and we know better this time.

One of our Austra-Whites, Bluebell, went broody last week. She was the mama that raised store bought chicks for us in 2017. Her sister, another Austra-White named Speckles, was the hen who successfully hatched the two chicks last summer.

Our 2018 chicks – a Black Sex-link male, and a Speckled Sussex male who is now one of our breeding roosters.

We never had any success in hatching with the three Welsummers or the Golden-laced Wyandotte who went broody, so when Bluebell decided to be broody again this year, I was happy. I know she is a reliable brooder and a good mama.

So, here we go.

We moved her to the brooder coop nest box, blocked off from the 8 week old chicks who are using the rest of the coop.

Our brooder box setup. Just shut the right door to keep the hen in, and the left one is opened or closed as needed for security or ventilation and to access food and water.

She was sitting on golf balls for a few days in order to adjust to the move before we gave her eggs.

Classic broody hen stink-eye

But after one night she had settled right in. So I figured it was safe to put eggs under her.

The next day (that was yesterday) we swapped out 9 golf balls for a dozen eggs we had been collecting from our breeding group from several days.

I’m pretty sure all the ones on the right are from our Speckled Sussex hen, Lizzie. She lays very light tan eggs, and usually it’s pretty easy to tell hers from the eggs that Feathers lays. But sometimes it wasn’t quite as obvious. Most of the ones on the left are from Feathers who is a Plymoth Barred Rock. They are both in with a Speckled Sussex rooster, Nigel. So Lizzie’s chicks will be pure breed Speckled Sussex. Feathers’ will be Black Sex-links, which means we will be able to tell immediately at hatching if they are male or female. And then there are a couple that I think are from our other Speckled Sussex in our other flock, which means they would also be pure breed. However, they could be from our Black Australorp, or our Golden Laced Wyandotte in that flock as well. In which case, the chicks would just be normal ol’ farmyard hybrids. Nothing special other than the fact that they would probably still lay some great eggs.

Hey, we should come up with a name for our sex-link hybrids. Every hatchery calls theirs something different dependant on the breeds of the parents. Black sex-links are almost always a Rhode Island Red or New Hampshire Red rooster and a Barred Rock hen and the offspring is almost always called a Black Star or Black Rock. Red/Gold sex-links have a much larger variety of breeds as parents, thus have many different “brand” names: Red Star, ISA Brown, Cinnamon Queen, Golden Comet, etc. Hmmmm…, Something to think about.

At any rate, we’ll hopefully have some Speckled Sussex and some sex-link and a couple mystery chicks hatching out in about 3 weeks. I will candle the eggs in about 12 days (I’m not confident in my abilities to candle on day 7) and their projected Hatch Date is June 8th.

I am sooo hoping this works this time. We really want an easy and natural way to replenish our flocks in order to be as sustainable as possible. If we can reliably hatch chicks, we wouldn’t have to purchase new ones, and we could sell some to offset costs.

I’ll keep you updated as we progress.

And this time, no moving of the eggs in the last 4-5 days!

Homemade Canned Mushroom Soup

I shared about my accident in my last post. I am feeling a bit of improvement, but still in quite a bit of pain.

Tonight I was home alone for the first time since hurting myself and had to get my own dinner. As much as I love the idea of fresh homemade foods, the convenience of canned goods just can’t be beat. Besides, it’s the middle of winter, and if it’s a veggie and it ain’t canned, it’s a lot harder (and more expensive) to get.

So tonight, I popped open a can of organic vegetable soup, heated it on the stove, and had myself some dinner.

As I was eating, I was thinking about how in the future I want to always make sure to have pre-made homemade canned soup available, not just the ingredients for soup.

And that got me thinking about the time when we lived in Oregon when I made canned mushroom soup. I was looking for a healthier version of canned condensed cream of mushroom soup. What I learned is that you can’t really make it “cream of” anything in a home kitchen since dairy cannot be safely canned. But you can can a broth soup and add cream to it when you use it. So I set out to make a mushroom soup that I could turn into cream of mushroom when the need arose.

Note: this is not a good substitute for traditional condensed cream of mushroom soup. The flavor is not quite the same, and it takes quite a bit of work to get it to thicken up if you’re looking for the consistency of the creamy stuff straight out of the can. But I will say that the flavor of this chunky mushroom soup far surpasses any of that condensed stuff. And is a wonderful soup to just heat and eat on it’s own. Once I have a full size kitchen with more time on my hands for food preservation (you know, when we’re not building a house), I plan to make more of this and do more experiments to work on thickening it for those times I do want the creamy stuff.

Note # 2: this is a canning recipe, but it’s not a canning tutorial. Pressure canning is pretty easy to learn (I learned just by reading the instruction manual when we bought our canner), so if you don’t know how, do a bit of research so you understand your canner before attempting to can anything in it.

Homemade Canned Mushroom Soup

Makes: 12ish pints

Ingredients:

  • 3lbs mushrooms – sliced
  • 1 large onion – diced
  • 3Tbl minced garlic
  • 2tsp thyme
  • 16+ cups chicken* stock/bone broth (bonus points if you make your own!)
  • Salt and pepper to taste

*I suppose you could use whatever type of broth you want, actually, if you have a preference. 😁

Combine mushrooms, onion, garlic, thyme, salt and pepper, and 1 cup of the chicken stock in a pot. Bring to a boil and cook till mushrooms and onions are cooked well. Heat remaining chicken stock in a separate pot.

Spoon ½ cup mushroom mixture into hot, sterilized jars. Fill remaining space in each jar with hot chicken broth, leaving 1 inch headspace. Put on lids and process in a pressure canner for 45 minutes at 10lbs pressure (adjusting for altitude).

To make into cream of mushroom, open a jar of processed mushroom soup and pour ½ cup into a pot, add 2Tbl your favorite thickening flour and stir till the flour is fully incorporated. Place on heat and cook till thickened, stirring often (this is called a roux I believe). Add about ½ cup of cream to the roux and stir constantly as it heats up and thickens. Once the roux/cream mixture thickens, add the remainder of the soup to the pot and heat through. If you want it thicker, cook it longer.

Ok, now I really want to make some more of this to have on the shelf. Hmmmm…maybe once I hit that point in my recovery where I can do light activity but can’t get back to construction yet I’ll take a day and make some of this, full-size kitchen or not! Yummmm.

What recipes are your go-to for stocking the pantry with healthier alternatives to store bought essentials?

-Maridy

Wild places

Rocks and trees, slides and swings, bugs and critters: our homestead playspaces are not soft places.

The other day as I was fixing up our slide for the kids, it hit me that many of today’s parents would take one look at it and shoo their children to something more safe. Maybe the sandbox.

Surrounded by rocks, no soft edges in sight.

Eventually, the terraces will be cleaned up and built up and beautified, but the rocks will still be there. The “danger” will still be there.

Our swings are attached to one of the very few suitable trees near the house, but they are not in an ideal location.

Our property is a wild place.

And it got me thinking. We are not a bubble wrap homestead. Or property is a wild place.

A place where kids can roam. Explore. Be free.

There are trees to climb, rocks to scale, bugs to find, and dirt to get into every nook and cranny.

And I love that about living in the country.

Kids learn to navigate the physical world with confidence when they are allowed to do so. Climbing high in trees, balancing on top of huge boulders, helps them learn balance and coordination. They learn what their body can, and can’t, do.

Sure, every once in a while, there’s bumps, bruises, and scrapes. There may even be a broken bone or two in our future. But bruises and scrapes and even broken bones heal. And you know what the truth is? Accidents and injuries happen even if you live in a bubble wrap world. Flower Girl broke her leg just by falling off the couch. And Princess Girl badly sprained her ankle just by walking down the stairs.

And so, we let our children run and play and explore and they are happy and healthy.

Broody Hen Saga: Day 19

*sigh*

I’m at a loss. I don’t think any of the eggs are gonna hatch.

We moved Summer into the main part of the coop in preparation for hatching (which could happen any time in the next 2 days).

I took the opportunity to candle the eggs again since we got her off them to clean her box (tried getting her to sit on them in the bucket, but she wasn’t having any of that.)

All of them have air sacks that are much too large for this stage of development. In one (top left in the collage below), you can see feathers that have developed, but again, there’s too much space in there. The chicks should be large enough to pretty much take up the entire egg by now.

We’re all sad that it looks like we won’t be getting any chicks.

I just don’t know why this happened. Summer was a great brooder. She was always on those eggs. Did they get too hot? Did she jostle them too much? Is there something wrong in the genetics?

The last time we got a hen to sit for the duration, only 2 out of 7 eggs hatched. And out of the 5 that were left over, 4 of then were fully formed chicks that died just before hatching. (One had never fully developed.)

So I just don’t know. Is it something we are doing wrong, or is it just nature and out of our control?

One day we’d like to be able to reliably hatch our own eggs, and maybe even sell hatching eggs. But if we can’t get them to hatch, then that’s an issue.

For now, I’ll leave them under her. A couple of them I’m sure are not viable, but there’s that one with the feathers that I’m not ready to give up on. There’s a part of me that keeps saying that chicks grow a lot in the last day or two before hatching. I have a feeling it’s not gonna hatch, but I won’t give up all hope till all hope is gone.

Broody Hen Saga: Day 3

9/1/18

[If you follow us on Instagram or Facebook- @castlerockhomestead – you’ve probably already seen this info, but I put it here for posterity and for those few of you who missed it. 😉]

This is “Summer”. She is a broody hen. That means she wants to sit on eggs and hatch them out into cute little fluff balls. But she is a chicken. And chickens really are kinda dumb. It’s all hormones and instincts that tells her to sit there. Some breeds of hens have a very strong broodiness gene and will be very dedicated to sitting on those eggs. Silkies and Orpingtons come to mind. But Summer is a Welsummer. They are not known to be particularly boody, although all three of our Welsummers went broody this year, and this is the second time for this one.

So, we’re trying again. Summer went broody in the nest box of the main flock coop. So I put a cardboard box in the nest box with some golf balls in it and let her sit on those for a day or two (that way I could take all the real eggs away from her but she would stay broody). Then one night, I moved her, cardboard box and all, to our brooder coop.

Our brooder coop is a small coop that is perfect for raising chicks in, once they hatch, and the nest box works perfect for a broody hen as well.

By blocking it off from the main part of the coop, the hen has enough room to get up and stretch her legs and get a bite to eat or a drink, but nothing to distract her from going back to those eggs.

The other three times we’ve tried to get Welsummers to hatch a clutch of eggs, they tended to get distracted and leave the eggs long enough that the developing eggs got too cold and died. Actually, the last one was in this same setup and was doing great, until the door got left open and she abandoned her eggs.

So here we are, with another broody hen and a new clutch of eggs. I let her sit on the golf balls until I had collected enough of the right eggs from our smaller breeding flock, then one night, out came the golf balls and in went the fertile eggs.

I put 10 eggs under her and the hatch date should be on September 18th. I say “should” because we did have a hen successfully hatch 2 chicks earlier this year and they hatched a day early (both males…of course) .

Hopefully it will be uneventful smooth sailing from here on out. We will candle the eggs in a few days and see which ones are viable. Then we wait.

Easy 2-ingredient CHOCOLATE sauce (that’s healthier for you!

I’ve been craving mochas a LOT lately.

But the ingredients in the chocolate sauce used by the coffee shops leaves a lot to be desired.

Not to mention that my cravings clash spectacularly with my wallet (nearly $5 a pop!).

So, I decided to work some more on my homemade mocha recipe. While I’m am not completely satisfied yet with the overall product, I’m digging how easy it is to make this chocolate sauce that has only two ingredients.

Easy 2-Ingredient Chocolate Sauce:

  • 3/4cup Pure Maple Syrup
  • 3Tbl unsweetened cocoa powder

I like to make this in an 8oz canning jars since it’s so easy. Simply put both ingredients into the jar, put a lid on it, and shake vigorously until combined. No heating required. You might need to use a spoon or a fork to break up a couple chunks and stir them in. Bonus for making it in the jar is that you already have it in a container to store it and only a measuring cup and spoon to wash. Alternately, you can mix this up in a regular bowl and whisk to combine, but the cocoa powder takes some convincing to mix with the maple syrup. It will happen eventually, just keep stiring. If you’ve combined it in a bowl, transfer to an appropriate size container and put a lid on it.

Use as you would any chocolate sauce. Mochas. Ice cream sundaes. Chocolate milk. Mmmmm….

I do not know if this needs to be refrigerated or not. I mean, we don’t refrigerate our maple syrup or cocoa powder. But just to be safe, I keep mine in the fridge just as I used to when we bought chocolate sauce from the store. That way if I forget about it, which sometimes happen as I tend to go through phases, I know it will last in there for a very long time.

So there you have it. Chocolate sauce that is easy to make, and way better for you than the stuff you get in the store (or coffee shops 😄).

Healthier Hot Chocolate (Only 3 ingredients!)

There’s nothing like playing hard in the snow, then coming inside to a steaming cup of hot chocolate.

It snowed again last night, the most snow we’ve had all winter.

The girls and I took the opportunity to get in some good old fashioned snow play.

When we came in for some hot chocolate, I realized we were dangerously low on our home made hot chocolate mix. But it was no big deal, because with only three ingredients, this hot chocolate mix goes together in a jiffy.

You read that right: three ingredients. This version is so much healthier than any store-bought hot chocolate I’ve found. And depending on what sweetener you use, you can make it even healthier. I’ve seen many other hot chocolate recipes what use more ingredients, and you certainly can add in flavorings of your choice, but we prefer to keep it simple. You can also omit the dried milk and add the cocoa and sweetener to whatever milk you normally drink. I like to have the milk in the mix, however, mainly because we don’t have a microwave, so heating milk on the stove means dirtying a dish. And we avoid that at all costs. Especially in the winter when our water system in the trailer is a bit more labor intensive. But also, I like to make up a big batch of this and have it on hand to drink, no matter how much milk is in the fridge.

Ok, I’ve talked long enough. Here’s the recipe.

Homemade Healthier Hot Chocolate

One serving:

  • 1 Tablespoon unsweetened cocoa powder
  • 1 Tablespoon sugar/sweetener
  • of your choice
  • 1/4 cup (heaping) dry milk

Put all ingredients in a mug and mix them together, add 6-8oz hot water, stir till all ingredients are dissolved.

One quart of MIX:

  • 1/2 cup unsweetened cocoa powder
  • 1/2 cup sugar/sweetener of your choice
  • 2½ cups dry milk

Put all ingredients into a bowl and mix well. Then pour into a quart size container, label and place in the pantry/cupboard ,etc for later use. To use, place 3-4 large spoonfuls of hot chocolate mix into a mug, add 6-8oz hot water, stir till dissolved.

Notes:

  • Add more or less mix and/or water to achieve desired taste.
  • Mixing all the ingredients together before adding the hot water helps the cocoa not form so many clumps.
  • Feel free to use whatever sweetener you prefer. You may need to play with the ratios a bit, though. We typically use raw cane sugar, but we’ve also used coconut sugar and pure maple syrup. If you prefer to use a liquid sweetener, you’ll need to put that in at the same time as the hot water.

How do we…stay warm

It snailed today.

Yes, you read that right. It’s not a typo.

And, no, it doesn’t have anything to do with slimy little creatures with shells on their backs.

See that “snow” on the straw bales? It’s actually hail.

Get it? Snow + hail = snail. I’m so puny.

See? Little tiny hailstones. But it was cold enough today for it to have been snow.

Never even made it to 50° outside. Probably going to have our first freeze tonight.

The weather brings to mind a question we get asked every time the temperatures plummet. And since we turned on our heater today for the first time this season, I figured it was a good time to answer everyone’s most pressing question.

Do we stay warm enough in the winter?

The answer is, “Of course!”

The the real truth of the matter, however, is that YOU might not think so, but we stay plenty warm. Relatively.

Yes, it’s a relative answer. WE think we stay plenty warm, but most people who live in climate controlled comfort would be rather uncomfortable at times. Case in point, as I sit here this evening and write this post, the thermometer is showing that it is 59° in the trailer. Now that is pretty chilly, I will admit. And I am about to turn on the heater to take off the chill before we turn in for the night. However, if we were not headed into a sub-freezing night, I wouldn’t bother. I’m just about perfectly comfortable as I sit here and type. How? I’ll share with you some of our tips to stay warm in the winter.

Tip #1: Your attitude affects your temperature. Ok, so I don’t know for sure if having the right attitude can actually physiologically affect how warm you feel, but it sure seems that way. We CHOOSE to live closer to the changing seasons. By having a cooler house in winter and hotter house in summer, not only are we saving money on heating and cooling bills, but we are more connected to the outdoors and the seasonal changes around us. We LIKE the changing seasons and don’t want to insulate ourselves from them too much. And honestly, you get used to it after a little while. I’m sure you’ve all heard of those people who live in Alaska coming down to the lower 48 and thinking it feels like summer when everyone else is all bundled up? Yeah, it’s like that. You can get used to anything. We chose to get used to colder temperatures in the winter.

Tip #2: Layers! I nearly roll my eyes every time I hear someone complaining that it’s cold at 65° when all they are wearing is shorts and a t-shirt. Unless you are one of those people from Alaska that I just mentioned, or you are doing physical work, yeah, you’re going to get chilled at that temperature. Go put some more clothes on. Throw a blanket around your shoulders. Something to help your body stay warm. And remember that your blood circulates through your whole body. So even if your legs themselves don’t feel particularly cold in shorts, your blood is getting cooled as it travels through them and contributing to your feeling of chilliness. Most people that I know just go bump up the heat a few degrees if they feel cold. We choose to put on more layers of clothing. It’s kinda nice having a whole different wardrobe in the winter. “New” clothes every 6 months. Woo-hoo! Oh, and this goes for night clothes as well. In cold weather, we bundle up to go to bed, often wearing a hoodie to keep our heads warm as well. I even made Flower Girl a sleep sack so that she stays warm enough, even if she kicks the covers off. It is basically a fleece nightgown that is long enough that it has a closure at her feet. Kinda like a combination nightgown and fleece sleeping bag. I am hoping she hasn’t grown out of it yet.

Tip #3 – Get moving! Want to warm up quick? Do some physical exercise. When we lived downtown, I would run up and down the stairs several times to warm up in a hurry. Even light housework like picking up toys, etc will get the blood flowing and warm you up.

Tip #4 – Auxiliary heat source. When we lived on the grid, I used to keep space heaters strategically located around the house so that when I got chilled, I could cuddle up in front of one. Living off-grid in a camping trailer now, that is not really an option. But you know what works great? Hot water bottles.

We got these last fall and Christmas and we use them All. The. Time. when the temps are cold. I have a problem with my feet getting cold before bed. And when my feet are cold, I just can’t feel warm. So I heat up my hot water bottle, put it at my feet in bed, and drift off to sleep in cozy warmth. They also work well to sooth sore muscles and relieve monthly cramping.

Tip #5 – Turn on the heat when you need to. So yes, we have a heat source in our trailer. And yes, we do use it when it gets cold. It is a propane fueled catalytic heater made by Mr Heater. The one we have is the Big Buddy.

Rarely do we ever have to turn that baby up on high. When we do, we have to turn it back down to low real soon or get heated out of the trailer. Even on low, it is capable of keeping us too warm – see the picture of our temperature reading earlier in this post. It was 74° inside because I was busy and hadn’t turned off the heater.

And in case you were worried, yes, we have a carbon monoxide detector. And no, we do not typically run the heater at night while we are sleeping. These heaters are supposed to be safe to run inside, but we’d rather be safe than sorry.

So yes, we stay plenty warm here in our little trailer on our mountain homestead. And if it’s chilly inside, it’s because we choose to have it that way. Because we’re different like that. But then, you probably already knew that.

Stay warm, my friends. And thanks for reading.

Granola Recipe

Back this summer I learned to make my own granola and we are loving it! I made up another big batch today, so figured it was a good time to give you my recipe.

img_20160928_102114

Making Granola in the early autumn sunshine with a borrowed solar oven.

I have spent countless minutes in the grocery store reading ingredient labels on granola packages and still ended up having to accept some ingredients I did not like in order to have the convenience of a cold cereal that is at least somewhat healthier for you.

So I decided to make my own. From be able to use whatever flavors you want to being able to control the quantity and quality of the ingredients, it just makes sense to make your own. Below is the recipe that I make every couple of months. Every time we run out, the Hubs gets a sad face and continually asks for me to make up another batch.

Oh, and speaking of the Hubby, did you see the post he did the other day about flashlights? I was so proud of him for taking the initiative to write up a post for this here blog. Ain’t my man great? 😉

I digress…

The recipe:

Homemade Granola

  • 6-ish cups Old Fashioned oats
  • 4-ish cups nuts or seeds of choice, chopped small
  • 1-ish cup chia seeds
  • 4-ish tsp Cinnamon
  • 2-ish tsp salt
  • 1-ish cup pure maple syrup
  • 3/4-ish cup coconut oil
  • 2-ish tsp real vanilla
  • 1-2 cups raisins
  • 1-2 cups unsweetened coconut flakes

Directions: Place all ingredients except for the coconut flakes and raisins in a large bowl and mix thoroughly. Once mixed, spread a 1 inch portion of the uncooked granola onto a baking sheet and bake in the oven at 300 degrees for about 15 minutes. Stir the granola and bake for an additional 5-10 minutes or until the granola is just barely lightly browned. Empty that panfull into a large bowl and repeat with more granola until the entire batch has been cooked (it takes me four 9×13 pans to cook this amount. You could do it one at a time or if your oven is big enough, all at once – lucky you!) Add the coconut flakes and raisins and mix completely. Let cool and store in an airtight gallon sized container (I use 2 half-gallon jars). Enjoy by the handful or with milk. And feel free to experiment next time.

Notes:

-As you can tell by all “ish” statements, I tend not to measure my ingredients very precisely. I just scoop or pour till it looks about right. 🙂 This recipe is very forgiving that way.

-Nuts: I usually use sliced almonds and chopped walnuts. Lately I’ve been putting in raw pumpkin seeds as well. This time I even added a bit of flax seeds. Whatever seems good at the time and to ramp up the nutritional value. If you really want to be uber healthy, you should soak the nuts ahead of time. I have never done this, mainly because I never think about it ahead of time. It sounds really easy to do, just takes some planning.

-Other recipes will tell you to add the coconut flakes in at the beginning or midway through for a “toasted coconut” flavor. I found that by doing that, I lost the coconutty flavor. So I just add it at the end with the raisins (which don’t taste good baked in my opinion – they get too dried out).

-Feel free to make substitutions as needed/wanted. Your results may vary from mine, but that’s what making your own food from scratch is all about, making it the way YOU want it. Want to use regular oats, not old fashioned? Go for it! Want to play with the ratio of oats to nuts? Awesome! Can’t stand coconut? Leave it out. Make it yours!

-A note about price. Obviously the price of your ingredients is going to affect the price of this granola. I have found that it is not really any cheaper to make my own than a good quality store bought, mainly because I use so many nuts, which are expensive. But, and that’s the most important “but”, I can make it exactly how I want it with the exact ingredients I want. I get to control everything that goes into it. And that is worth more than the price tag.

Well, there you go. I finally got my granola recipe up here for y’all, as I said I was going to in a facebook post way back in August!

I hope you enjoy.