Tag Archives: no way!

Building update – and a great wood cutting tip!

For those of you who do not follow us on Facebook or Instagram, you probably don’t know that we actually started building our house! 

Finally!

After months and months of permit delays. And more and more months of weather delays, we finally “broke ground” on Easter weekend.

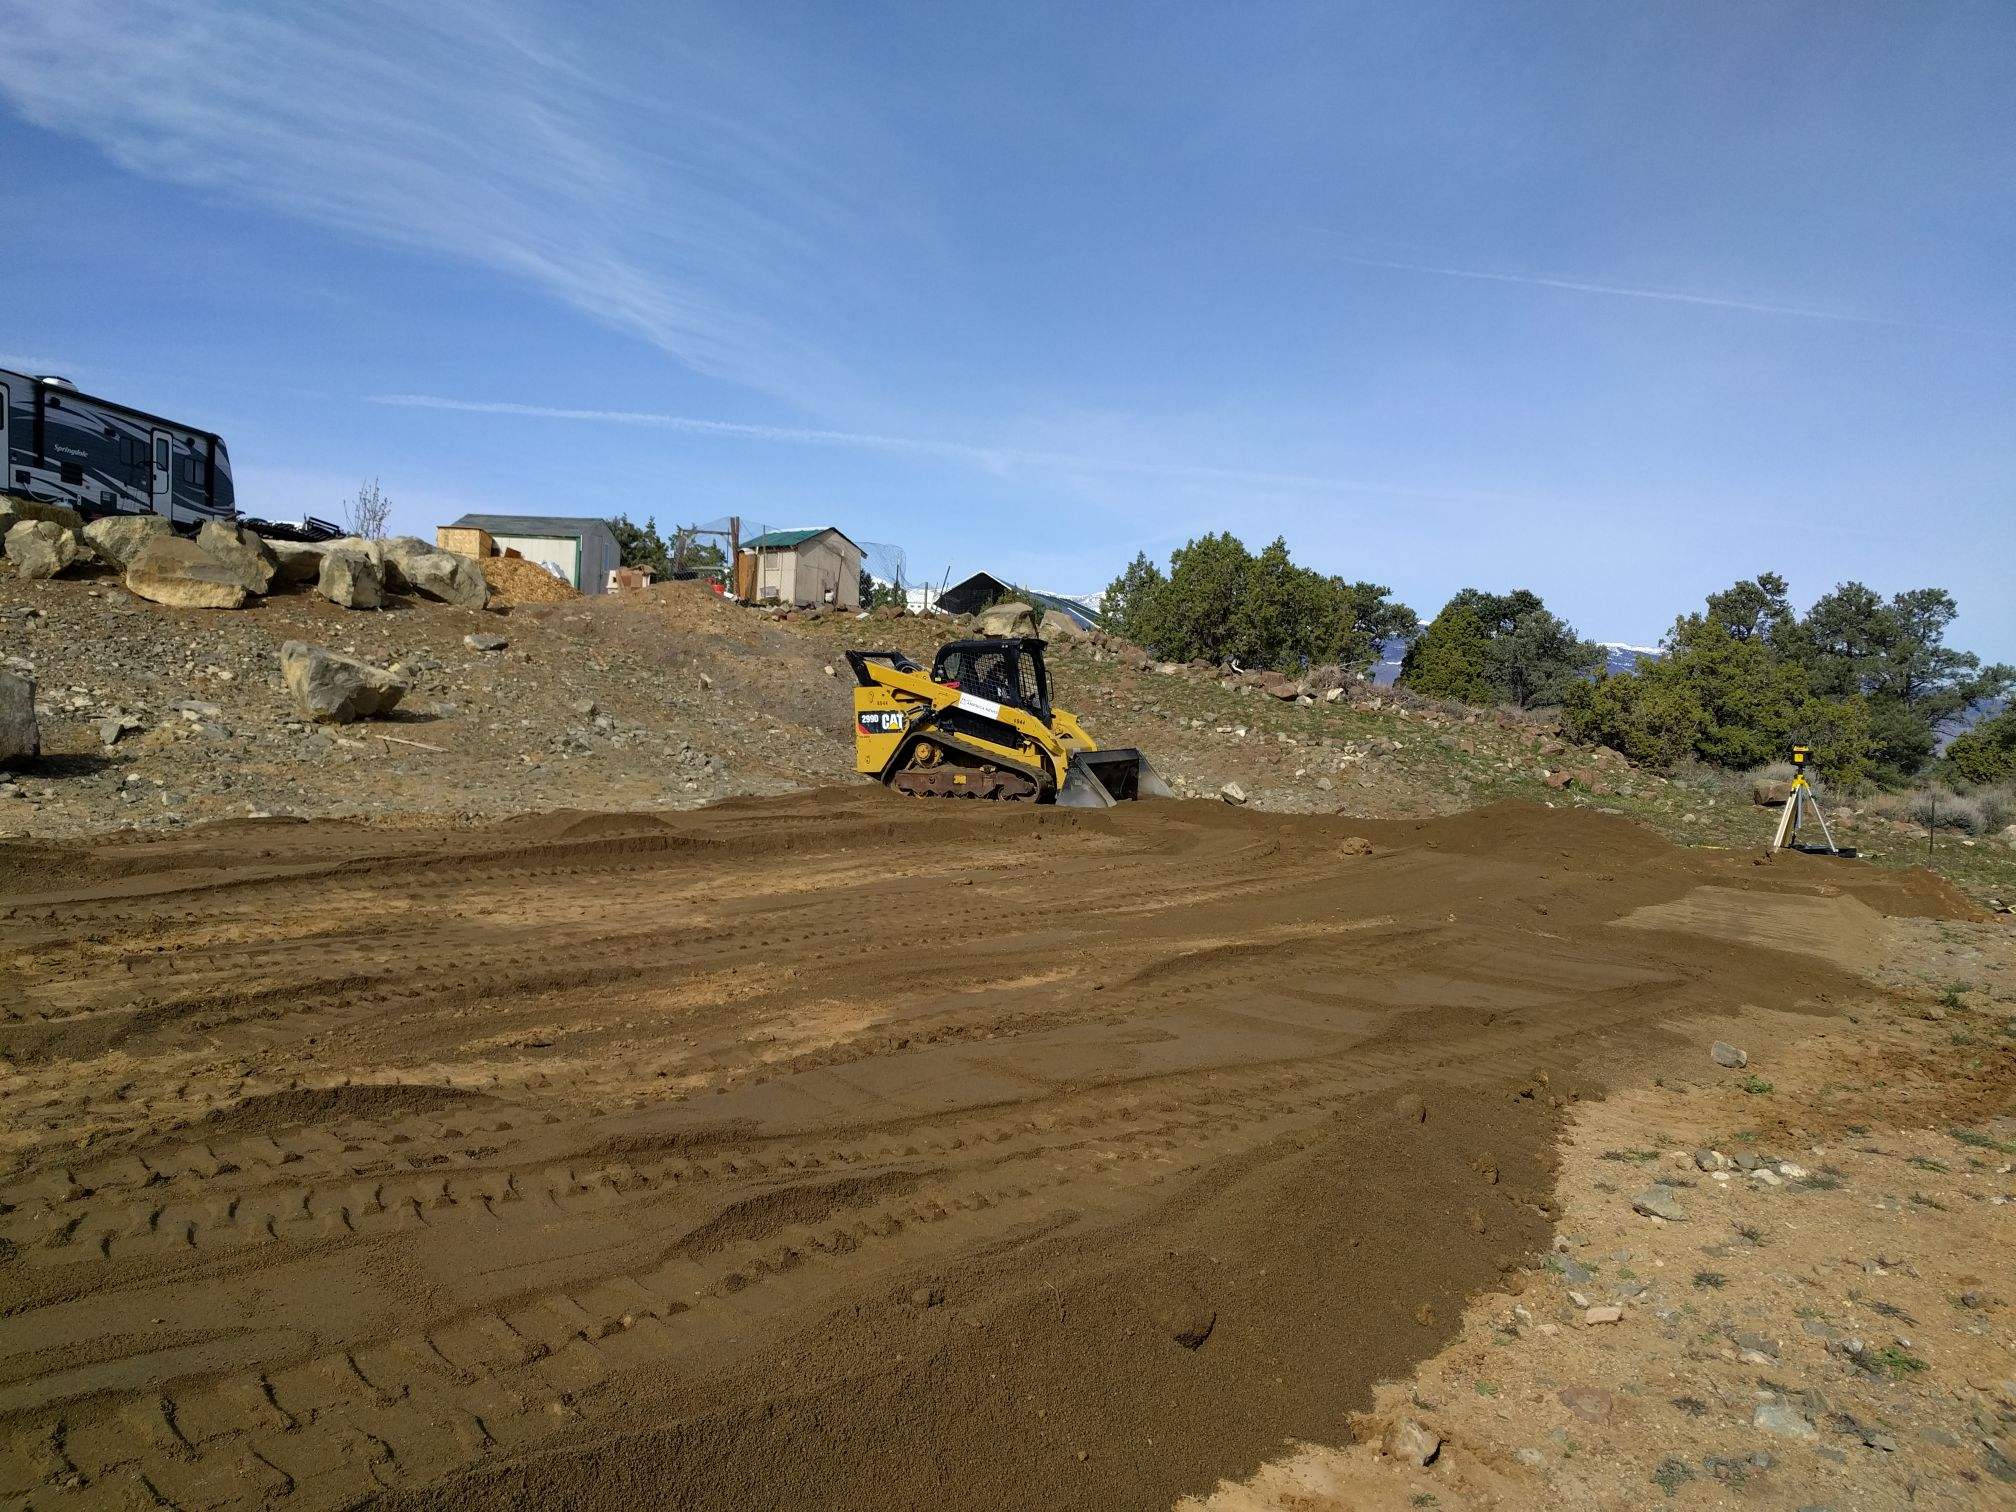
Bringing in “DG” (decomposed granite) to level out the house pad.

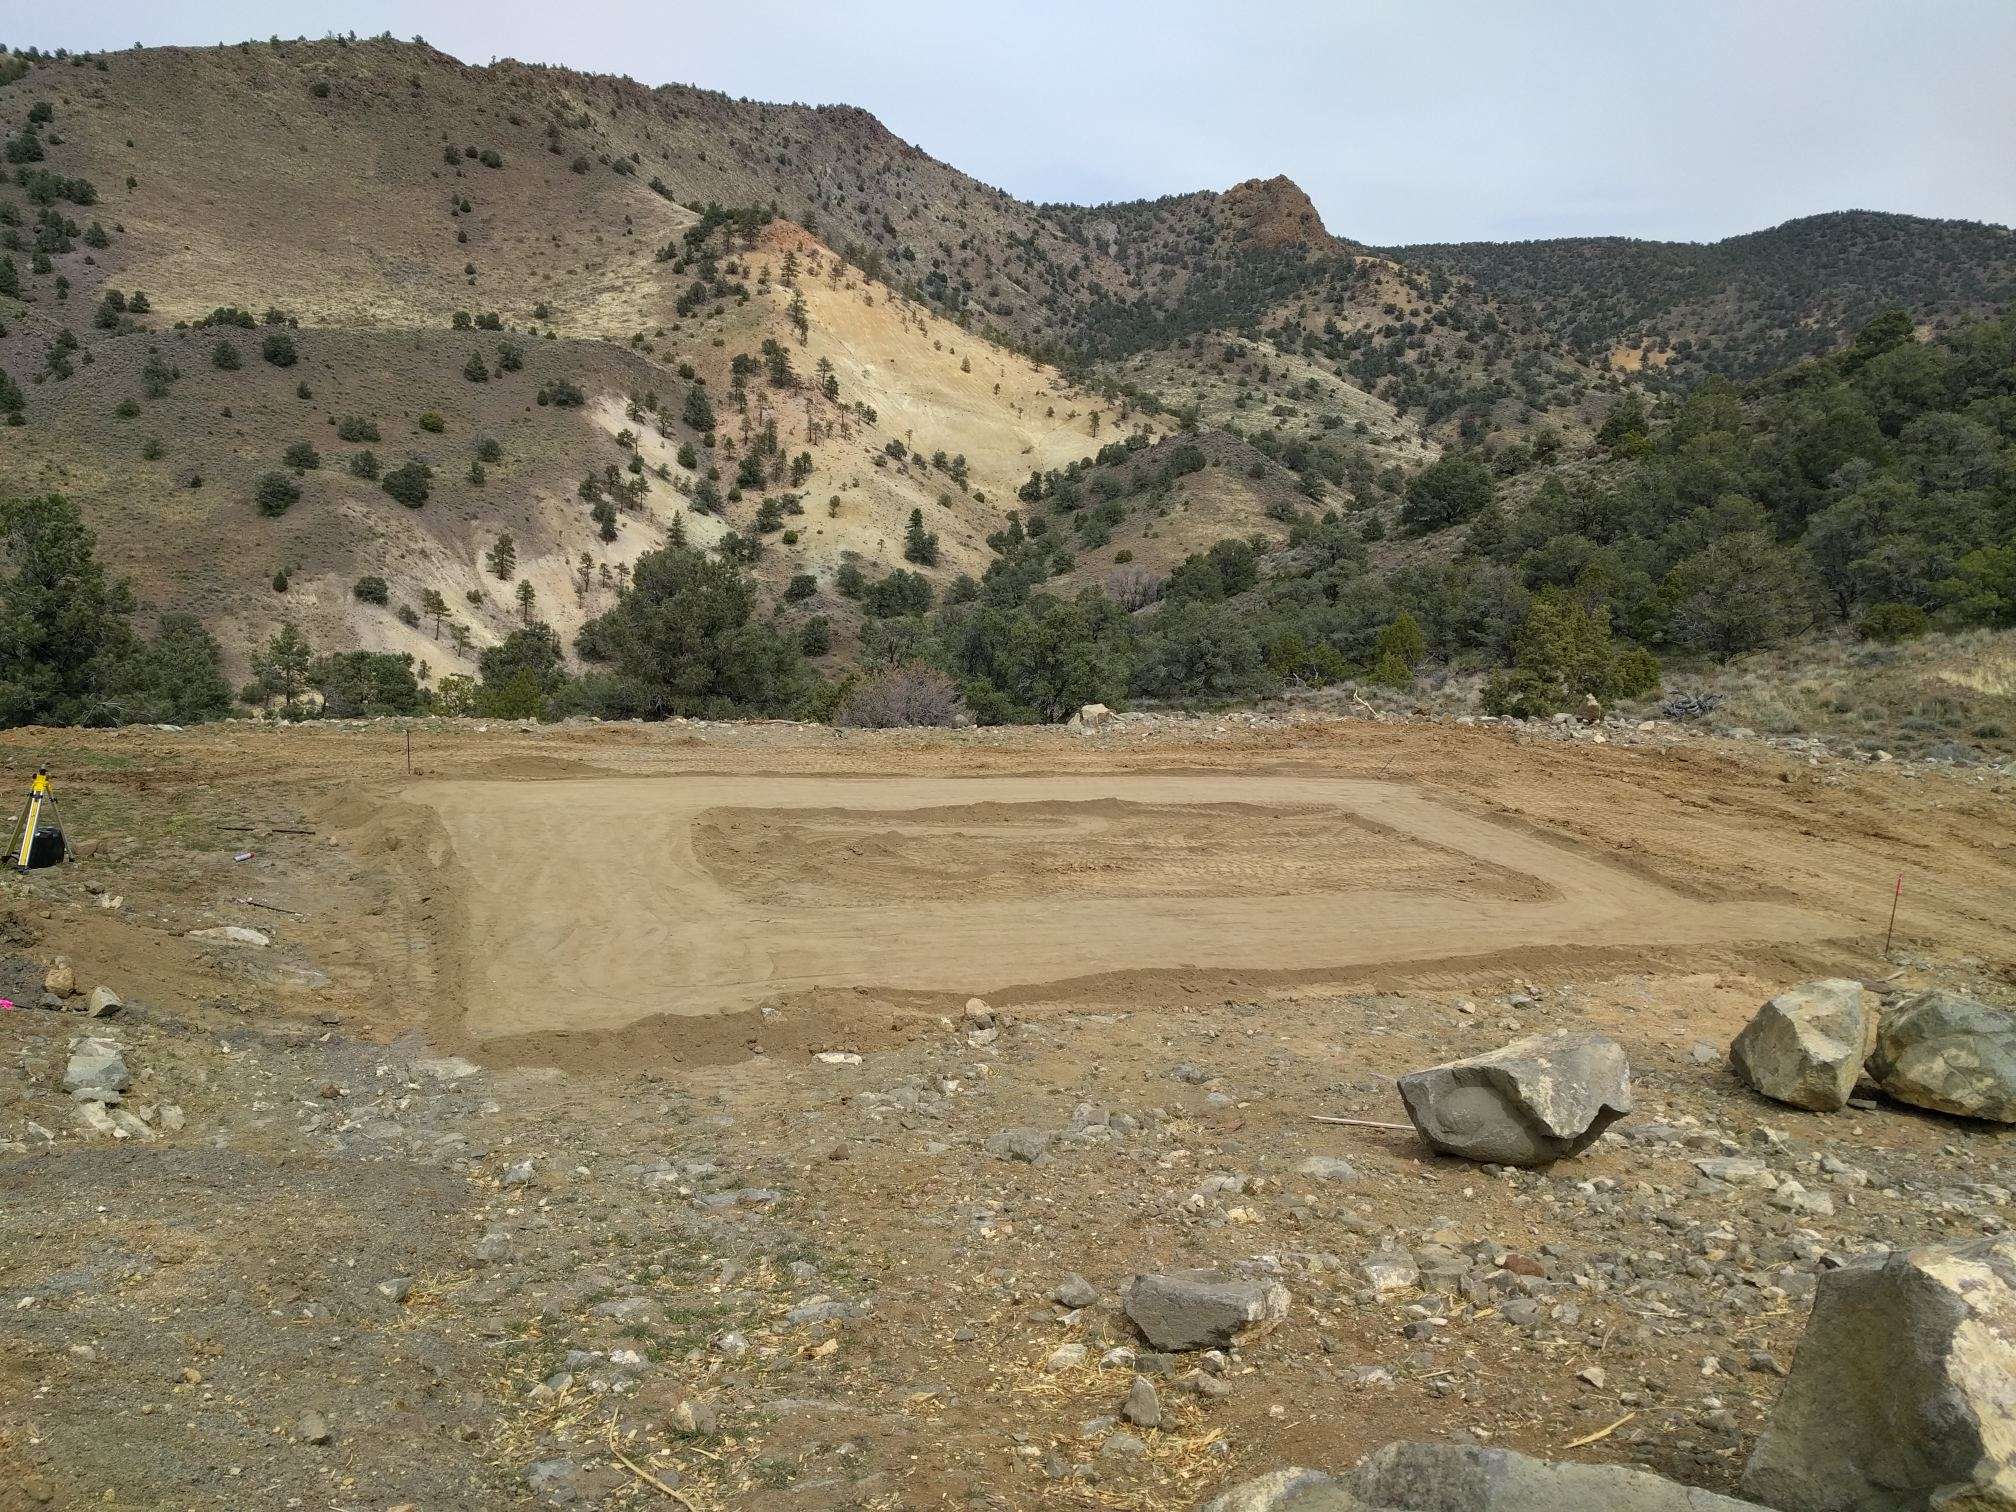
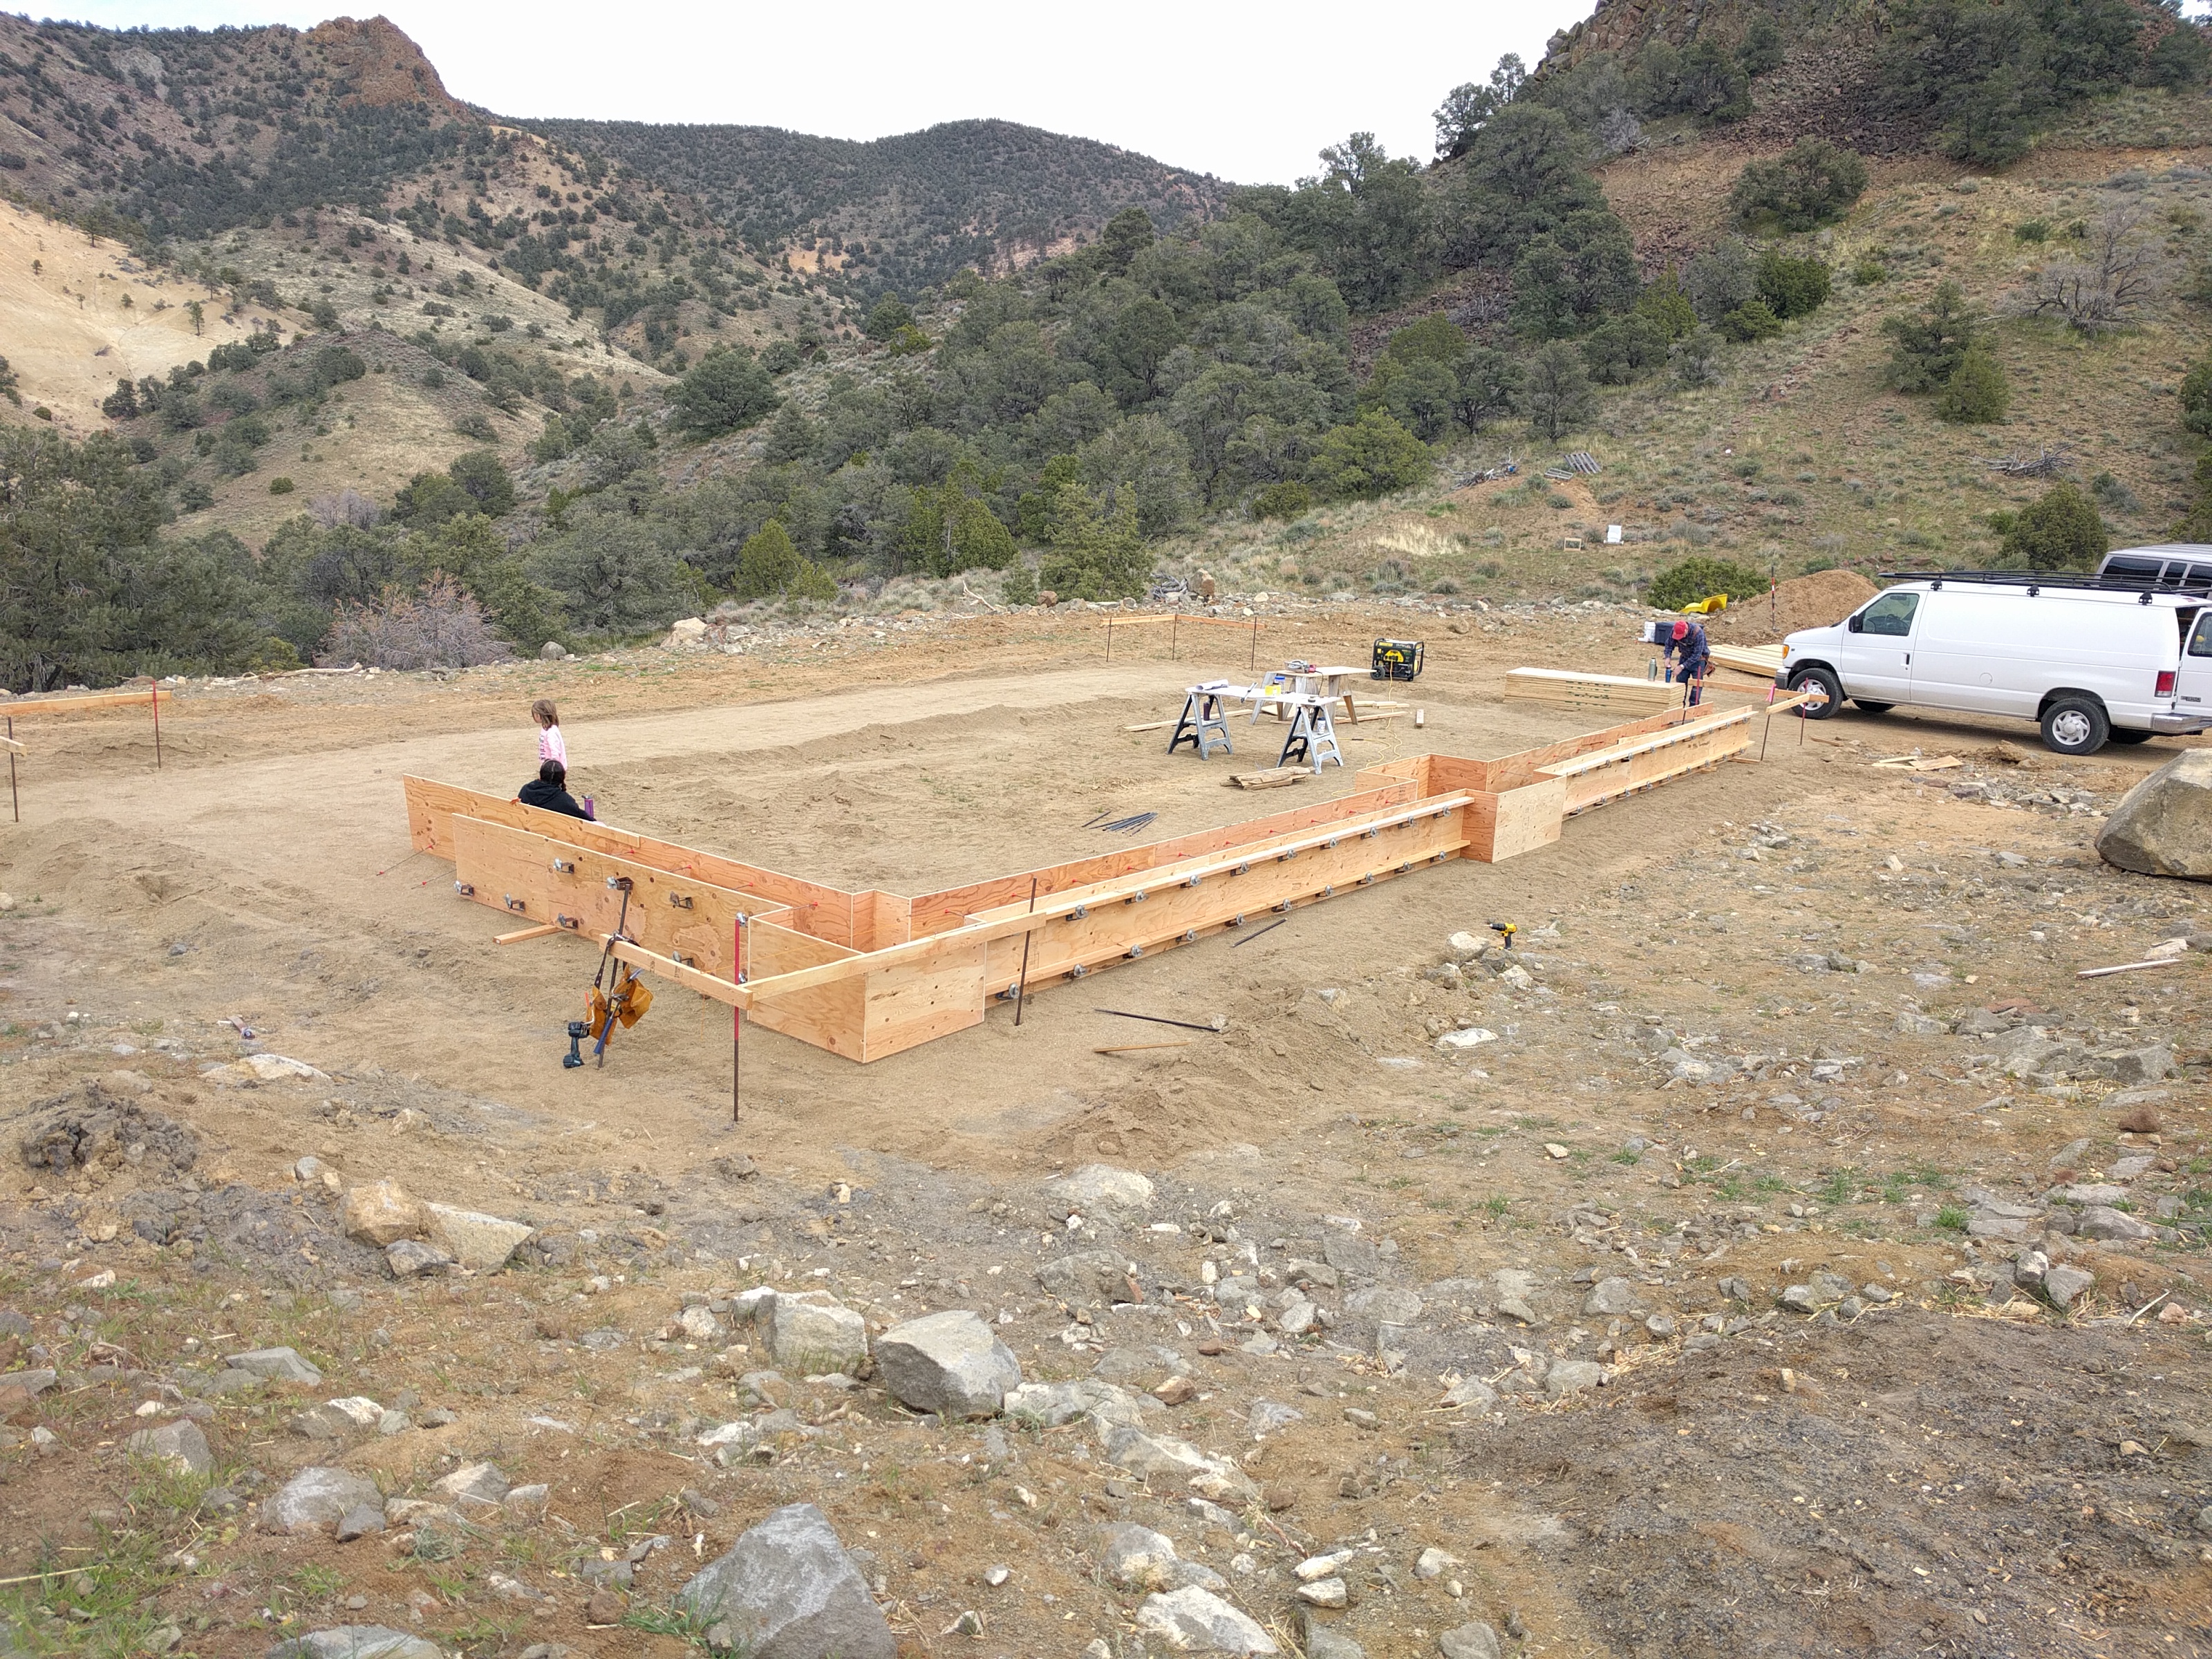
The perimeter of the house outlined in compacted and leveled DG

Once the pad was leveled, it was time to build the footing forms. We decided to build the forms up and backfill rather than try to dig down into our very bouldery ground. 

Yes. “Bouldery.” See all those huge boulders in the above pictures? That’s what lies just below the surface up here!

The first day’s progress.

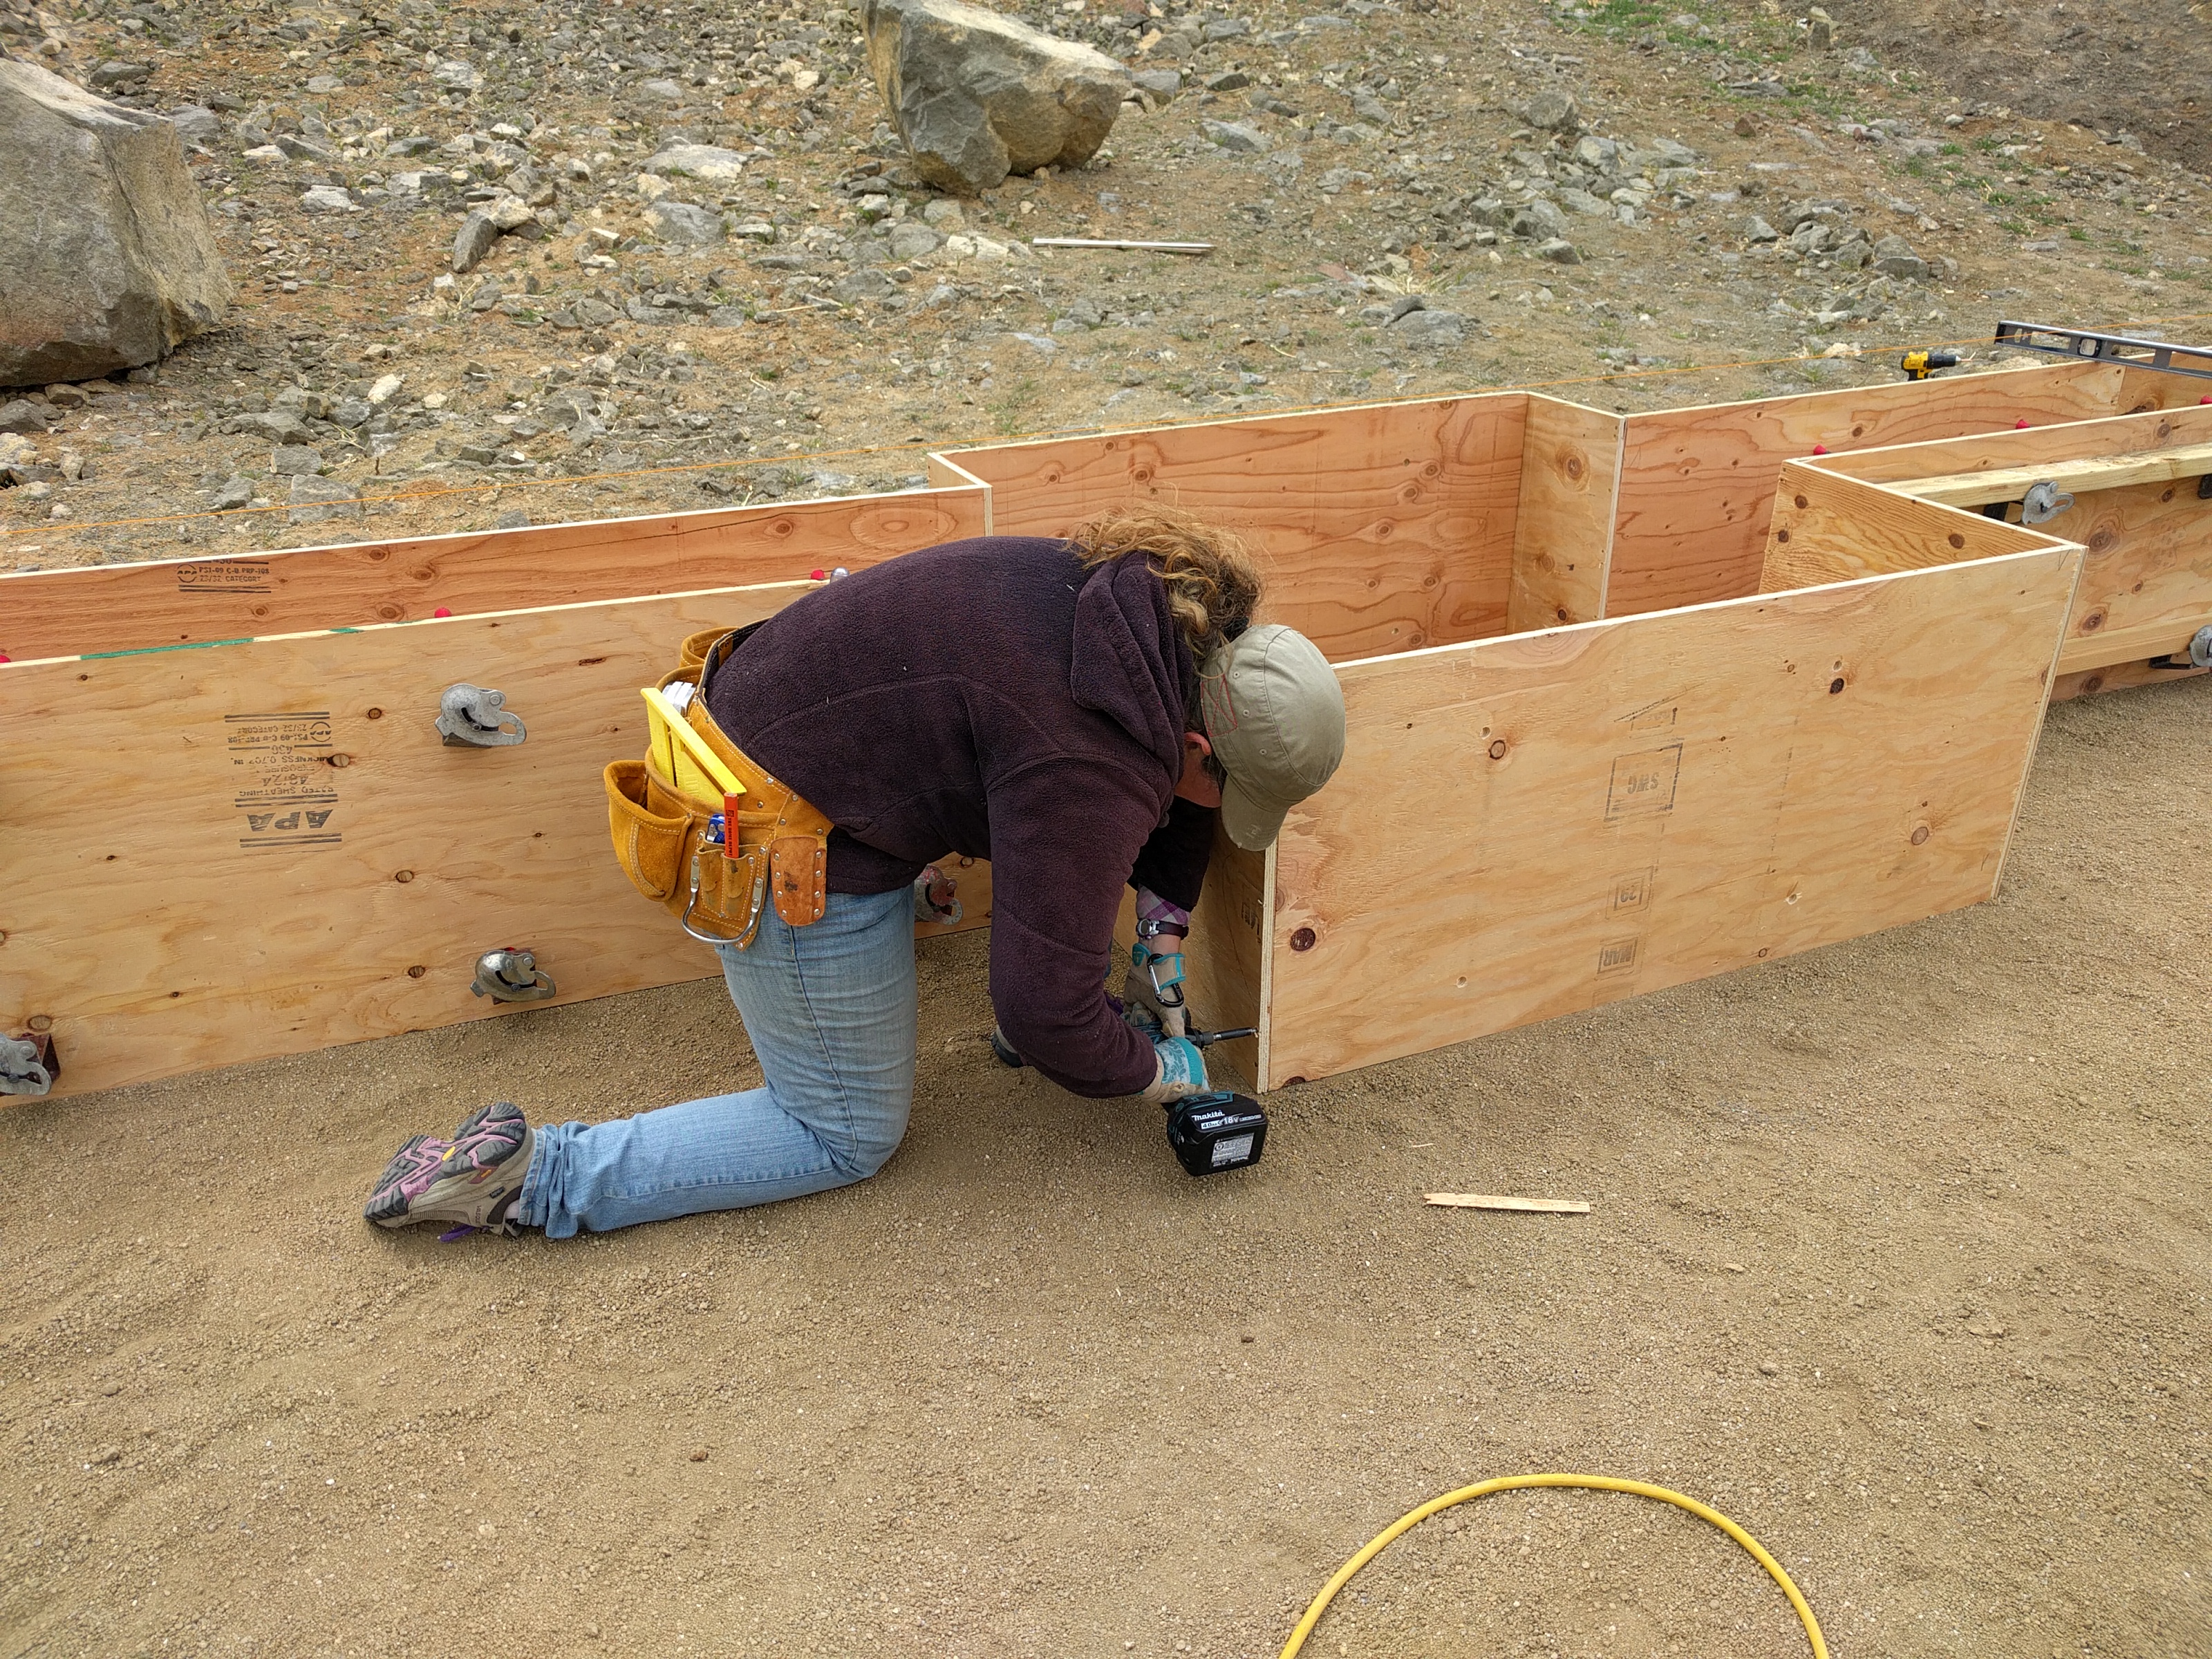
Yup, that’s me, putting one of the pier footing forms together.

We have a family friend who is a licensed contractor who is helping us get all this right (that’s him in the red plaid shirt). We couldn’t do it nearly so well or as easily without his help. As with many things in life, it’s not what you know, it’s who you know. And we are so very glad to know him (and that he is so generous with his time) ’cause we don’t know much!

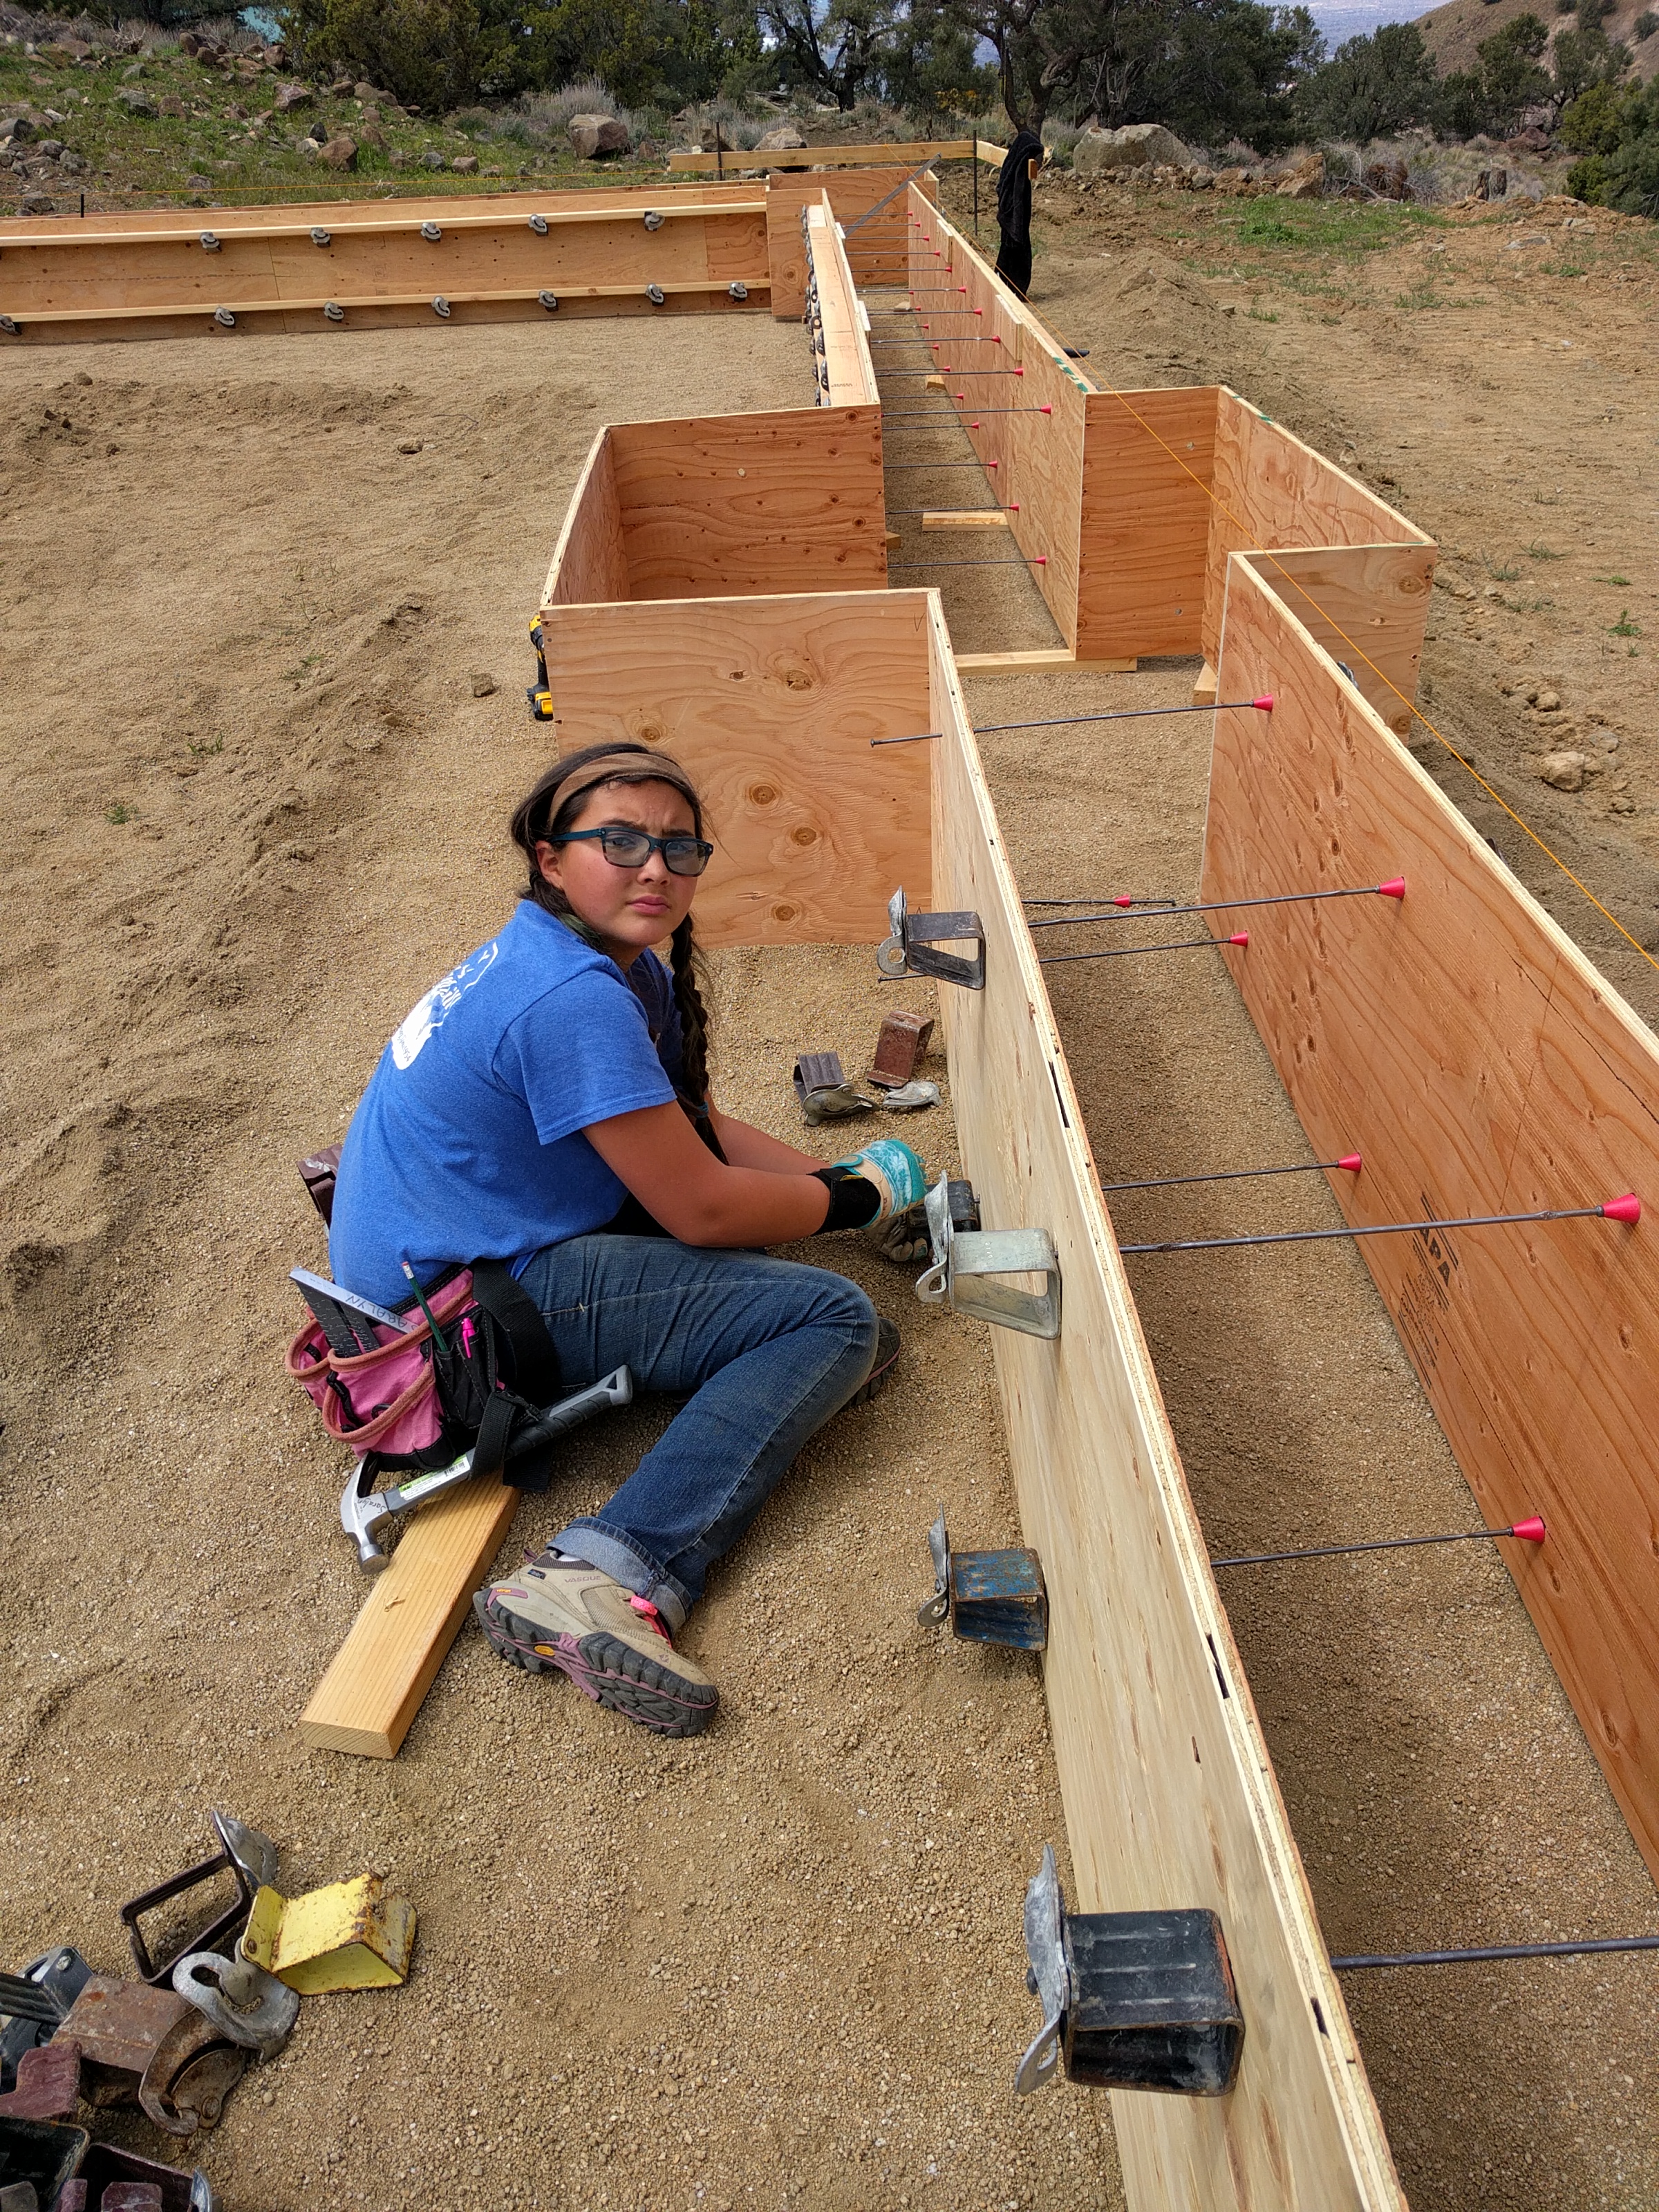
Princess Girl, “Mom, I need ‘more cowbell’!” So proud of my girl. Not only was she a huge help putting all those “cowbells” on the forms, but she also quoted a Saturday Night Live skit. Yep, we’re raising her right! 😃

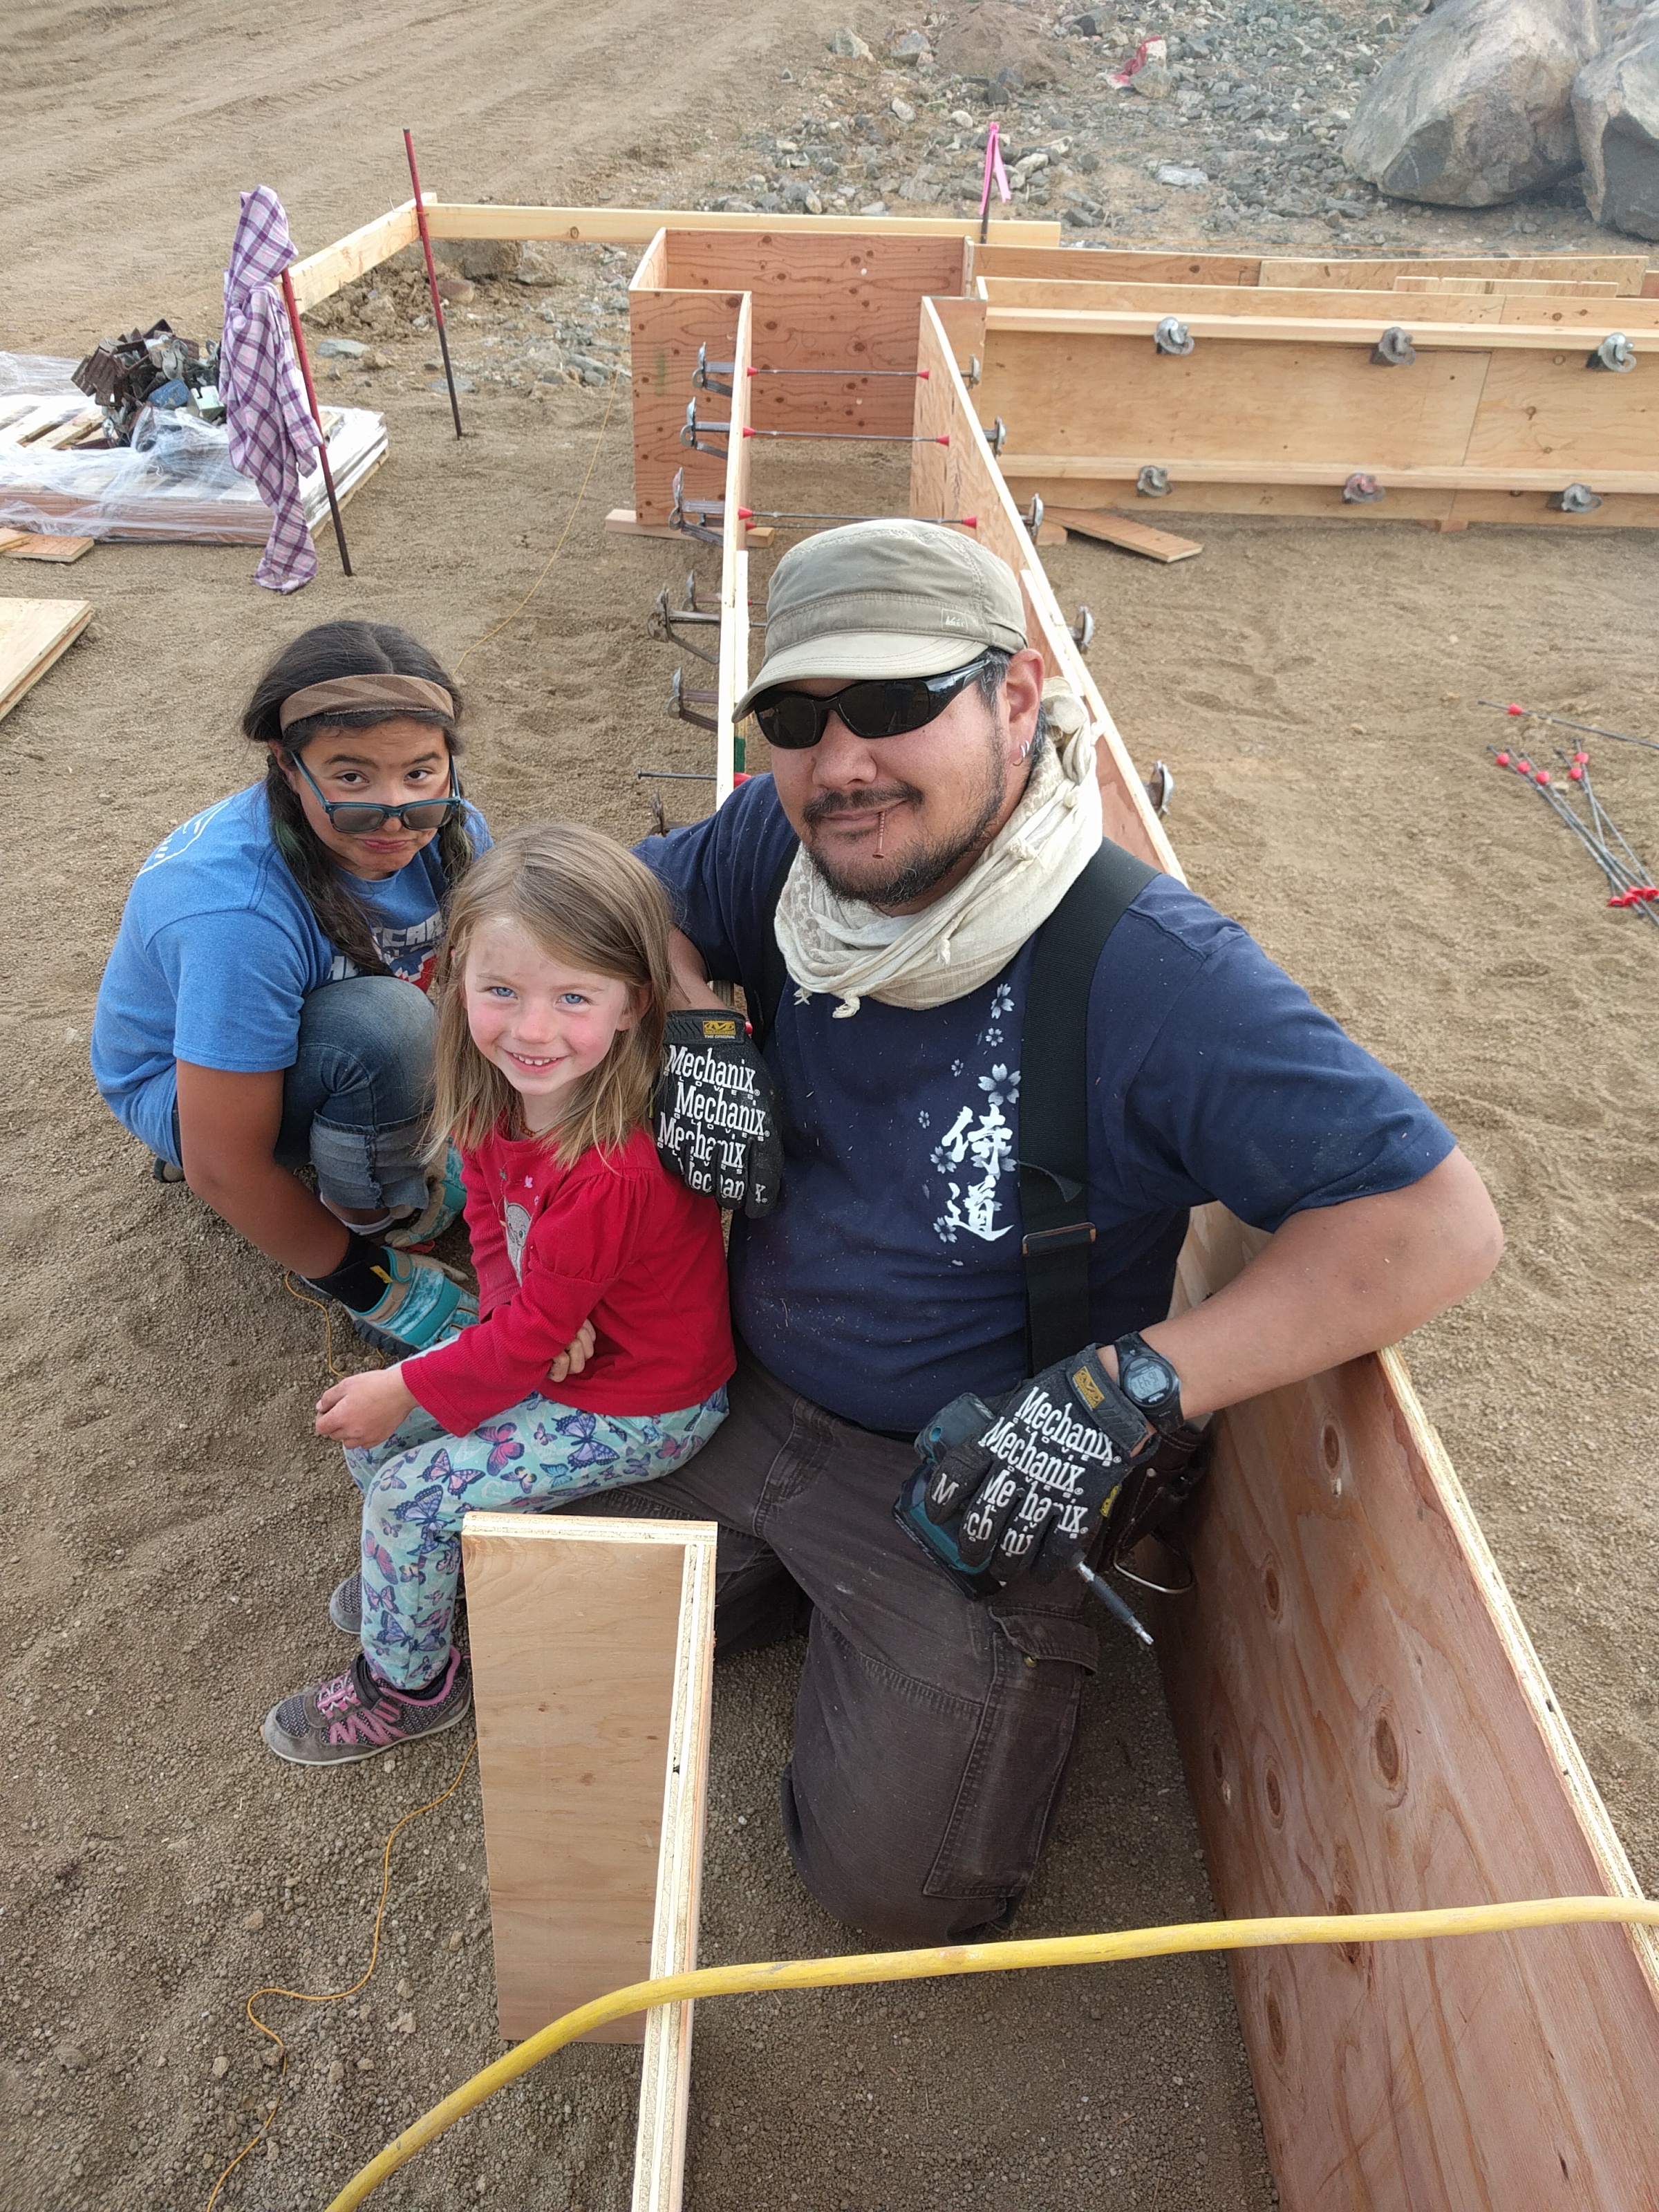
Building: a family affair

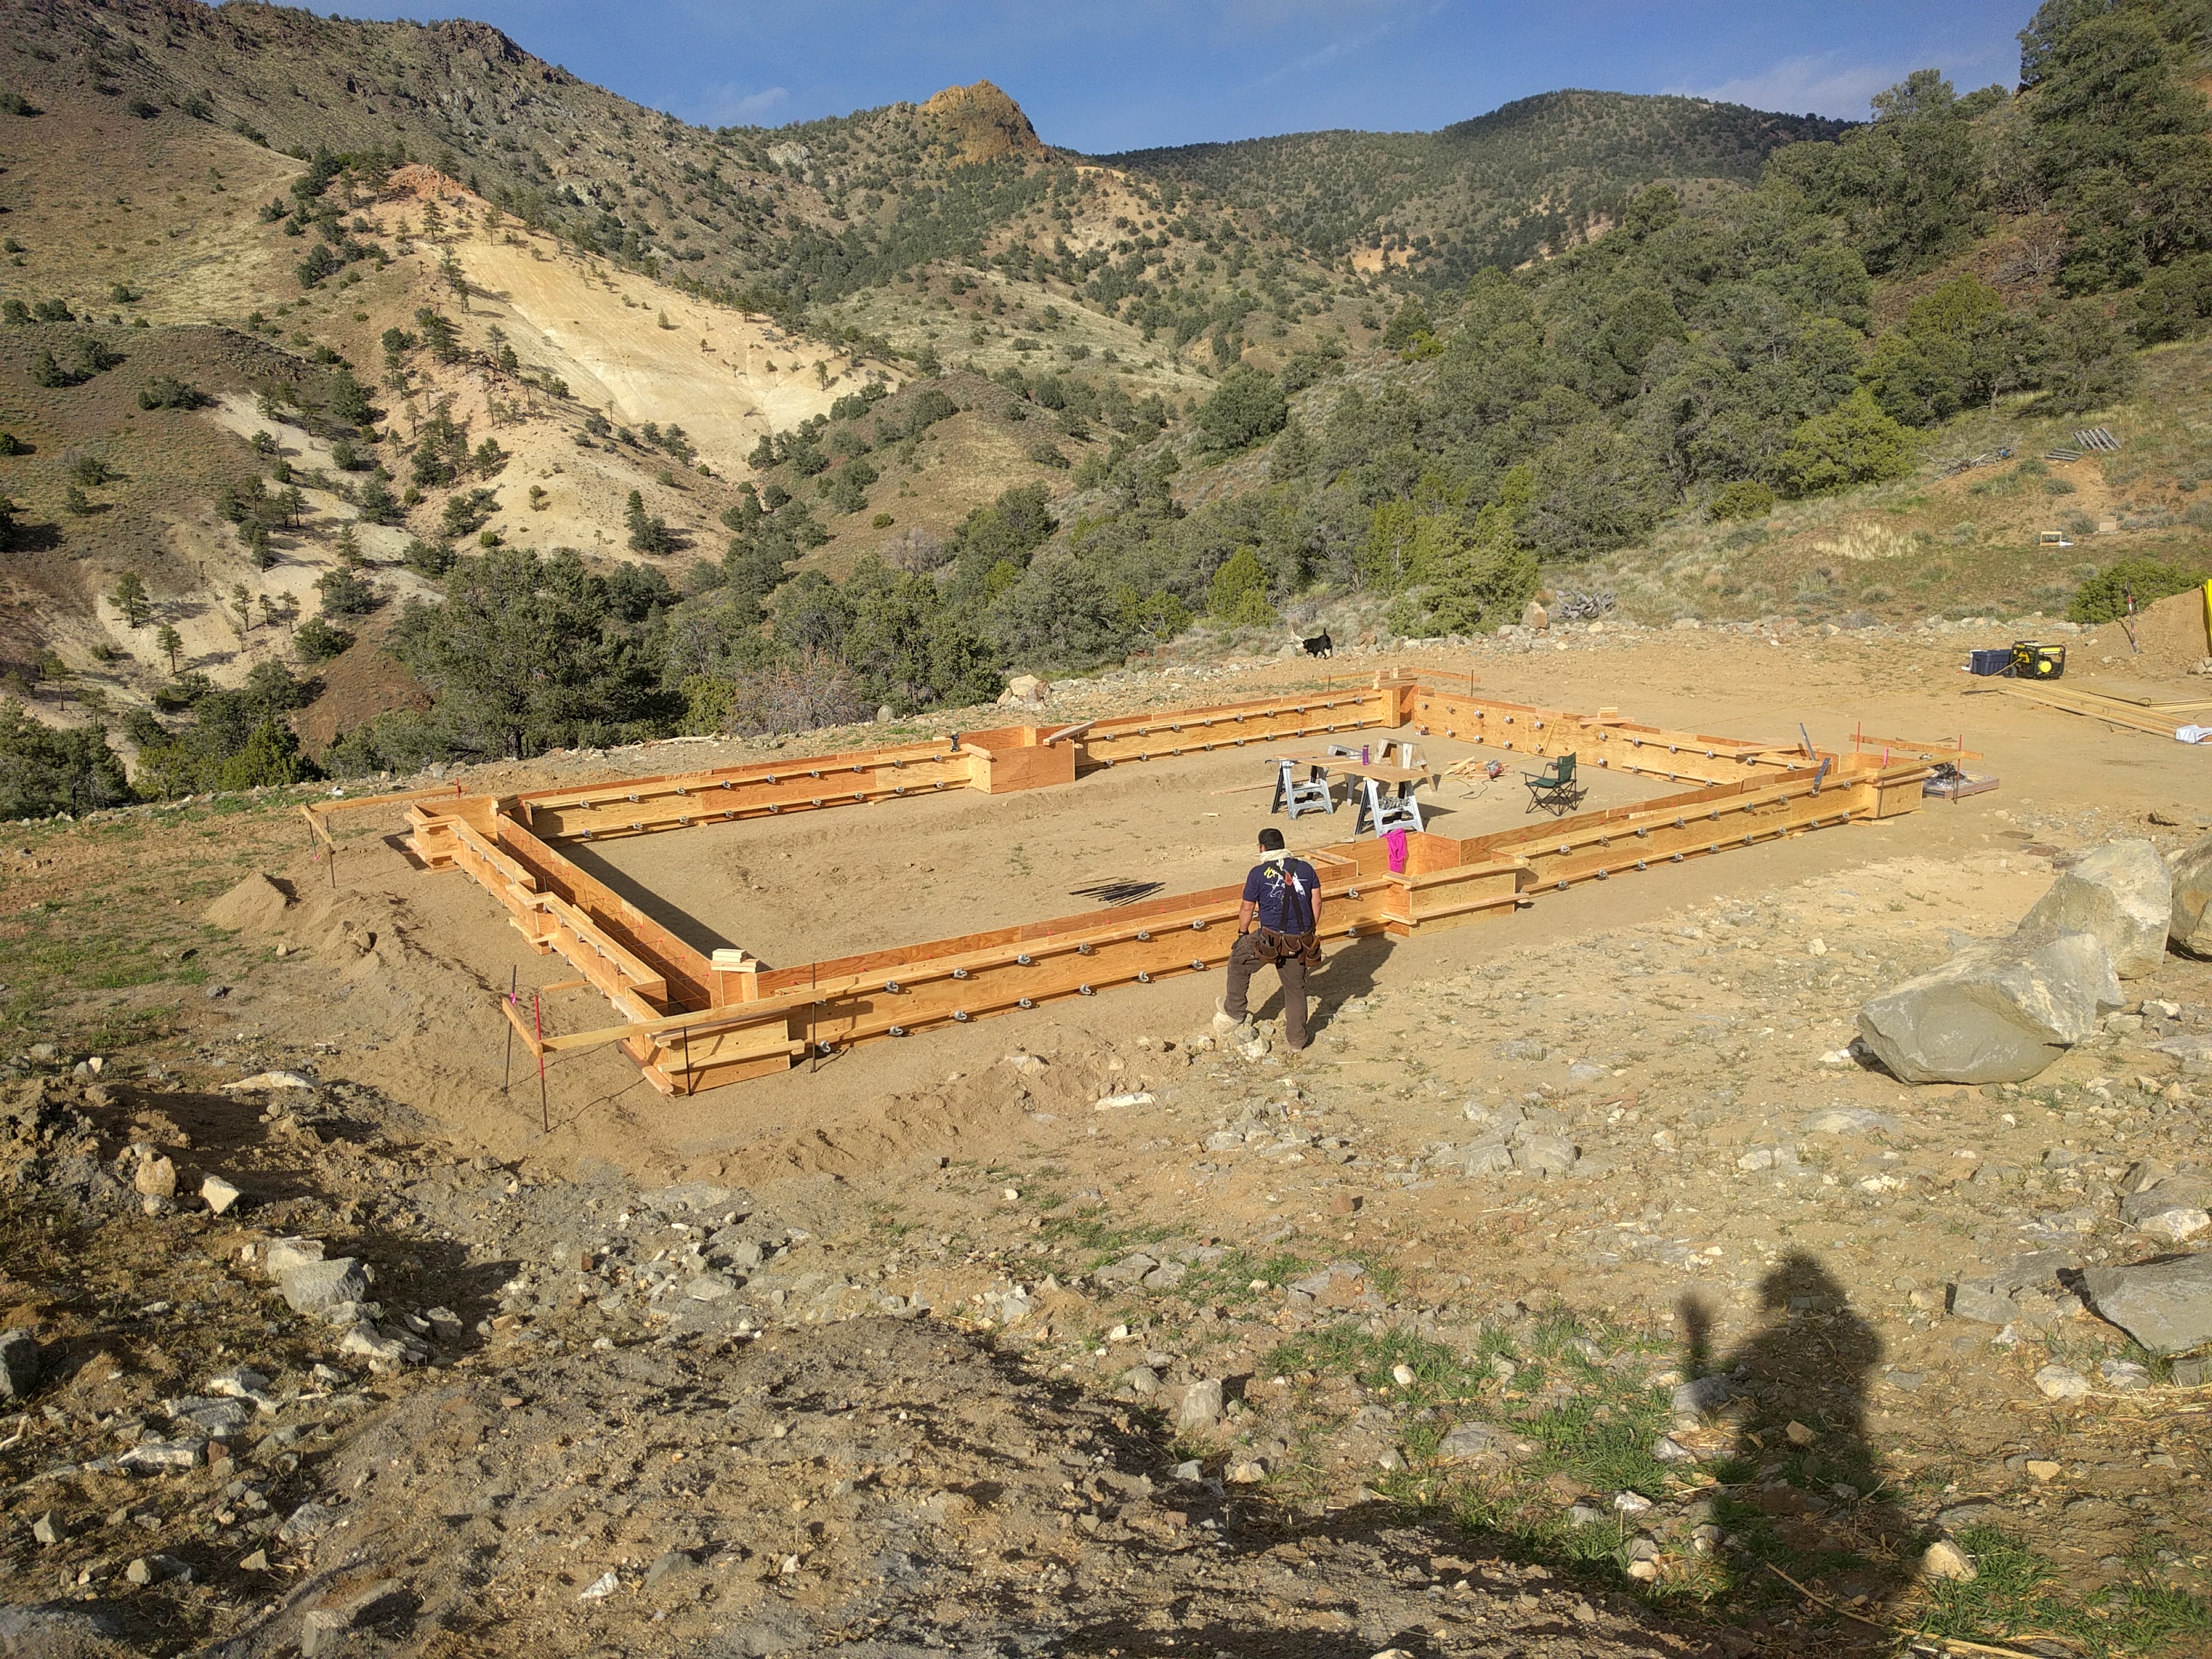
The perimeter of the house footings – almost completely built. Now to do all the leveling and put in rebar, etc.

It’s so wonderful to see the progress after waiting for so long. 

And today I learned something new. Something that makes me say, “No way!” A new way to use a skill saw!

I’ve used a skill saw for 20+ years and just today learned something new. I’ve seen the pros (building contractors, etc) use a skill saw in a certain way but never knew why. Today, I tried it and was blown away with the results!

The old way: you lay the 2×4 flat on the sawhorse(s) and hold it with one hand while pushing the saw across the wood. All the while, the force of the saw pushes against the board and it is hard to hold it still. 
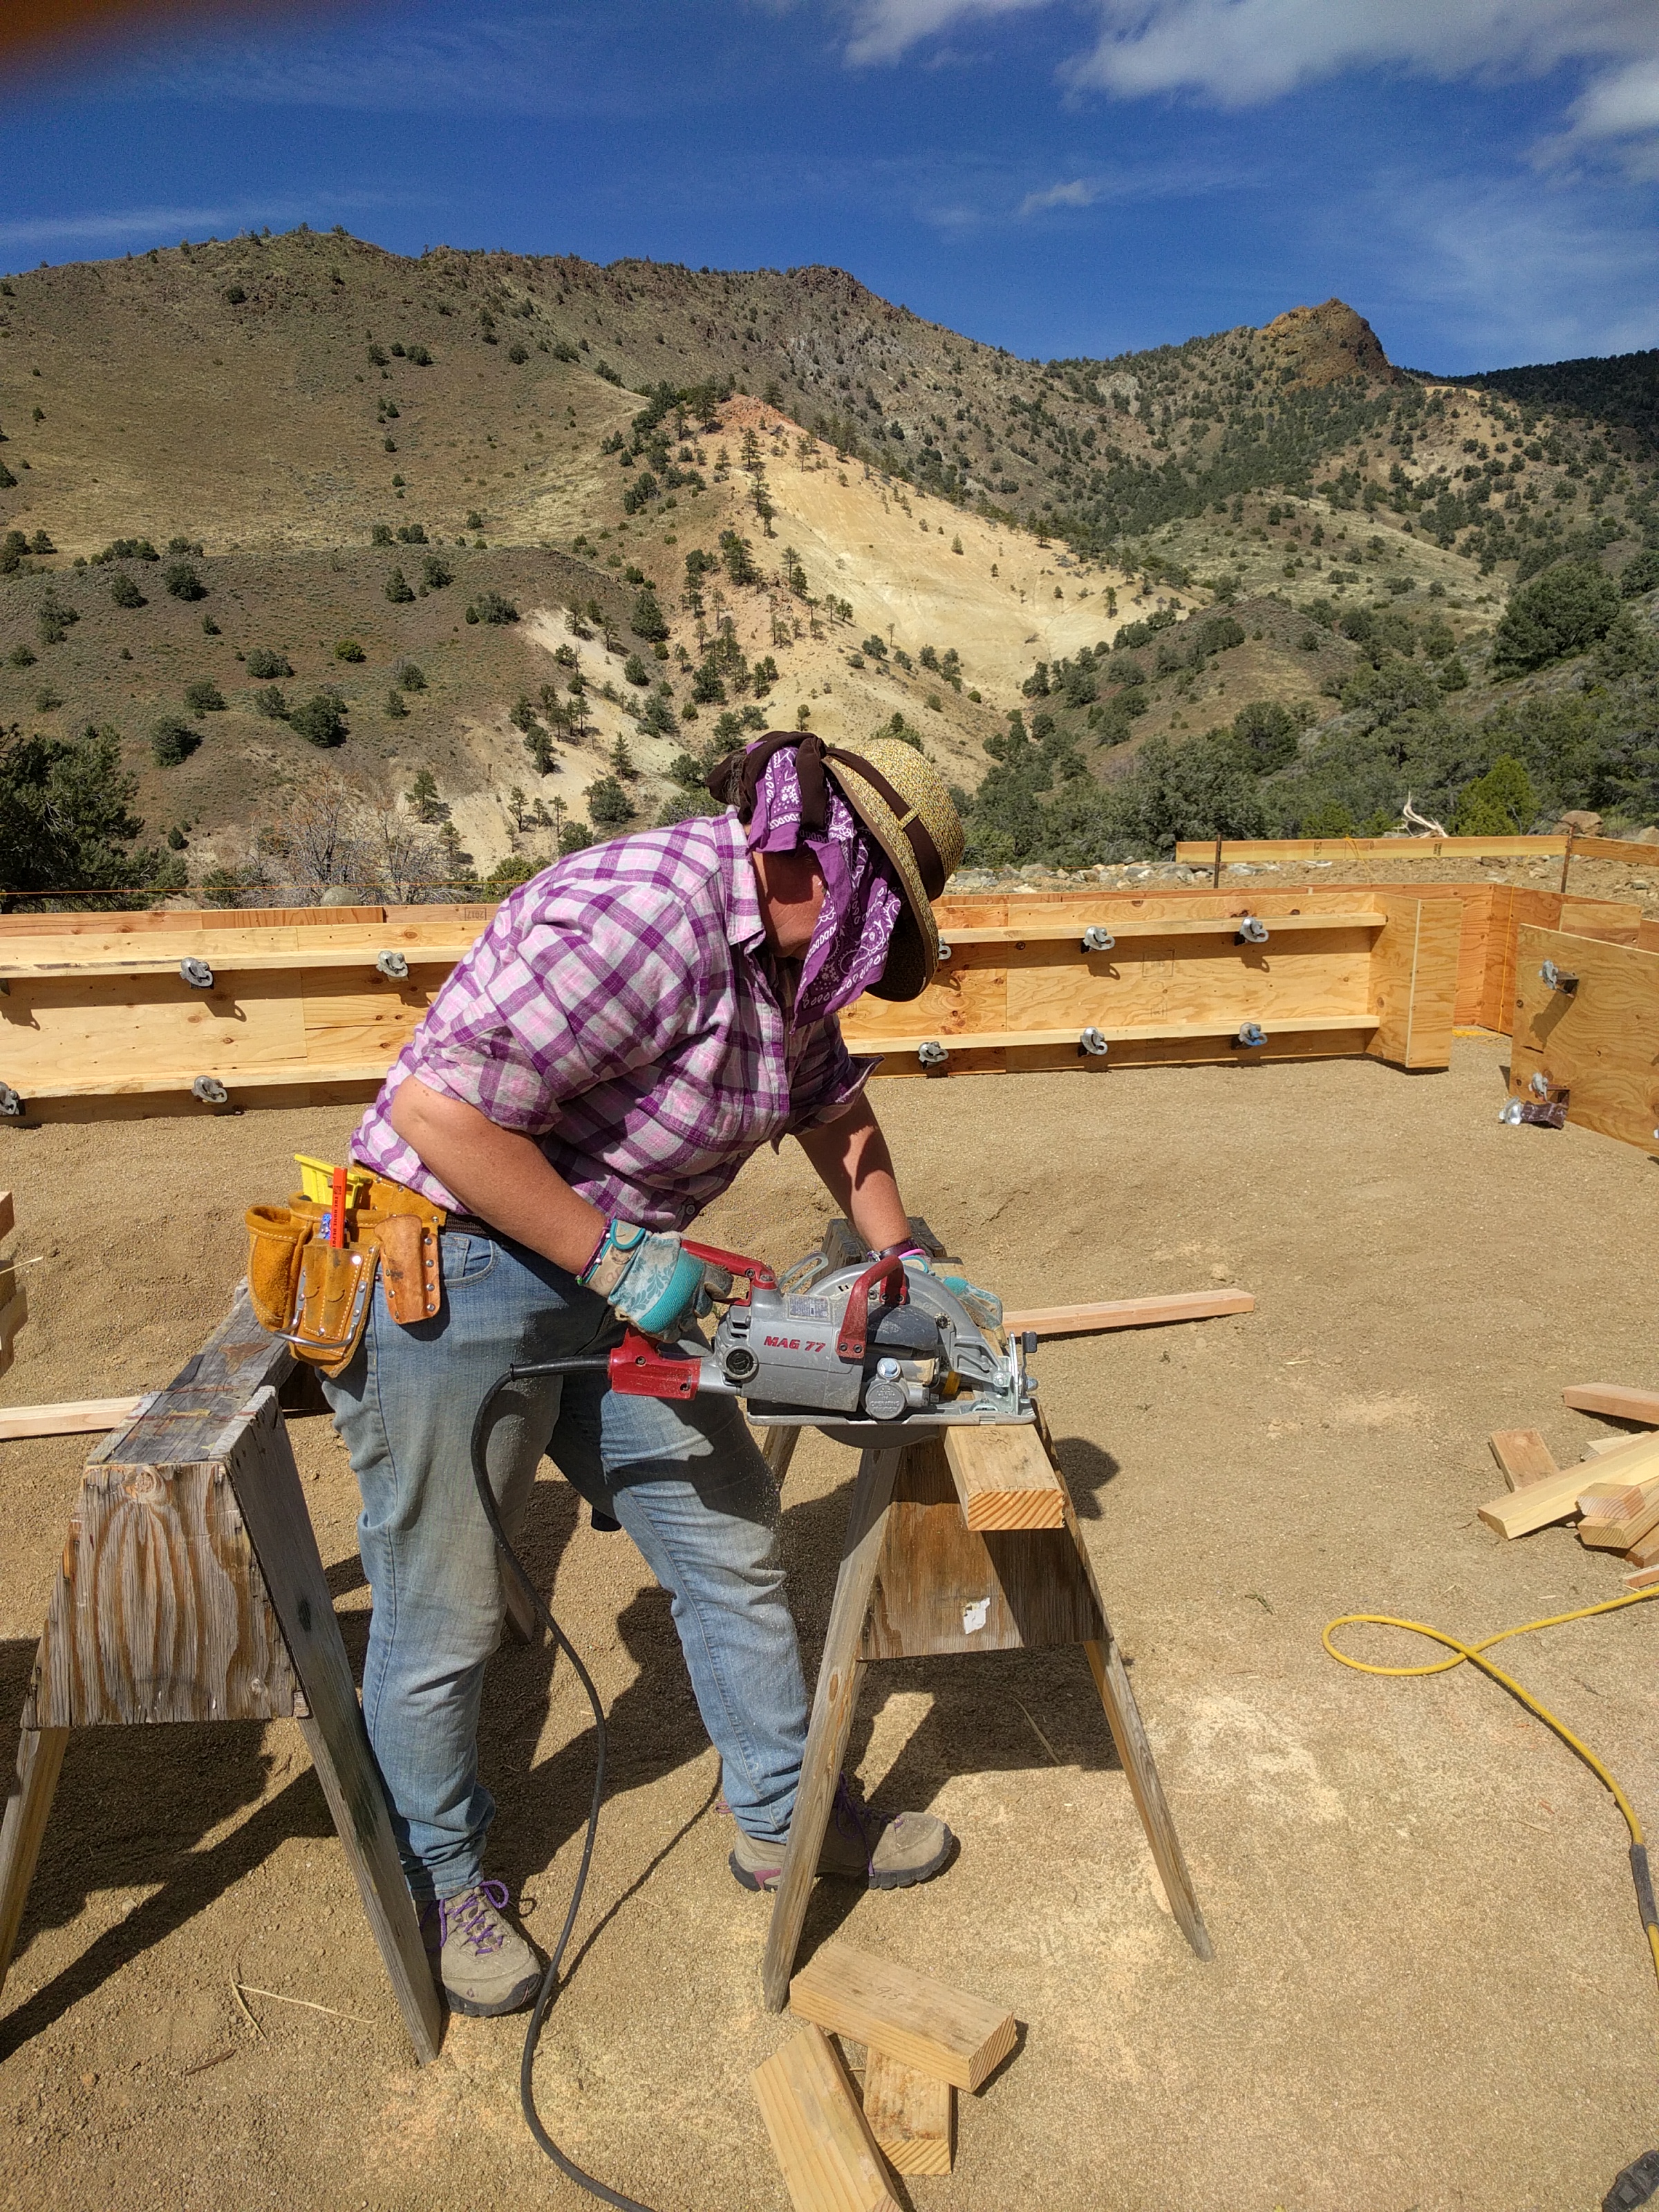
The old way.

Close up – old way

In order to hold the wood still, you can use a clamp, but that takes a while to put in place and remove, and when you’re making a bunch of cuts as I was today, they are too cumbersome to use.

I’m not sure what made me think to try something new, but I figured, what could it hurt?

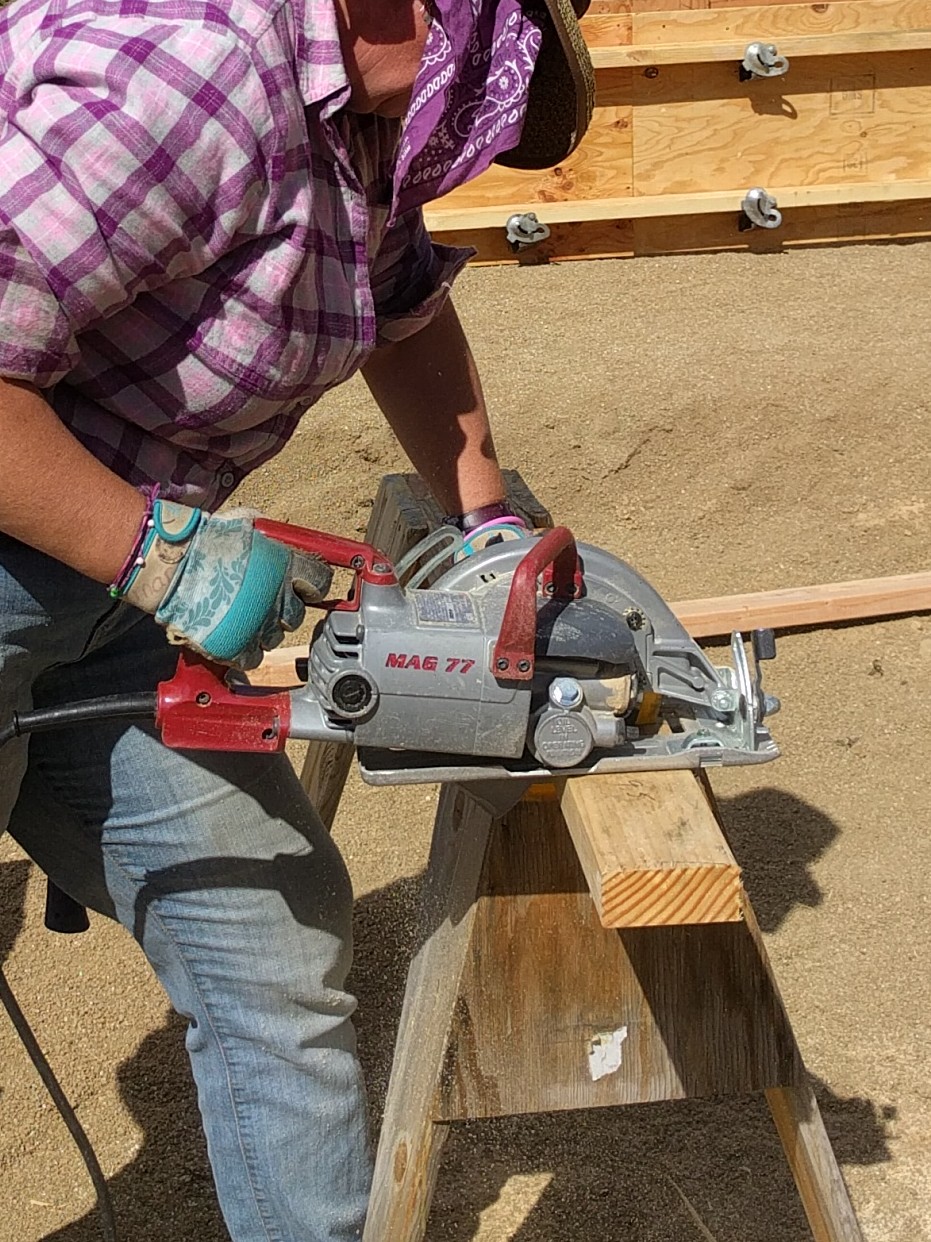
The new way: So, I turned the 2×4 up on it’s long edge at about a 45 degree angle and the saw cut through so easily, I was shocked. I had no trouble keeping the saw on the cutting line, and the weight of the saw pushed it’s own way though the wood. 

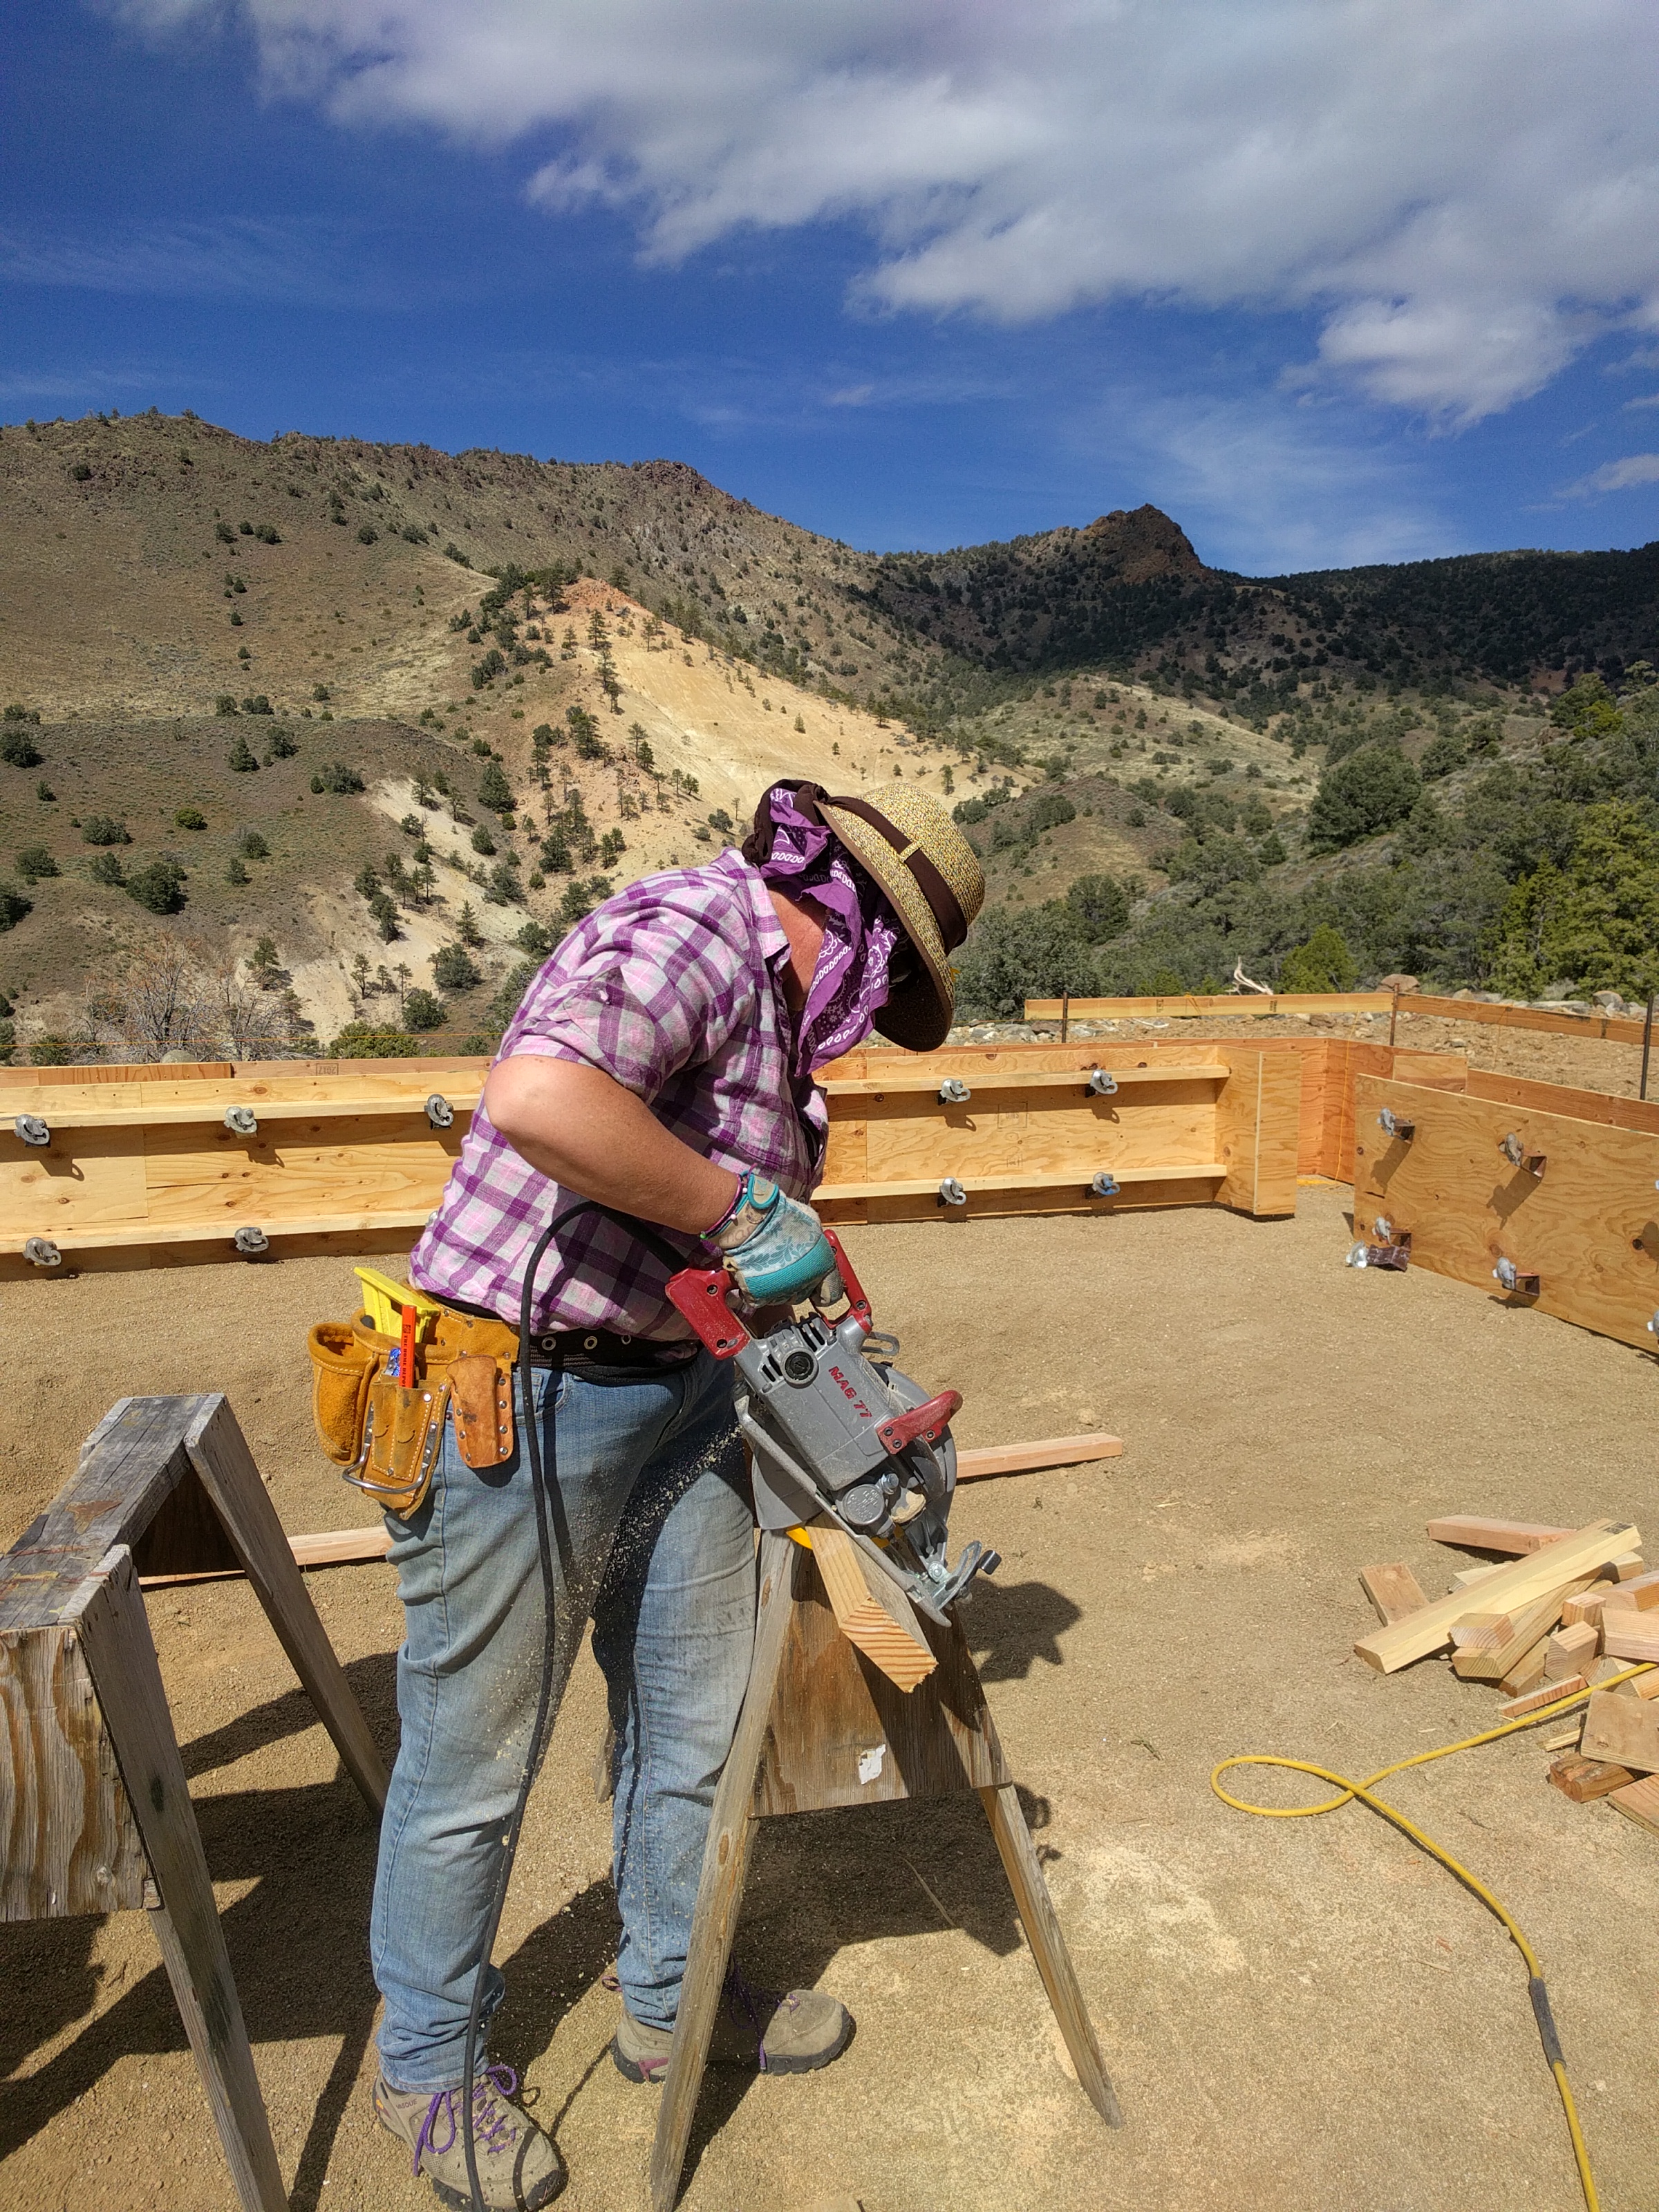
The new way: turn that wood up on it’s edge!

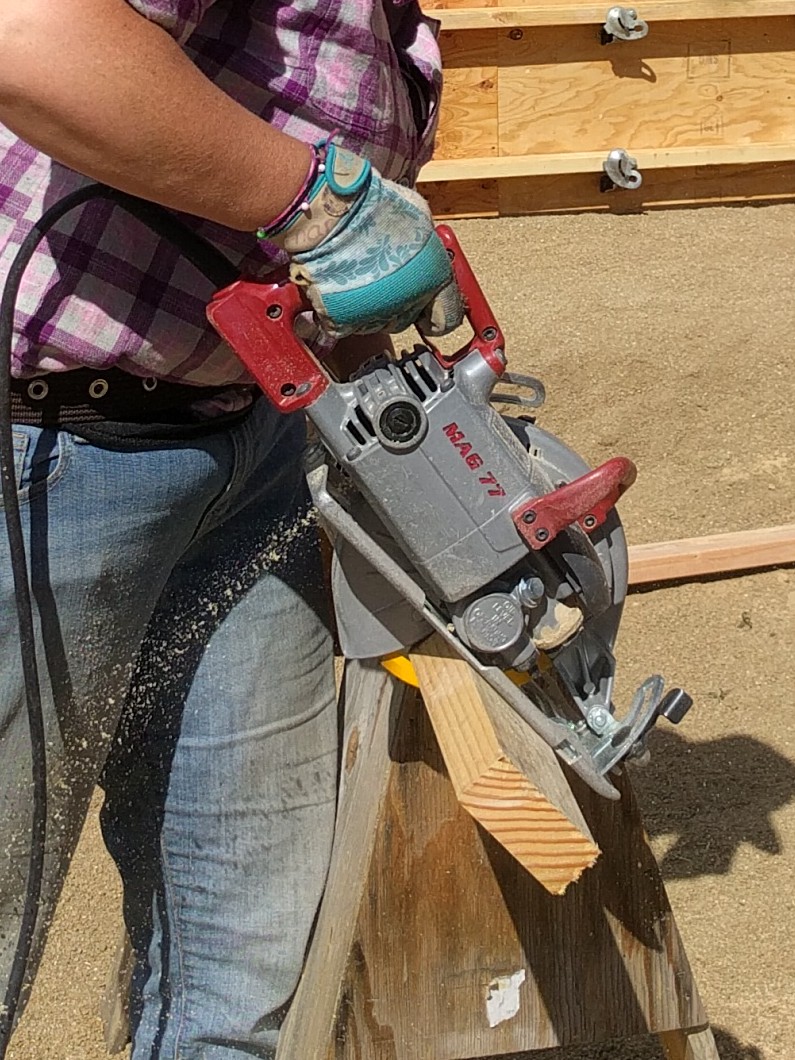
Close up – the new way

The wood rests on the sawhorse and the force of the saw is pushing downward rather than across, so the board doesn’t move around.
So easy!

This technique will make the thousands of cuts I’ll be making over the coming months that much easier. 

Just goes to prove that it’s never too late to learn something new.

This awesome hack will save your pant cuffs!

OK, I know the title of this post sounds like click bait, but it’s really true. Today I did one of those simple little things that had me saying, “No way! Why didn’t I think of that sooner?”

You see, all this winter as I’ve been bundled up working outside, I have been frustrated with the cuffs on my insulated pants. The legs are too long and the edges would get nasty in the mud and dirt.

Too long pants

In fact, the cuffs are even starting to fray. And that’s just really annoying.
Often I would just roll then up, which looks silly, but whatever. 

This works if  there’s not a ton of mud or it’s not actively raining, both of which I was dealing with today. The mud gets on the inside of the pants if they are rolled up like that while working in mud, and the water gets trapped in the cuffs if it’s raining.

What’s a girl to do?

Then I had an epiphany!

Elastic cuffs! It’s kinda hard to see in the pic since my elastic is the same color as my pants, but I found some wide elastic and wrapped it around the outside of my pant cuffs.

I didn’t even sew them. Just used a big safety pin on each one.

External elastic pant cuff

So simple. Just a couple items and my pant legs didn’t bother me all day!

I’m thinking this same idea would work with Velcro, or string, or even a thick rubber band. 

I’m just wondering why it took me all winter to think of it! 🤣

Daily Life #4 – DIY Mason Jar Spout And Carpet Deodorizer Recipe

So I’ve seen this tip on Pinterest several times and today the planets aligned and I was able to make one for myself.

20160129_125920_resized

And by planets aligning, I simply mean that I happened to have the need for one right when I had a nearly empty salt container.

I finally got around to vacuuming today and wanted to use my homemade carpet deodorizer (recipe below). But I tend to accidentally shake half the powder on the carpet when I try to shake it out without some sort of top on the jar. I thought about punching holes in a jar lid, but then I remembered this tip.

All I did was use a sharp knife to cut the top off the salt container, then put it on the jar in place in the lid. It worked remarkably well! It is the perfect size for a wide mouth jar. In order to use a regular mouth jar, just trace around a regular size lid and cut it down accordingly.

20160129_125741_resized

So, the carpet deodorizer recipe. That also is super easy.
-Fill a quart size mason jar about 3/4 full with Washing Soda (not baking soda)
-Add 10-20 drops of your favorite essential oils (we like orange and clove or lavender and eucalyptus), put the lid on, and shake the jar to distribute the oils.
-Shake the deodorizer on your carpet 15-30 minutes prior to vacuuming (test on obscure area 1st).
-Vacuum as normal.

Notes:

-Do not use baking soda, it is too powdery and tends to leave a white residue, thus why the recipe calls for washing soda. It still absorbs the odors of stinky carpets but is more granular. It can be found in the laundry isle of most grocery stores.

-You can fill your mason jar full, but then you’d want to dump the soda into a bowl, add the oils, mix, and return to the jar. Otherwise the jar will be too full to shake to distribute the oils. I prefer to just do it as stated above so I don’t have another dish to wash.

-I find that I use about 1/4 of the jar (roughly 1 cup of the mixture) per application. Depending on the size of your house you may have to use more or less. This is where the salt container spout comes in handy as I found that without it, too much sprinkles out and I invariably ended up using over half my mix for one round!

-I use this powder every other or every third time I vacuum, depending on how stinky the pets and kids have been. 🙂

I really like that this carpet deodorizer is all natural. No weird chemicals to worry about around my family.

So aside from vacuuming my house (finally!), and in between the daily tasks of taking care of the family, I started researching how to make candles from scratch. An article I read recently got my gears turning and Hubs and I got to talking about all those skills which we have a theoretical knowledge of, but have never actually tried. Like candle making. Did you know that you are supposed to treat wicks with something like boric acid in order to make them burn properly? I had no idea, and my minimalist side is wondering if it really  makes a difference. So my plan is to try a couple different types of wicks and see what the results are.

So in a couple days hopefully I’ll have a post all about making candles. 🙂

Princess Girl and I also got around to mounting the puzzle we finished a couple weeks ago.

20160129_135640_resized

I cut a piece of cardboard the same size as the puzzle, we covered it in Elmers glue, then slid the puzzle onto it and slathered a bit more glue on the top. Then, when it had dried a bit, we covered it in plastic and put a box on top to keep it from bowing. Princess Girl is going to hang it in her room when it is finished.

And that’s how this homesteader spent her day.

Maridy

“I lift up my eyes to the hills, where does my help come from? My help comes from the Lord, the maker of heaven and earth.” Psalm 121

Preserving the harvest

There is a house in our neighborhood which is vacant and for sale. In the back yard stands two apple trees and five (yes 5!) plum trees.

image

Last year I got permission from the owner/tenant to pick their apples since it was obvious by the number of apples on the ground that they were not going to be doing anything with them.

This year I called the realtor and he gave us permission to take all the fruit we want.

Yay!

So I’ve been supplying us with plums to snack on for a couple weeks now. And I’ve had a basket of apples sitting in the corner waiting for me to do something with them.

Then two days ago a friend gave me some cucumbers and zucchini that she had left over after making all the pickles and relish she wanted.

image

So today, I sat down with my recipe books and a pad of paper and made some lists.

Apples : make into cider
Cucumbers: pickle them
Zucchini: shred and freeze
Plums: unknown (I don’t care for plum jam/jelly. What else is there to do with plums?)

As you can see, I had some research to do. I finally decided to make plum butter amd a plum bbq sauce. But first we gotta go pick the plums!

Fist on the agenda for the day was to make the pickles since they are best when the cukes are fresh and they were already 4 das old.

image

I’m not going to give a tutorial on how to make pickles. There are already a million of them out there, and I followed the instructions from the Ball Blue Book (one of my go-to canning guides). The only thing I changed is that I left out the sugar. I mean, really. Dill pickles do not need sugar!

However I did want to mention one tidbit that might be handy. The instructions say to tie the spices in a bag. I’ve heard that you can use a tea bag (the kind you buy empty and put loose leaf tea in to steep). But I don’t have any of those lying around, besides, I don’t like to use disposable if I can help it. You can tie the spices up in a square of cheesecloth or fabric, but that just seems awkward. What I’ve done for years now is use panty hose.

image

Yep, I purchased a cheap pair specifically for this purpose so they had never been worn. I gave them a good washing. Snipped off the foot portion and tied a knot in the end. Then I just fill the tube with the spices and knot the other end.

image

Because the fabric is so stretchy, when it is time to clean, it is a simple task to unknot it, turn it inside out over the compost bucket, and then rinse and wash. And since it is nylon, it dries almost instantly, too.

So once I had the pickles all canned, it was time to deal with the apples. The Hubby and Princess Girl helped cut them up. Because they were so wormy we only got about half of each apple for the pot. The wormy parts went into a bucket to be fed to the chickens. No waste that way.

image

I put them on the stove to cook a bit and while they were heating, Princess Girl and I attacked the zucchini.

image

image

I shredded, she packed. We put approximately two cups into each bag since that’s what most of my recipies tend to call for.

We did not blanch the zucchini. I have seen directions that call for it, but in my experience, it has never made a difference in the end product.

I got called away to help Mom with some stuff and when I came back I found that the apples on the stove had cooked down to apple sauce!

image

I realized I had cooked them too long to make cider, so I changed my plans and decided to make apple butter instead. Unfortunately, all the peels were still in there. I know some people cook their apple butter with the peels on and they eventually break down into the sauce, but I believe that lends a bitter taste to the sauce and resulting butter. So, I strained out the peels.

image

(Gotta teach Princess Girl how to take clearer pictures!)

I spooned the peely sauce into a mesh strainer and by tapping the strainer “ears” on the rim of the bowl and stirring the sauce in the strainer, I got most of the sauce separated from the peels.

image

Another of Princess Girl's photos

Even though the apples were not real sweet, the sauce is some of the best I’ve made. I think that is because usually I use the Victorio strainer and it mashes the peels up and strains them out. And while the peels don’t end up in the final product, I think some of their flavor does.

image

Princess Girl told me I have to keep this picture and post it. 🙂

At any rate, I got all the peels strained out of the sauce (more food for the chickens!) And ended up with 10 cups of sauce which I put in the slow cooker with some cinnamon and clove. I will let it cook over night.

image

I have to buy some honey tomorrow to use as the sweetener since we don’t have enough at the moment.

image

Princess Girl helped me finish up the zucchini and get the bags ready for the freezer.

image

Twelve pints of pickles canned, 6 bags of zucchini in the freezer, and apple butter cooking in the slow cooker. I’d say it was a productive day.

And tomorrow we go pick apples and plums.

I love harvest season and knowing that I am providing healthy food for my family. And it’s especially great when I get that food for free!

Maridy

“I lift up my eyes to the hills, where does my help come from? My help comes from the Lord, the maker of heaven and earth.” Psalm 121

Homemade Laundry Soap

Soooo….I’m a horrible blogger. I made about a year’s worth of laundry soap a couple days ago. I meant to take pictures so I could post step by step photos. The last time I intended to do a DIY tutorial, I ended up in the Emergency Room. This time, I got half way into the process and forgot to take pictures.

I’m horrible, I tell ya!

But enough about me. Let’s learn how easy (and cheap!) it is to make your own laundry soap.

There are about a bajillion different diy laundry soap recipes out there. I’ve been using this particular recipe on our clothes for at least two years now. Why did I choose this one?

Because it was the one my cousin gave me back before I really got into this diy journey.

image

And because it’s simple – only 3 ingredients besides water. Washing soda, Borax, and Fels-Naptha soap (all can be found in the laundry isle of most large grocery stores).

That’s it.

Truly.

I know, right?

And the process is just as simple.

Step #1: put 4 cups hot water in a pot.

Step #2: grate the Fels-Naptha into the water.

image

Step #3: stir and then gently (gently!) boil until the soap is all melted. Don’t vigorously boil unless you don’t mind suds all over your kitchen.

image

(And that’s all the pictures I got till the next day.)

Step #4: add in 1/2 cup borax and 1 cup washing soda (this is not baking soda – there’s a difference!) to the pot and stir till dissolved. (Note: this time around I doubled the amount of borax and washing soda to see if there is any difference in the long run.)

Step #5: fill a 5 gallon bucket half full with hot water. Pour the soap contents from the pot into the bucket and stir well.
Step #6: fill the rest of the bucket with hot water, stir and set aside until the next day to let it set up.

image

See, told you it would set up.

Step #7: now stir, stir, stir! It would be awesome to have one of those paint stirring attachments for a power drill. That would make this part super easy. I thought we had one of those somewhere. Hmmmm… it’s probably still in our shed back on the homestead. Since I didn’t have one of those stirrer thingies, I just used a big slotted spoon.

image

And eventually I even just used my hand to reach in and mush up all the gloppy clumps. It was strangely satisfying.

image

Step #8: fill a container such as an old laundry soap dispenser or large jar half full with your soap, fill the rest of the way with water and shake. Use approximately 1/4 cup for a front loading washer (you lucky folks) and about 3/4 cup for a top loader. Shake with each use.

That’s it. See, told ya it was simple. And yes, with 4 people in our family and a top loading washer, this amount of soap will last us approximately a year.

So, how does it work? You know, I have to be honest, it’s not the greatest on stains. But it does a good job keeping things generally clean.

It is gentle enough that we used it on Flower Girl’s clothes when she was a baby and suffering from bad eczema and it did not irritate her condition.

It does tend to be clumpy when I pour it, but then, I’ve never taken the time to really, really stir it up well either. I’m sure that would make a huge difference.

As we travel on our journey toward all natural products, I like that the majority of ingredients in this laundry soap are all natural. I did however, read the ingredients on the Fels-Naptha soap and it does have some perfumes and unpronounceables. It’s diluted quite a bit in this recipe, so I went ahead and used it this time. I think by the time we need another batch, I will try to find a more natural soap. I have heard you can use Ivory soap in place of the Fels-Naptha. I will have to look into it more.

But, I’ve got a year to do it. 😉

Have you ever made your own laundry soap? What’s your favorite recipe?

Maridy

“I lift up my eyes to the hills, where does my help come from? My help comes from the Lord, the maker of heaven and earth.” Psalm 121

Garden Plot Update #2

20150217_101044Our first garden visitor!

So, I mentioned before that we planted our seeds on Feb 17th. What I didn’t show are our garden markers. I have used popsicle/craft sticks before with so-so results. Oh one hand they are cheap and easy to use. You write the veggie on the end and stick it in the ground. But I found that the sun and rain fades the lettering after a couple months. Just fine if you only want to know which row you planted your carrots vs onions in until they grow and you can tell them apart by their leaves. Not so good if you want to permanently mark your 4 different varieties of tomatoes so you can remember which type is which when it comes time for harvest. So, I thought I’d try a little experiment.

20150217_114825First, I wrote the info on the stick as usual. I used both sides. The front has what it is. The back has the expected harvest date so I can remind myself when I’m out in the garden and don’t have to refer back to my packets or journal

20150217_114854Then, I coated the end of the stick in clear nail polish. The polish soaked into the stick and dried very quickly, so I am hoping it will keep the letters from fading. At least until I can remember which variety of lettuce I planted where! I guess we’ll just have to see how it does.

20150217_123501And there’s the newly planted (and marked!) garden.

A friend of mine expressed some skepticism about planting so early in the season, but here’s one of the reasons I wasn’t concerned. I have shower doors! And they fit almost perfectly on my new bed. I guess this means I have a cold frame. I’m still working on a system to cover the gap in the middle, but for now, they work admirably.

20150221_132523They help heat up the soil during the day to give my little plants a boost, and they hold in just enough heat at night that the slight frosts we’ve had don’t touch the seedlings (even though everything that I have planted right now can tolerate lights frosts.)

20150221_184551And, if it gets really cold, the doors make it a cinch to cover the bed.

20150305_140335They are easily propped open so that I can work in there or to let out excess heat in case we have some really warm sunny days (hahaha! warm sunny days in the springtime in the Pacific Northwest? I crack myself up!)

20150304_103200Wait, what was I just saying about warm, sunny days??

At any rate, the shower doors also serve two more VERY important roles. One, they keep the free-ranging hens out of my seedlings!

And two, they provide the perfect table for a two year old to play with her dinosaurs and a pail of water. 🙂20150305_141309-1

Stay warm everyone. And God bless!

On my walk…

The other day I came across these structures in a yard in the neighborhood:

image

They are over what look to be berry bushes (blueberries?). I thought at first they were for covers for unexpected late freezes or to create greenhouses in early spring. Until I looked closer.

image

They are covered with a fine netting. Birdproofing the berries! I have not stopped long enough to see how you might enter them to get to the berries, but it seems like a rather simple and ingenious design.

What about you? Do you do anything to protect your harvest from the wildlife?

Maridy

“I lift up my eyes to the hills, where does my help come from? My help comes from the LORD, the maker of heaven and earth.” Ps 121:1-2

Starbucks, eat your heart out!

First of all, for you subscribers, are you enjoying the old posts? I think I have about 4 more of those scheduled. I hope the info is interesting to you. I felt like this blog started in the middle of the story of our move to the homestead (and then our subsequent move here to Portland). So I wanted to be sure the whole story was here on the blog. Okay, back to our regularly scheduled program:

I think I mentioned before that I have a guilty love of mochas. Starbucks mochas, half sweet, to be specific. Well, today as I was making yogurt (following the super easy instructions from Jill, over at theprairiehomestead.com) I got a hankering for one of those mochas.

Might have something to do with the fact that I had just had to resist the temptation to run into Starbucks on my way home with milk. That little logo sure can get my mouth watering! (Pavlov anyone?) But I resisted because my wallet is near empty and their chocolate syrup is full of questionable ingredients such as highly processed sugars and preservatives.

What’s a girl to do? As I set the milk for the yogurt to heat on the stove, my tastebuds were still craving that creamy bittersweet chocolatey goodness. So, of course, I whipped up my own cafe mocha. Right in my kitchen. Whithout an espresso machine. And full of only nutritious real food. No way!

image

Yes way!
-I started with about 3oz of really strong coffee. It could maybe even be called espresso, it was that strong.
-To that I added about 6oz hot milk (I used the microwave to heat the milk, but you could easily use the stove as well, or steam it if you have an espresso machine).
-About a tablespoon of cocoa makes a rich chocolatey mocha.
-To balance out the choloclate and add depth of flavor, I added about a quarter teaspoon real vanilla.
-For sweetness I added a splash of pure maple syrup. I really don’t know how much. If I had to guess, I’d say probably 2 teaspoons. But I don’t like my mocha very sweet. I just dropped some in, stirred it all up, tasted it, added a bit more, and tasted it again.

Perfection.

Well, it was missing the real whipped cream on top, so I dropped in a dollop of heavy cream. That kicked up the delish factor to as high as it could go without having actual whipped cream on hand (and no patience to make make some).

Who needs to shell out $4 for a drink when you can make an even better version for a fraction of the price right in your own kitchen?

Maridy

“I lift up my eyes to the hills, where does my help come from? My help comes from the LORD, the maker of heaven and earth.” Ps 121:1-2

A “new” way to wind a garden hose

image

Yesterday, I experienced one of those moments that make you say No Way! I was winding the garden hose back into its spot on the ground. It kinda sorta did its own thing and wound into a figure 8 rather than a circle. But here’s the thing,  as it was being put down, I didn’t have to twist or wind the hose to get it to lay flat. In fact, the whole thing laid down with nary a twist in the entirey. Which means, that in theory, when I pull the hose out next time, it shouldn’t twist and coil and kink.

Did I really just discover the secret to un-kinked hoses? Will it unwind with the same ease? Will my gardening life hereafter be blessed with free flowing water?

Have any of you experienced this? Am I really just now discovering this? Is this the “right” way to wind hoses and I’m just now learning about it??? Or was it a total fluke and it won’t make a difference?