Tag Archives: DIY

Daily Life #’s 17 &18 – Groceries and Even MORE Candle Testing

Yesterday, February 11th was grocery shopping day. And it was a doozy! 4 hours and over $400! And there’s still a few things left to get at a different store.

But, it feels good to have the freezer and storage shelves filled up again. January is always a lean month as we recover financially from the holidays.

And our shopping trip came just in time since a good friend and her 4 kids joined us for dinner. Plenty of food to go around. Might not have been that way the day before. 🙂

Today, February 12 –
More candle testing today and I’m thrilled! We burned the taper/dipped candles we made the other day.

image

You like my make-do candle holders? We do have a couple of taper holders, but since I didn’t know how much/if these candles would melt all over the place, I decided to use these jars with foil. It worked remarkably well.

The three wicks I used were the 48 hour borax soaked (middle), the skinnier string untreated (right), and the thicker string untreated (left).

image

The girls wanted to burn the candles they made, as well. I don’t know how many times Flower Girl blew hers out then re-lit it by holding it up to one of the others.

image

It was immediately obvious that the borax soaked wick was not going to work very well. You can see from this picture the way the crystallized borax builds up on the wick. I don’t know if it was the borax alone, but this candle burned 4 times as fast as the others.

image

This is after just one hour. The borax wick candle is all but gone. The others, however, are doing great!

image

I needed my little jars to make some more candles, so I transfered these to taller jars. By this point (3 hour) burn time, all I had done to these candles is trim the wicks at hour 2. You can see in the above picture that the candle on the left (the thicker wick) has a taller flame and even though the candle started out taller, it is now shorter. The bigger wick is burning faster. It also smoked more.

image

By hour 4 it was just down to the candle with the smaller wick. It lasted a total of 5 1/2 hours. And I only trimmed the wick twice. There was very little smoking with this one, even when the wick was longest.

I think we have a winner!

And, yes, the only thing I did to this wick was dip it in wax. How’s that for minimalist candle making? 🙂

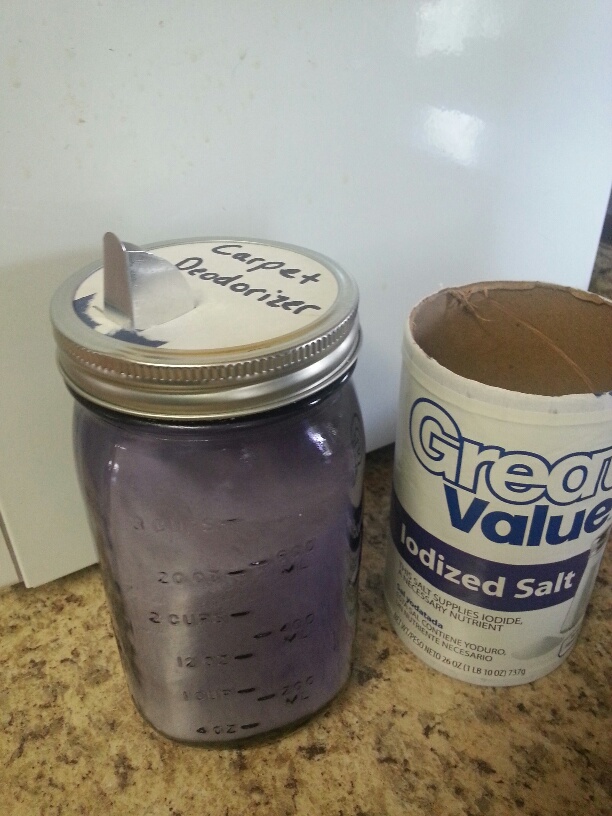
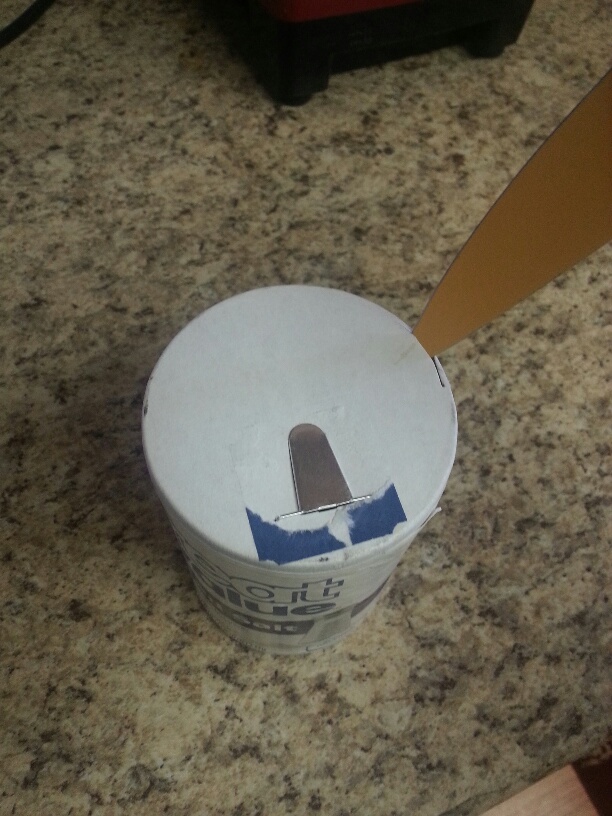
I made five more jar candles to test my theory that the main thing that affects the burnability of these wicks is that they are centered and straight rather than anything they may or may not be treated with. If they are straight, maybe they well stay upright easier. I figured out a way to keep the wicks centered and straight. I also figured out a new wick stand that is easier to use as well as reusable. But more on that tomorrow. For more, I’m tired and off to bed!

Maridy

“I lift up my eyes to the hills, where does my help come from? My help comes from the Lord, the maker of heaven and earth.” Psalm 121

Daily Life #15 – Candle Wick Testing

February 9

I’m am so pleased and surprised with today’s tests results.

To recap, my Man and I have decided that it is a good idea to practice some of those skills which we have a theoretical knowledge of, but have never really learned how to do ourselves. Such as making candles.

I started researching how to make candles when you can’t go out to the craft store and buy supplies. The basics are wax and cotton string. But I got to reading that you should treat the string with something in order for it to burn properly.

Most sources I found with a quick internet search said to use a solution of Borax and salt. I did find one or two which said just pre-soaking in the wax would do. And at least one source which stated that a salt solution would work.

Well, I wanted to see which one worked best. So, I pre-treated four lengths of string and another to use un-treated.

I made a solution of borax and salt (1 Tbl Salt, 2 Tbl Borax, 1 cup hot water). I soaked one length of string in it for 1 hour, one length of string in it for 48hours (was only supposed to be 24, but I forgot), and one length of string I soaked for 1 hour once the solution had cooled off.

I also made a salt solution (2 Tbl salt to one cup water) and soaked a length of string in that for 24 hours.

I then took those four strings (once dried), plus the untreated one and dipped them in melted wax 3-4 times and laid them out on foil to dry.

Yesterday, I cut the strings to size, put foil feet on them and put them in little jars, then poured hot wax into the jars.

Overnight, the wax solidified, and voila, I had candles!

Today was the big burn test.

At 10am we lit the five candles.

image

10 minutes later it was obvious that we were going to have troubles with the 48hr borax soaked wick.

image

I it wouldn’t stand up straight and I had to baby it along, as well as the other two wicks soaked in the borax solution. Every 10-15 minutes, I had to either straighten the wicks or relight them altogether.

At the thirty minutes mark, I trimmed the wicks down a bit on all the candles since they were all smoking quite a lot (except for the 48hr borax soaked one which was barely burning as you can see).

image

Finally, after about an hour, the 48hour soaked one seamed to be doing fine after being re-lit several times, but the other two borax ones still had to be taken care of every so often.

By two hours into it I had just about given up on the two candles with wicks soaked for an hour in the borax solution (the middle and far right). The 48hr soaked one was better than those two, but not by much. And the cold soak versus hot soak for an hour didn’t seem to make any difference at all. As for the candle with the untreated wick, I had straightened the wick and re-lit it once. And hadn’t touched the salt treated one even once!

image

By 12:30, after 2.5 hours of burning, I gave up on the borax treated ones.

image

However, the untreated one was still hanging in there, and the salt treated one was turning out to be a champ. Finally, after 4 hours of burning, even the candle with the non-treated wick gave up the ghost.

image

So, it’s the salt treated wick for the win!

I’m fact, it burned for a solid 6 hours without me having to do a thing to it! Eventually the wax liquefied enough that my poor aluminum foot couldn’t hold the wick in place any more and it fell over.

And, no, that is not what was happening to the others because they never burned enough to liquify to that point.

So, what now? Is this a definitive answer? Well, no. I want to try replicating the results. Because as any good scientist knows, if you can’t replicate it, it doesn’t count. So, while all this burning was happening, I made three new candles. One has a 48 hour soaked wick, but it is doubled up so maybe it will be stiffer and not fall over as easily. One has the same salt treated wick. And one had a wick from a different cotton string which I found. It is thicker and again, I’m hoping it will keep the wick from falling over as easily, which seemed to be the biggest problem. I also knotted the bottom of the string before making the aluminum foil foot, so the feet should hold the wicks better.

I will do another burn test tomorrow and let you know the results.

And today we also made taper candles.

image

image

image

I used some of the same wicks and want to do the same type of burn tests with those, too.

I’m having fun with this and hope you find this information useful.

Maridy

“I lift up my eyes to the hills, where does my help come from? My help comes from the Lord, the maker of heaven and earth.” Psalm 121

Daily Life #14 – Candles

February 8th

I made candles!

Yes, I have made candles in the past. The waaaaaaay past. Like, I was a kid and it was a school project.

And as I mentioned last week, I wanted to try making candles from scratch, including the wicks. So today’s project was to finish the wicks, and get the candles made so that I can do the burn test tomorrow.

Over the last week or two, I’ve been soaking and drying string in several different solutions. Today I dipped them in wax, let them dry, cut them to size, made little feet for them out of aluminum foil (worked with mixed results), put them in labeled jars, and poured in the hot wax.

image

Waxing the wicks

image

Homemade wick with homemade stand

A couple of these little feet fell off the string when they came in contact with the hot wax being poured into the jar. I have and idea of how to fix it next time.

image

Homemade candles - I used the aluminum foil to hold the wicks in the middle of the candle.

It’s a good thing to put down some sort of protection on the counter, because candle making is messy!

I’m excited to see how they do tomorrow. When I get the results of the burn tests I will post a full report.

As for today, we enjoyed some rare sunshine and warm weather. So nice to get outside and soak up some vitamin D.

image

Maridy

“I lift up my eyes to the hills, where does my help come from? My help comes from the Lord, the maker of heaven and earth.” Psalm 121

Daily Life #9 – Failure is always an option.

First of all, hello to our new followers! I’m so honored that you are here! If you’re new to reading this blog, you can learn a bit about our journey by reading our About page.

So this is Day 9 of my daily life posts. If you’re just tuning in, you can read all of them, or at least go back and read about why I’m doing this month of daily life posts.

And that reminds me; why did I start on January 26th? That seems like an odd time to start a project. Why not January 1st? Or even wait a few more days and start on February 1st? Well, I would have loved to start on January 1st, but I didn’t think of it till the 26th. 🙂 And as for waiting, normally I would have. In fact, I normally would have waited until spring, when my life was a bit more exciting.

But Hubby and I had just watched the movie Julie & Julia. I was inspired by the main character, Julie, who started her project (to cook all the recipes in one of Julia Child’s cookbooks in one year) on a mid-August day. She didn’t wait till it seemed like an obvious time to start something so momentous. She just went for it. And so did I. 🙂

So anyway, Day 9.

Hmmm…let’s see, aside from the usual of cooking, cleaning, and caring for the family, what all did I do?

Ah, that’s right, I did my hair.

Why mention this on a homesteading blog?

Well, just because I’m a homesteader doesn’t mean that I don’t care about my appearance. I like to look nice as much as most people.

Sure, there are days when my hair goes up in a bun and my flyaway bangs get pinned back, or I throw on a hat. But often I like to “do” my hair.

The pictures below were taken a couple years ago when my hair was a bit longer than it currently is, but shows a good contrast between my “Hermione hair” as my man calls it, and how I like to style it on a regular basis.

kdk_2319 (Small)

Before, with my hair like Hermione Granger from Harry Potter – I had gone to a party where we dressed 80’s style, thus the off-the-shoulder shirt. But then. those are coming back in style, aren’t they?

kdk_2324 (Small)

After, with my wild hair tamed down (much easier to keep that way in the dry air of Nevada rather than the humid air of Oregon!)

However, in the spirit of reducing (my time, the energy used, etc), I try to find the fastest, easiest way that works for my hair with as little hair product as possible. And now that it’s growing out, that means straightening it, no hair mousse needed like when I let it go curly. Yes, I am blessed with hair I don’t have to wash every day, and it’s cooperative enough that unless I get caught in the rain, I can straighten it one day, and not have to mess with it (other than brushing) for 3-4 days afterward. So I spend 20 minutes on my hair once or twice a week to get it looking how I like it. Then all the other days, it’s usually less than a minute. Can’t get much easier than that!

Ok, let’s see, what else did I do all day?

Princess girl and I went on our Bible Study Date. It’s a weekly date that we have. She wants to have more in-depth study time, and I know that if I don’t make it a “date”, the chance of it getting pushed under the rug in lieu of “more important things” like dishes and laundry (heavy sarcasm there) is all too likely.

And, I started working on a belt. This is where the “failure” part comes in. I found instructions online of how to make a paracord belt. I figured it was high time I give it a try. I want a new belt, and I like the idea of having lots of paracord on me. I typically wear a survival bracelet, but I want to change things up.

So, I worked and worked while watching TV with the family. It took me 3/4 of the belt to finally really get the weave right so that it was consistently looking good. And then I ran out of paracord. And still a good 6 inches left till it was the right length. Grrrrrr!

So I ripped it all out and I will start over tomorrow with a different color that we have more of. So, yes, my first attempt at making a belt out of paracord failed. But as Adam from Mythbusters likes to say, “Failure is always an option.” Because even though it didn’t work out the first time, I learned a lot in the process.

And that’s a great attitude to have for a homesteader. Failure is going to happen. Whether it’s that your tomatoes didn’t do so well this year, or the litter of rabbit kits all died from heat exposure (please don’t ask me how I know 😦 ), you are going to fail somewhere, sometime in your journey. The question is, what do you do with that? Do you give up? Or do you collect the data and analyze what happened and do better next time? It’s all up to you.

Daily Life #6 – Crafty Goodness

Ok, so I can’t show you all the fruits of yesterday’s labors (day #6 of my Daily Life posts) because they are a surprise for some of my family and friends. But I’m willing to show you a couple of them. I got this idea out of the blue the other day and am pleased with how well they turned out.

image

For Princess Girl - she loves My Little Pony

I made bookmarks!

The short of it is that I printed pictures onto cardstock paper, cut them into appropriate sized strips, and covered with clear packing tape.

But a lot more went into it than that.

First I did some test bookmarks a couple weeks ago to work out the bugs. I learned that using cardstock it essential. Even with the tape, regular paper is too flimsy. I also learned the best way to get the tape onto the paper without wrinkles. Static cling’s a pain!

Step one: plan your bookmarks
I made a simple template on my computer so that as I planned pictures, etc they would be the correct size. My clear packing tape is 2 inches wide, and I learned that you want some space on the sides, so I made my columns on my template about 1.6 inches wides. With my paper in “landscape” configuration, that gave me 6 bookmarks with a bit of space in between each one.

Step 2: print your bookmarks
Arrange your chosen pictures on the page and printed them. Now, our printer only prints in black and white, so I had to get creative. Some pictures look better in black and white than others.

Step 3: cut out your bookmarks
Carefully cut them out (oh, where’s one of those old fashioned paper cutters when you need one?).  I used a ruler and a pencil to get straight lines.

Step 4: add decoration if desired
Now I channeled my inner child and started coloring. Remember, they were all in black and white. Some only had one picture to color, others I didn’t want colored, prefering to leave them as printed. On nearly all of them, however, I added some sort of hand written message.

Could I have typed something up on the computer instead? Of course, but I wanted it to be more personal than that.

And of course, if you are an artist, you can skip the printing stage and just draw, color, paint, sketch, design, etc something freehand onto appropriately sized pieces of paper.

Step 5: put your name on it
If you’re putting time and effort into making these, don’t forget to put a maker’s mark of some sort on it! I put mine on the back.

image

Then comes the tricky part. Putting the tape on.

Step 6: “laminate” it
Once you have your bookmark decorated to your liking, tear off a piece of tape that is a couple inches longer than your bookmark.

image

Then you are going to hold the tape sticky side up and tuck each end under about an inch and tape it to the table top. Hopefully  the picture below will show what I mean.

image

Then position your bookmark above the tape, centering it on the tape as best as possible. But don’t let it touch the tape yet!

image

Once you have it centered, let one end touch down. Then, holding the other end slightly above the tape, smooth along the length of your bookmark, starting with the first end you stick down and working toward the end you’re holding.

image

This will prevent the tape from bubbling or wrinkling underneath. Don’t ask how many bookmarks it took to come up with this technique! Wrinkled tape ruins all that work you just did!

Next you’ll tear off another piece of tape that is a bit longer than your bookmark and put it -sticky side down – over top the bookmark in the same fashion of how you applied the paper to the first piece of tape. (Center it, stick down one end while holding the other end up a bit to stop it from sticking, and smooth down from the stuck end toward the other.)

image

Smooth it all over and trim all around it with scissors.

image

And there you have it. Fully customizable homemade bookmarks. Easy enough to make for all your book-loving friends.

image

And, yes, with planning, printing, cutting, coloring, amd writing, my bookmarks took me all of yesterday afternoon and evening. But then, I made quite a few of them. Once I started, I didn’t want to stop! 🙂

Maridy

“I lift up my eyes to the hills, where does my help come from? My help comes from the Lord, the maker of heaven and earth.” Psalm 121

Daily life #5 – Free Stuff and Crystals

I got to sleep in this morning! It was heavenly! And needed after several nights in a row of poor sleep due to not feeling well.

By the time I ate breakfast and finished my journal entry (which I started yesterday morning), showered and dressed, etc, it was time to take Scooter to the vet and do a bit of shopping. Later in the afternoon, I met a lady and took a floor mat she no longer wanted off her hands.

image

Don't you just love my thrift store desk chair?

I love Freecycle! That or the free section on craigslist. I know there are even more free trading/swapping site out there. Have you ever used any? I highly recommend it. Not only is it a great way to find items you might need without having to buy new, but it’s a great way to get rid of items you know have a use, you just no longer want them. We’ve gotten quite a bit of good quality wood which we’ve used for several projects around the house.

And today I got a floor mat. I seriously would have bought one had I run across it on a store. And here I got it for free! (Well, I guess I had to spend a bit of money in gas to get it, but she lives near me, so it was minimal.)

This afternoon, I also checked on my wicks which had been soaking for 24 hours as the instructions said.

And I found this:

image

The solution had crystallized! Weird, but cool. Not sure what happened. But I saw other instructions which said to soak for only 20 minutes. So I soaked another section of string for about an hour and it is drying right now. I left the crystal solution in there to see what it does if I leave it longer.

I plan to also try a few other options I have heard about and see what all makes a difference.

After dinner, I sat down with my garden journal and started planning my 2016 garden. As I said in my New Year post, I’m not going to be as ambitious this year, but I still want it to be organized. Basically. I was looking for what can be planted in a small space that either yields a lot on one plant (ie, a tomato plant), or is small enough that you can plant a lot in a small place (like lettuce). And of course it needs to be something we actually eat. And something I don’t have to tend to a lot.

When I have the finalized plan I will share it with you.

Maridy

“I lift up my eyes to the hills, where does my help come from? My help comes from the Lord, the maker of heaven and earth.” Psalm 121

Daily Life #4 – DIY Mason Jar Spout And Carpet Deodorizer Recipe

So I’ve seen this tip on Pinterest several times and today the planets aligned and I was able to make one for myself.

20160129_125920_resized

And by planets aligning, I simply mean that I happened to have the need for one right when I had a nearly empty salt container.

I finally got around to vacuuming today and wanted to use my homemade carpet deodorizer (recipe below). But I tend to accidentally shake half the powder on the carpet when I try to shake it out without some sort of top on the jar. I thought about punching holes in a jar lid, but then I remembered this tip.

All I did was use a sharp knife to cut the top off the salt container, then put it on the jar in place in the lid. It worked remarkably well! It is the perfect size for a wide mouth jar. In order to use a regular mouth jar, just trace around a regular size lid and cut it down accordingly.

20160129_125741_resized

So, the carpet deodorizer recipe. That also is super easy.
-Fill a quart size mason jar about 3/4 full with Washing Soda (not baking soda)
-Add 10-20 drops of your favorite essential oils (we like orange and clove or lavender and eucalyptus), put the lid on, and shake the jar to distribute the oils.
-Shake the deodorizer on your carpet 15-30 minutes prior to vacuuming (test on obscure area 1st).
-Vacuum as normal.

Notes:

-Do not use baking soda, it is too powdery and tends to leave a white residue, thus why the recipe calls for washing soda. It still absorbs the odors of stinky carpets but is more granular. It can be found in the laundry isle of most grocery stores.

-You can fill your mason jar full, but then you’d want to dump the soda into a bowl, add the oils, mix, and return to the jar. Otherwise the jar will be too full to shake to distribute the oils. I prefer to just do it as stated above so I don’t have another dish to wash.

-I find that I use about 1/4 of the jar (roughly 1 cup of the mixture) per application. Depending on the size of your house you may have to use more or less. This is where the salt container spout comes in handy as I found that without it, too much sprinkles out and I invariably ended up using over half my mix for one round!

-I use this powder every other or every third time I vacuum, depending on how stinky the pets and kids have been. 🙂

I really like that this carpet deodorizer is all natural. No weird chemicals to worry about around my family.

So aside from vacuuming my house (finally!), and in between the daily tasks of taking care of the family, I started researching how to make candles from scratch. An article I read recently got my gears turning and Hubs and I got to talking about all those skills which we have a theoretical knowledge of, but have never actually tried. Like candle making. Did you know that you are supposed to treat wicks with something like boric acid in order to make them burn properly? I had no idea, and my minimalist side is wondering if it really  makes a difference. So my plan is to try a couple different types of wicks and see what the results are.

So in a couple days hopefully I’ll have a post all about making candles. 🙂

Princess Girl and I also got around to mounting the puzzle we finished a couple weeks ago.

20160129_135640_resized

I cut a piece of cardboard the same size as the puzzle, we covered it in Elmers glue, then slid the puzzle onto it and slathered a bit more glue on the top. Then, when it had dried a bit, we covered it in plastic and put a box on top to keep it from bowing. Princess Girl is going to hang it in her room when it is finished.

And that’s how this homesteader spent her day.

Maridy

“I lift up my eyes to the hills, where does my help come from? My help comes from the Lord, the maker of heaven and earth.” Psalm 121