Tag Archives: Homesteading

How we do this Off-Grid thing

So you all know we live “off-grid” on our homestead in our trailers and are building our house to be off-grid as well.

But what does that mean?

It does not mean that we are completely independent from modern conveniences. I mean, I do drive a vehicle (more than I want to, I admit). We heat our trailers with propane. And there are times our little temporary solar system just does not cut it and we need to run the generator to charge the batteries. Like when the sun hasn’t come out for days.

Or, like today, when we did have some sun, but I didn’t get laundry out on the line in time for it to dry and needed to use the generator to run the clothes dryer.

It’s times like this that I’m very glad for modern conveniences like generators and the gasoline needed to run them.

Big generator pulled up to the well shed to run the dryer

Our washer can run on our small solar system, but the dryer requires more power.

BTW this is how we vent the dryer. We don’t want to put a hole in the shed wall since this is temporary until we can move the washer and dryer into the house. We also route the washer drain out this window.

So, yeah, for us, living off-grid does not mean that we do not rely on the grid. We are not one of those families who live in the wilderness, eating only what we can hunt or gather or grow, heating our house only with wood we can gather, etc. Not by a long shot!

But it does mean that we produce about 90% of our daily (not construction) power needs through our solar system. (And once we are living in the house it will be even more since our solar system will be larger.) And we stock up on propane and gasoline when the storms are threatening. It means that in an emergency situation, we could live quite comfortably for quite a while. And in a long term situation, we could get by without the backup generators if we ran out of gas. Yeah, it might mean not watching TV, and having to do essential bits of laundry by hand and hanging it to dry in front of the fire in the house, but we’d get by till the sun came back out. Way better than most people who rely completely on the grid. For us, it’s about being as self sufficient as is feasible in our current lifestyle. I also like the idea that by using mostly solar power, we are reducing our carbon footprint.

Now, to just get this house built so that we can focus on producing our own food again and be even more sustainable. 😁

A little bit of winter fun

Every winter, we look forward to the right conditions to use our old fashioned runner sled.

Check out our YouTube channel to see a short video of Flower Girl and I going for a ride.

While you’re there, be sure to subscribe to our channel. We don’t post videos very often, so you don’t want to miss a single one. 😄

Homemade Canned Mushroom Soup

I shared about my accident in my last post. I am feeling a bit of improvement, but still in quite a bit of pain.

Tonight I was home alone for the first time since hurting myself and had to get my own dinner. As much as I love the idea of fresh homemade foods, the convenience of canned goods just can’t be beat. Besides, it’s the middle of winter, and if it’s a veggie and it ain’t canned, it’s a lot harder (and more expensive) to get.

So tonight, I popped open a can of organic vegetable soup, heated it on the stove, and had myself some dinner.

As I was eating, I was thinking about how in the future I want to always make sure to have pre-made homemade canned soup available, not just the ingredients for soup.

And that got me thinking about the time when we lived in Oregon when I made canned mushroom soup. I was looking for a healthier version of canned condensed cream of mushroom soup. What I learned is that you can’t really make it “cream of” anything in a home kitchen since dairy cannot be safely canned. But you can can a broth soup and add cream to it when you use it. So I set out to make a mushroom soup that I could turn into cream of mushroom when the need arose.

Note: this is not a good substitute for traditional condensed cream of mushroom soup. The flavor is not quite the same, and it takes quite a bit of work to get it to thicken up if you’re looking for the consistency of the creamy stuff straight out of the can. But I will say that the flavor of this chunky mushroom soup far surpasses any of that condensed stuff. And is a wonderful soup to just heat and eat on it’s own. Once I have a full size kitchen with more time on my hands for food preservation (you know, when we’re not building a house), I plan to make more of this and do more experiments to work on thickening it for those times I do want the creamy stuff.

Note # 2: this is a canning recipe, but it’s not a canning tutorial. Pressure canning is pretty easy to learn (I learned just by reading the instruction manual when we bought our canner), so if you don’t know how, do a bit of research so you understand your canner before attempting to can anything in it.

Homemade Canned Mushroom Soup

Makes: 12ish pints

Ingredients:

  • 3lbs mushrooms – sliced
  • 1 large onion – diced
  • 3Tbl minced garlic
  • 2tsp thyme
  • 16+ cups chicken* stock/bone broth (bonus points if you make your own!)
  • Salt and pepper to taste

*I suppose you could use whatever type of broth you want, actually, if you have a preference. 😁

Combine mushrooms, onion, garlic, thyme, salt and pepper, and 1 cup of the chicken stock in a pot. Bring to a boil and cook till mushrooms and onions are cooked well. Heat remaining chicken stock in a separate pot.

Spoon ½ cup mushroom mixture into hot, sterilized jars. Fill remaining space in each jar with hot chicken broth, leaving 1 inch headspace. Put on lids and process in a pressure canner for 45 minutes at 10lbs pressure (adjusting for altitude).

To make into cream of mushroom, open a jar of processed mushroom soup and pour ½ cup into a pot, add 2Tbl your favorite thickening flour and stir till the flour is fully incorporated. Place on heat and cook till thickened, stirring often (this is called a roux I believe). Add about ½ cup of cream to the roux and stir constantly as it heats up and thickens. Once the roux/cream mixture thickens, add the remainder of the soup to the pot and heat through. If you want it thicker, cook it longer.

Ok, now I really want to make some more of this to have on the shelf. Hmmmm…maybe once I hit that point in my recovery where I can do light activity but can’t get back to construction yet I’ll take a day and make some of this, full-size kitchen or not! Yummmm.

What recipes are your go-to for stocking the pantry with healthier alternatives to store bought essentials?

-Maridy

Goals for the New Year

We’re not so different than most people this time of year. We eagerly make our goals, we start out with determination, we work hard to accomplish them.

Besides the obvious goal of completeing the house (which barring any more major set backs looks totally doable by summer time), we have quite a few other goals for the homestead and in our personal lives.

One of our goals for the homestead is to get rid of this junk wood.

It’s right at the entrance to our property and looks uuuuugly! I want it gone!

One of the personal goals I have is to work on getting my legs back in shape. I want to start backpacking again and right now, my knees could not handle that. Especially with the injury I sustained this summer.

Remember that?

Laid up with a bum knee in June 2018

Yeah, not fun.

So, I have mapped out a one mile route from our trailer, around the house, up the upper driveway and around Castle Rock and back.

The girls and I will be walking this route every day for a while, then we’ll find a way to extend it and build up our miles as our muscles build up. We will also be taking longer hikes once a week, and this summer I want to go on a couple of backpacking trips.

And while this goal is not specifically about homesteading, I love, love, love that I can walk an entire mile on my own property (well, mostly – part of the driveway is technically on our right-of-way on the neighbor’s property). Also, staying in shape is going to help out with gardening and animal care, etc as we get back into that. Especially on this hilly property, and especially as we get older (I turned 40 last month, so I’m feeling my age a bit). It’s the only way to be even somewhat sustainable here. We gotta stay in shape!

Also, I share this with you all to help hold myself accountable. As all the success gurus tell us, writing a goal down and sharing it with others makes you more likely to follow through.

So, there we are. Building a house. Daily walks. De-junkifying the property. Oh, and I want to have a small garden this year. And chicks! I need some cute little baby chicks in my life once again. And through it all, teaching Flower Girl to read, taking some fun school outings, working my summer job, a big family vacation in July that’s been in the works for a few years now, and of course, deepening my relationship with the Lord.

I’m excited just thinking about it all!

What are some of your goals for 2019?

House update: more interior framing

We have more walls up!

We have had many of our friends ask when they could come up to help with the house. So, we set a date for a Framing Party for Saturday, December 29th and let all of our friends know about it.

But before everyone showed up, we needed to get the most complicated wall built since it was heavy on the calculations and decision making – something Hubs and I wouldn’t necessarily have time to do with 10-15 people looking for direction.

So on the 27th, Ahma and Pops (my mom and stepdad) came up to help with that wall.

It was all angles and complicated calculations and we had to make decisions on where (exactly) the door and window needed to go.

But we got it built and raised in about 6 hours.

On the 28th we prepped for the work day.

Framing Party:

December 29, 2018

Here you’ll see a couple familiar faces, but mainly these are friends from church and a few others.

These ladies provided us with lunch. It was amazing that we didn’t even have to think about it. They just showed up with the food and we ate!

When all was said and done, we were able to build and raise 8 walls in one day. Eight! On the 27th, we got one. On the 29th we got eight!

We definitely couldn’t have done that without all the help from our wonderful friends.

And then we ran out of the right length studs. Guess my calculations were off.

So, an after-church trip to the lumber store was in order the next day.

Today is Monday the 31st. We have yet another friend coming today to help out. We should be able to finish all the bottom level framing. Then it’s time to put on the floor joists and floor sheeting and then the upstairs walls. But that will take a bit of time. Nothing like 8 big walls in one day!

Probably without even thinking too hard, you can guess what our goal for the New Year is. 😄

Finish this house!

Happy New Year!

Happy Holidays!

Here’s our biggest and best gift this Christmas…

Our wood stove was installed earlier than expected!

This has been a game changer! Not only is the house nowhere near ready to install a furnace, but we plan to heat nearly exclusively with wood, so having this system installed and usable is amazing.

Since we were closing in on Christmas and were loving just hanging out by the stove, we moved some of our collected free furniture into a living room of sorts.

I was even able to spread out for wrapping Christmas gifts. So nice after the last couple of years of using my bed as a table to wrap.

We collected a bunch of junk wood that we had laying around and cut it down to length. I jokingly said that this pile would last us a day or two, and I wasn’t too far off.

With as cold as it was and as small as this wood was, and as little insulated as the house is with gaps still here and there, we went though that wood very quickly.

But it kept us warm enough that we decided to have our Christmas Eve and Christmas morning and day celebrations in the house.

Our first Christmas in our house!

We moved our tiny tree and stockings from the trailer and put them on the scaffold. 😊

And the girls spent Christmas Eve night and Christmas night on the pulled out hide-a-bed. The first people to sleep in our house!

We woke up Christmas morning to a slightly white Christmas. We normally get the majority of our snow in January and February.

So it was magical to have snow on Christmas.

And then we had a good friend give us some actual real firewood.

This stuff burns much slower. It is great to put a few logs on and not have to feed it again for several hours.

On New Year’s Day, we are hosting a movie marathon and we’ll all be down in the house. All because of a wood stove.

So nice!

I hope you all are having a great holiday season, no matter how you celebrate.

Happy Holidays.

House update: Interior Framing!

This is a post I’ve wanted to write for a very long time. The start of interior framing means that our house is beginning to look like a house.

We haven’t gotten very far yet, but it’s started!

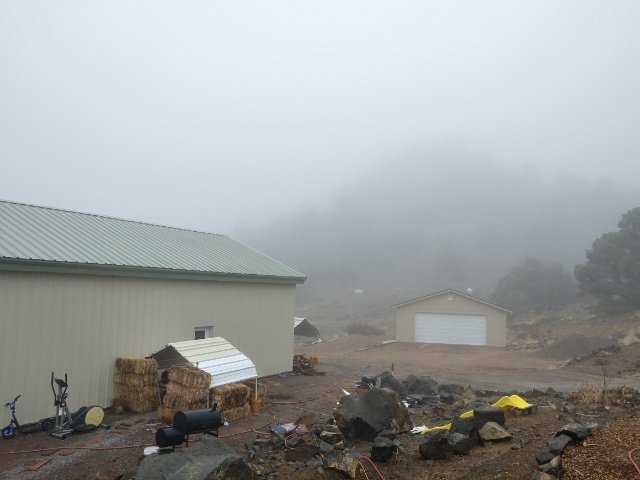
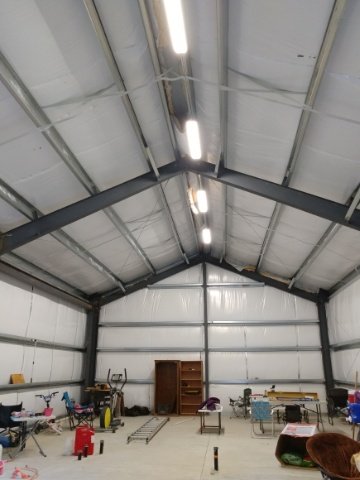
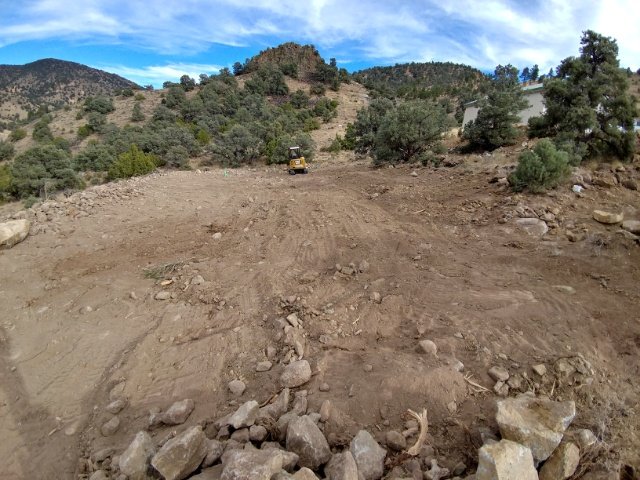
So, as a reminder, the frame and exterior shell of our house is basically a metal warehouse/shop type building.

On the inside

In order to support our second floor/loft, and to have something to attach sheetrock to on the inside, we have to build a 2×4 wall inside the metal frame. It gets attached to the metal frame with brackets and everything is nice and solid and tied together at that point.
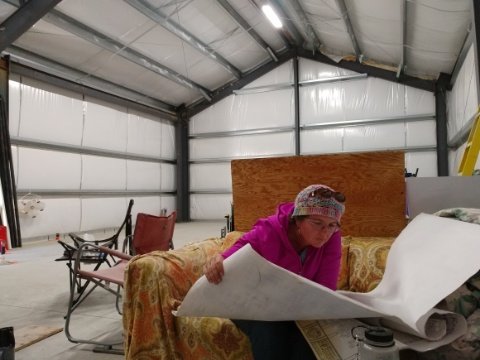
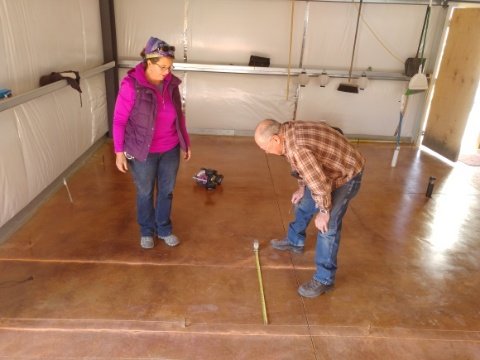
Lay-out:

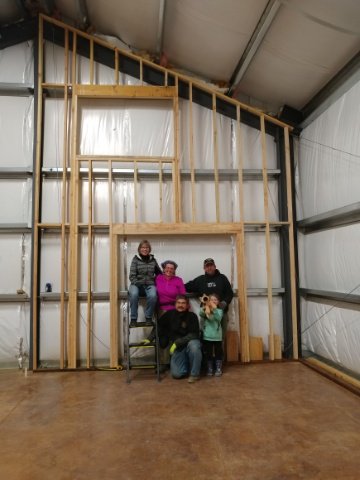
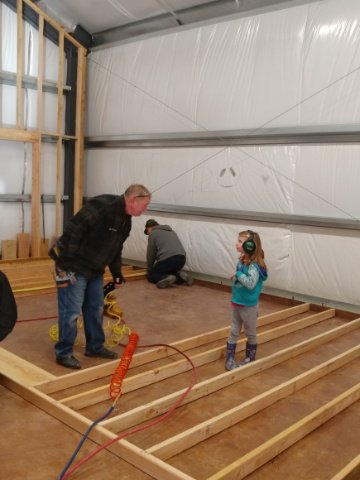
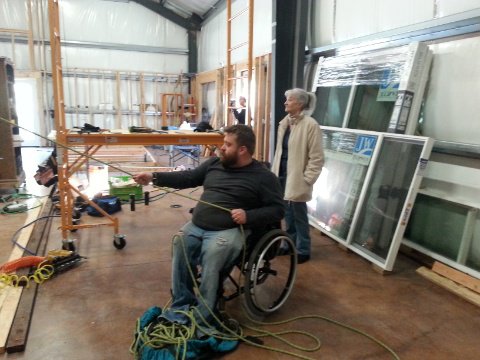
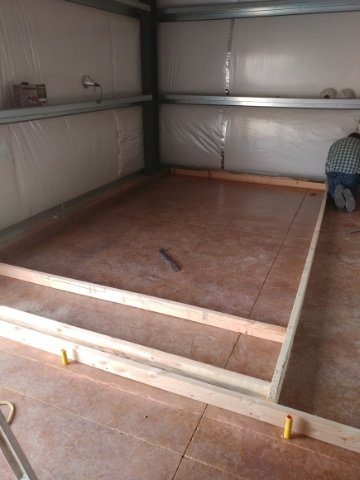
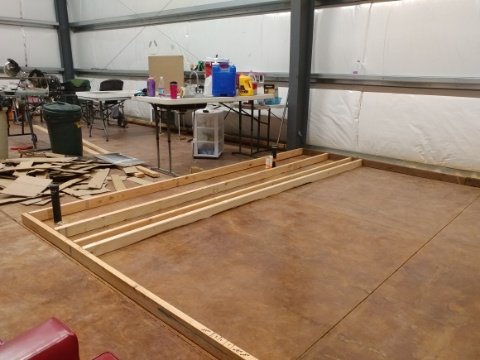
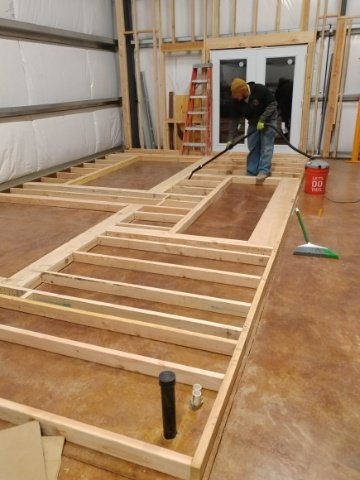
So, on October 24th, our contractor friend – who helped us get our foundation laid – came back to help us lay out our interior framing. (That means measuring where the walls are going to go and marking them on the floors.)

As I write that, I realize it’s been over a month and a half since we started framing, and we don’t have a lot to show for it. But there have been a lot of small things to try to figure out as we go along, birthdays and holidays and sick days and mental health days.

*Sigh*

I guess that’s how it goes when you are an owner-builder. If you’re not doing it, it doesn’t get done. Oh well, we have quite a bit of forward momentum now. Let hope we can keep it up.
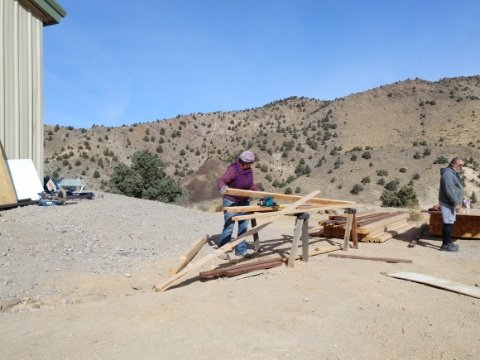
Prepping:

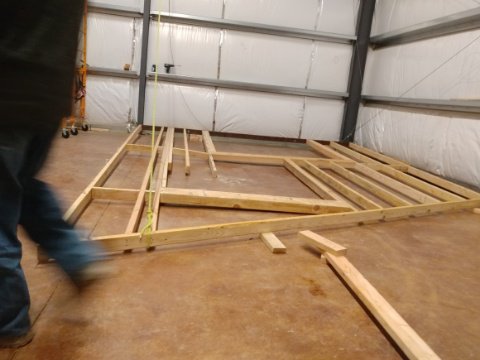
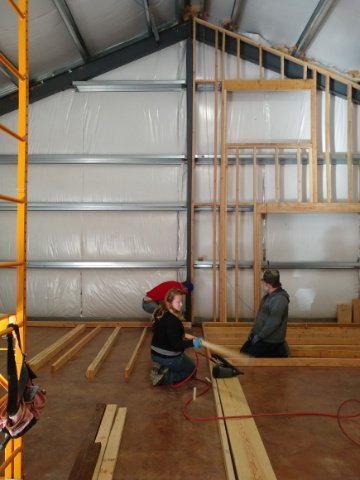
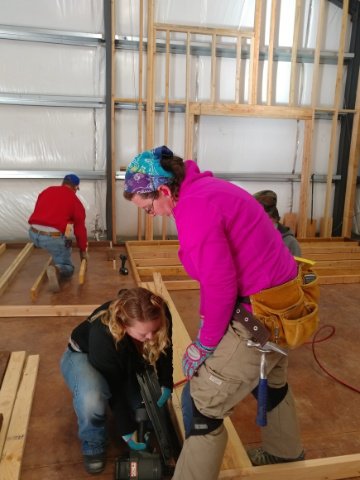
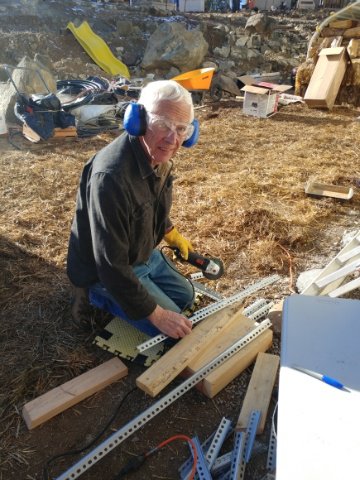
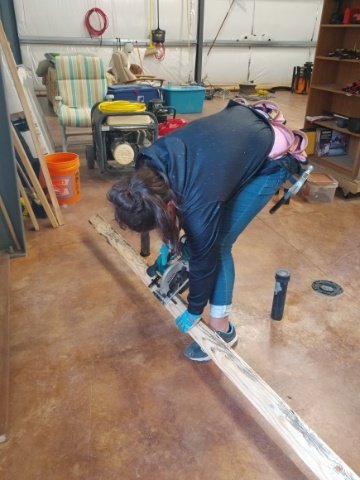
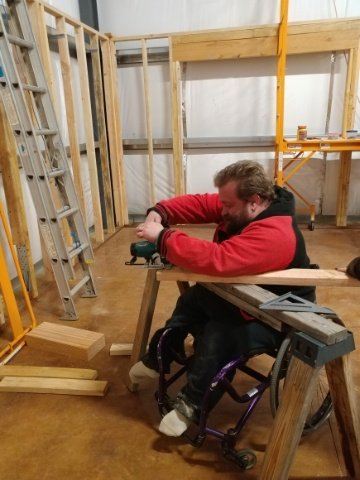
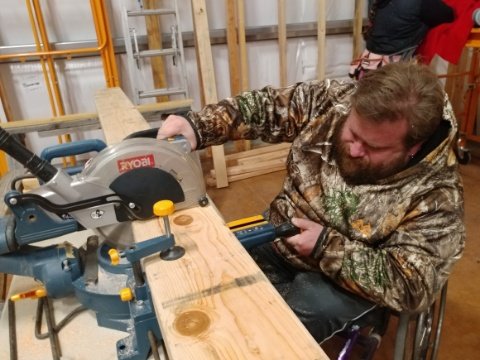
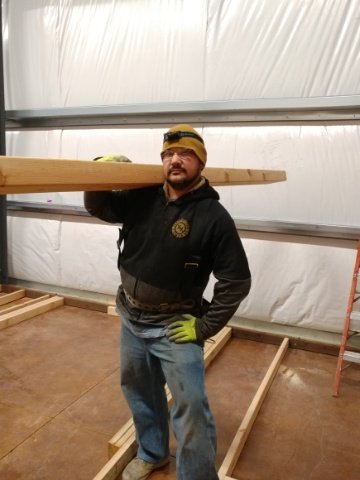
Once we had the walls marked out on the floor and could get accurate measurements, we started cutting sill plates and top plates and studs.

First Wall!:

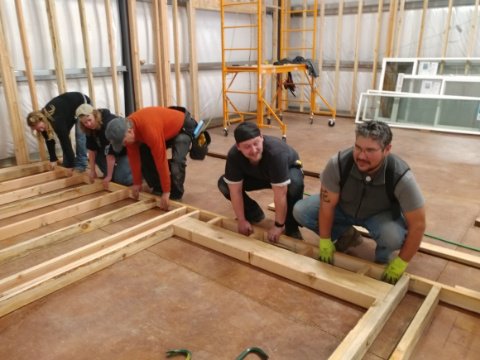
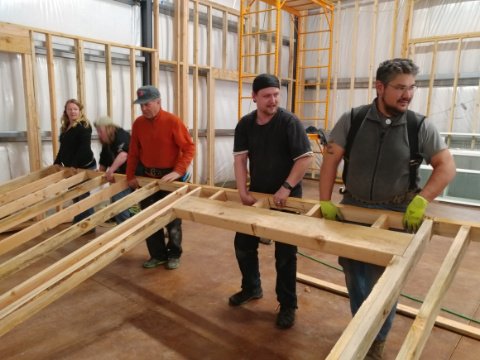
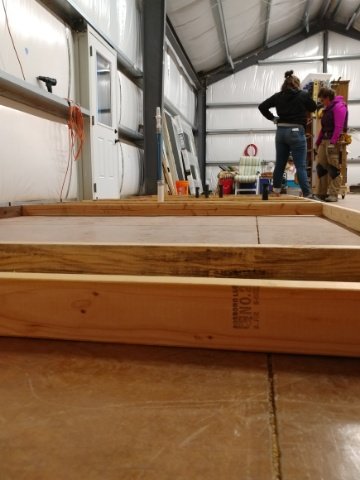
After we had done more prep work, we started actually forming the walls. We chose the front wall first so we could get in a door asap to close off the gaping hole in our building.

We framed the walls on the floor first.

Nearly there. Just a bit more work needed to frame in the window above the front door.

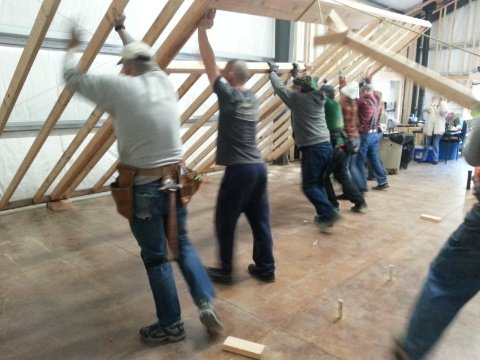
Time to raise it! Mr Contactor had a winch to use, so just the two of us were able to get this entire wall into place.

In fact, I made a little video of the process. (This is my first time trying to embed a video into a blog post, so bear with me if it doesn’t work.)

Ta-da!

The shape looks funny because the right hand side will have a second story on it…eventually.
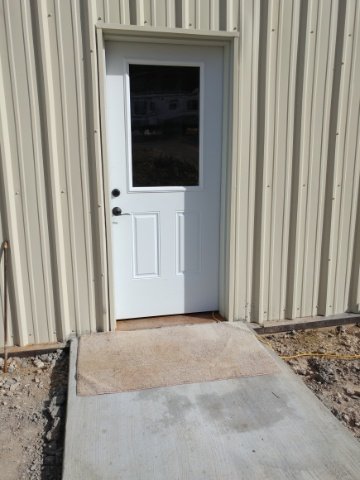
Front door:
After we secured that wall to the metal frame, it was time to install the front door!

In the picture below, I marked where the eventual doors and windows will be cut and placed. It’s gonna be so nice…eventually!

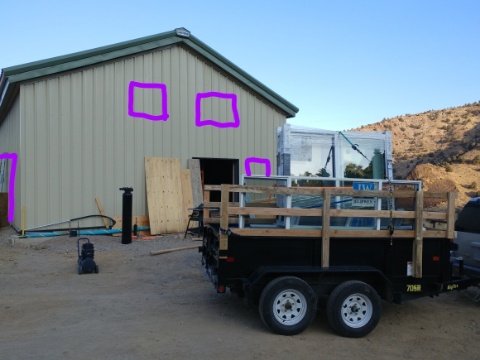
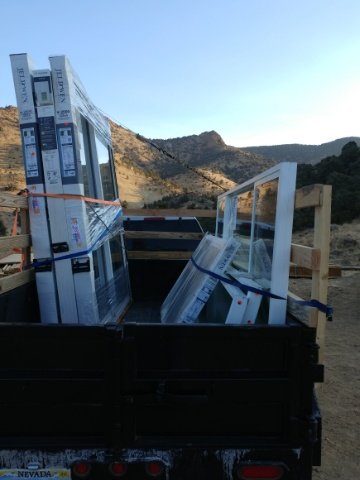
Not nearly all the windows we’re gonna need, but it’s a start!

Then we put the front door into place to test-fit it.

Then moved it back out of the way and applied a thick seal of silicone under the threshold.

Then placed it again, shimmed it, tinkered with the fit for a while, screwed it into place, and now have a fully functioning front door!

Ta-da!

We eventually stuffed insulation around it to stop the drafts.

But it is a beautiful sight to behold.
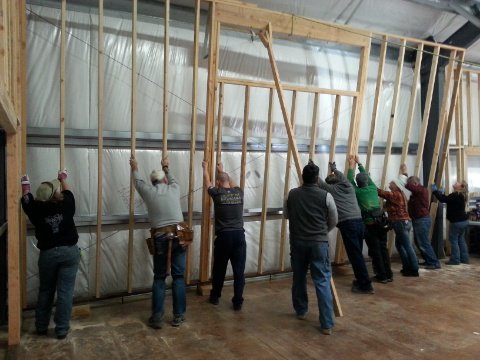
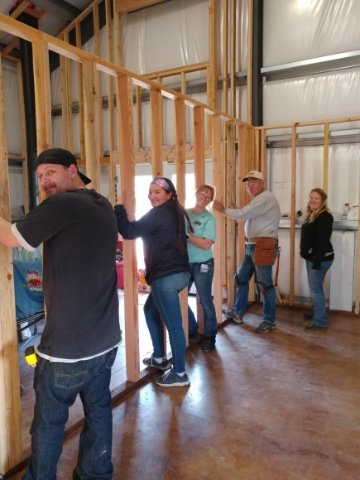
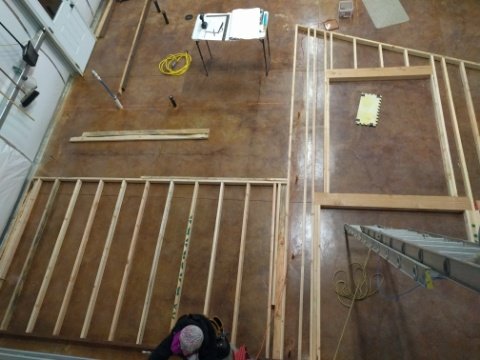
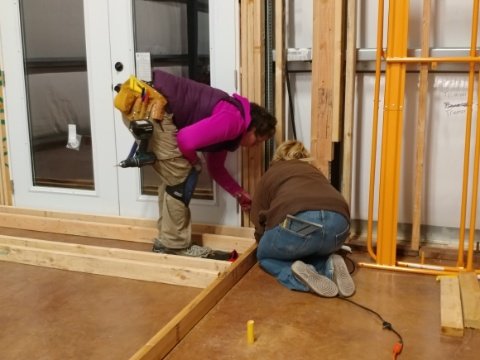
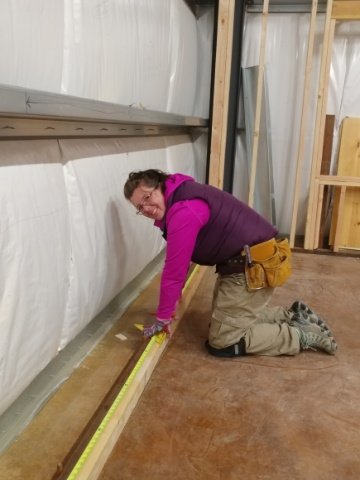
More walls:

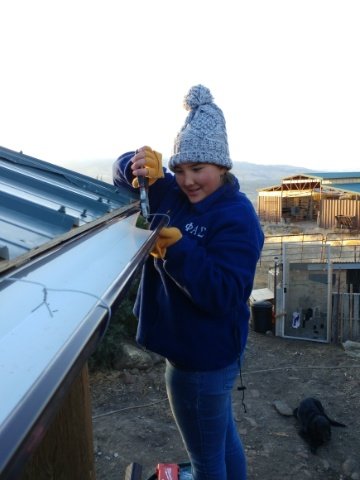
If I were making a video, the next section would be a montage of us putting up more walls. My brother and sis-in-law and her family came on a couple different evenings to help build then raise a couple more walls. (Though the first wall of this montage was was completely built and raised by Hubs, Princess Girl, and myself.)

Made a mistake in the placement of this anchor bolt and had to cut it off. We will replace it in the proper location later.

Even my brother’s dog, Tsunami, came to help. 😁

My studly hubby

Just cleaning up some sawdust so it’s not slippery under foot when we go to raise this wall.

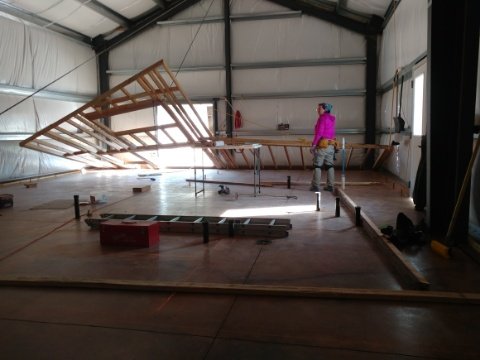
We were not sure how heavy this wall would be to lift, so we wanted to add a bit of safety. We created a pulley type system where the wall was attached at the top by a rope, through an eye bolt in the ceiling, to our other (anchored) wall with a friction device used in climbing. This way, if things went terribly wrong, at least the wall wouldn’t come crashing down on our heads.

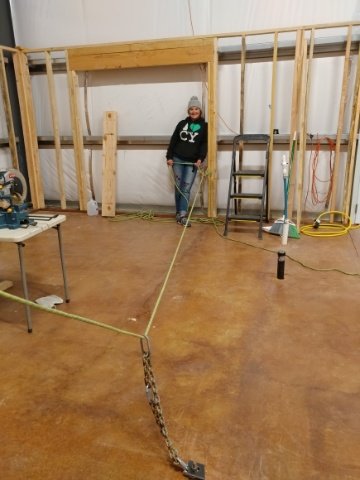
Our safety mechanism.

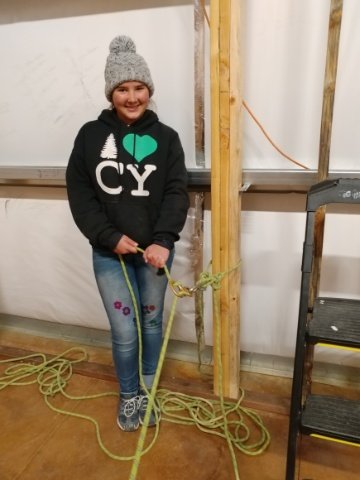
Princess Girl was in charge of taking up the slack and locking the rope as we raised the wall. She was “belaying” the wall just like we do with a climber at the ropes course!

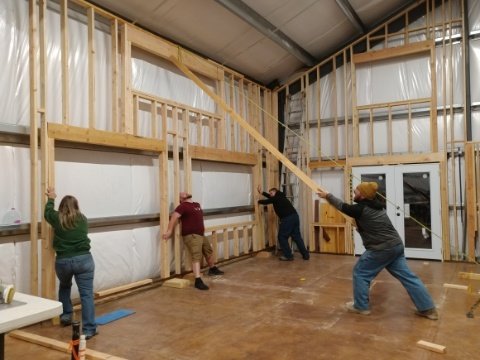
With 5 of us lifting, we “accidentally” lifted the wall into place.

No, seriously, we didn’t really mean to do it. We we’re waiting on Bro and SIL to get there so we’d have a couple more hands and the five of us (Hubs, SIL’s mom and 2 brothers, and I) decided to “just see how heavy it was going to be.” And, fwoop, there it went.

Yes, that’s the actual sound it made.

“Fwoop.”

At least in my mind. 😁

I didn’t have the cameras ready or anything. So I took this “staged” shot of the 4 of then holding the wall in place after it was already standing.

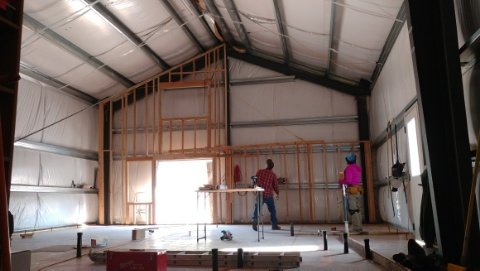
Once we got the wall secured in a few places…

we called it a night and had dinner and just sat around chatting for the next 2 hours. 😁

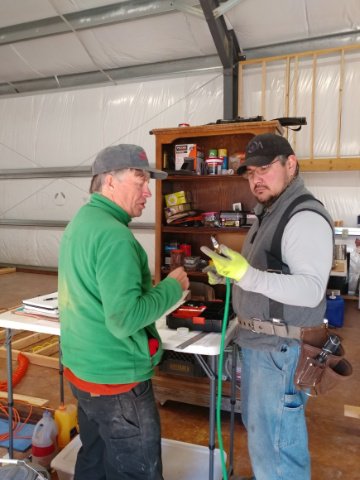
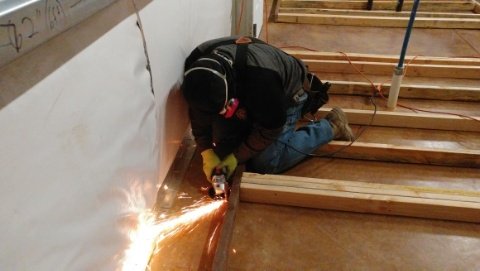
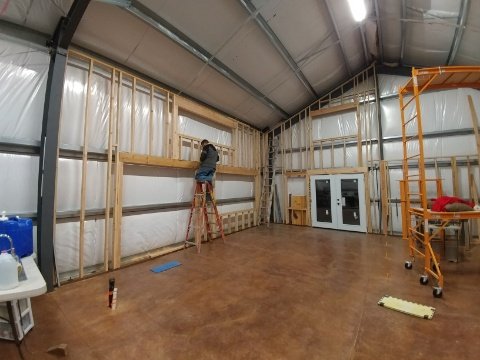
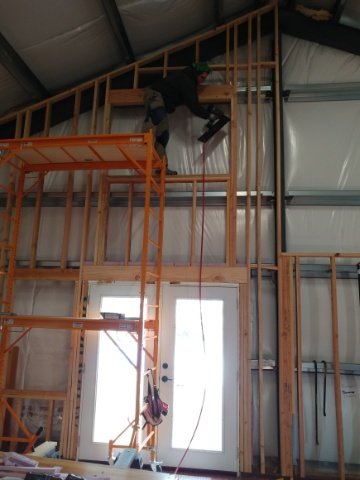
Then we spent another evening or two putting in all the braces and fixing some areas we had messed up on (more on that later).

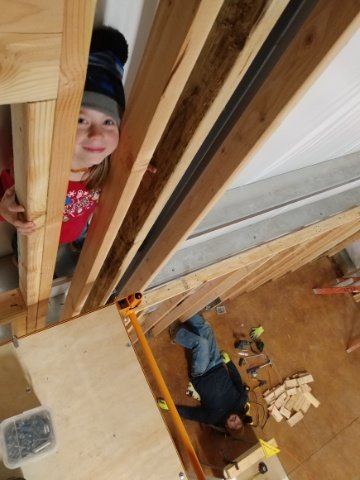
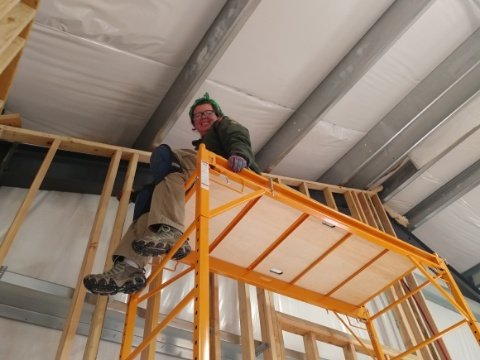
One thing we did do is buy a scaffold. It has already come in SO handy, and will continue to for quite some time to come.

And that’s where we are at right now.

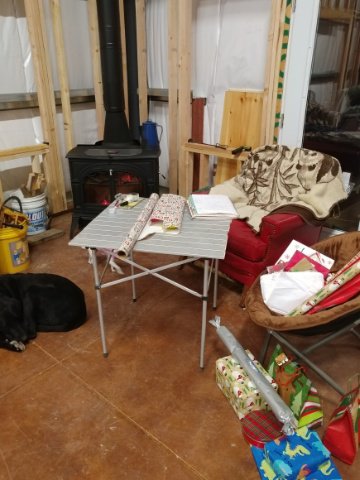
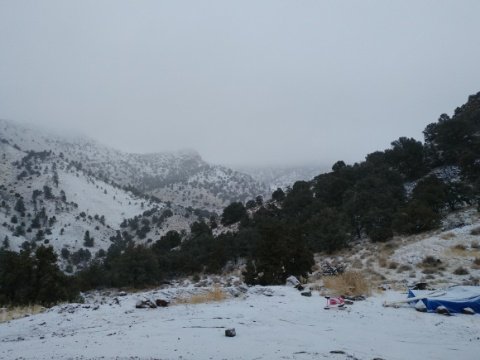
Winter hit here in Northern Nevada and the temperatures dropped substantially. Though there is some insulation on the building, it is not a lot, and without a heat source, insulation doesn’t help a whole lot anyway. So the temps inside the house were getting down into the 30’s and not warming up. We had a snow storm come through and then we stayed cloudy for 10 whole days! That is almost unheard of here in the high desert. When the sun doesn’t come out, things don’t warm up. On top of that, Flower Girl got sick, and I could feel my body fighting a cold, so we decided that until something changes, we’re not going to stress over working in the house.

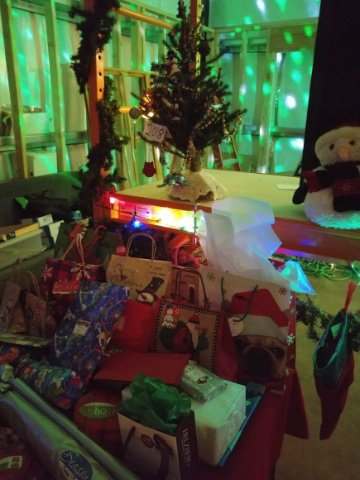
Besides, who wants to be building when there’s cookies to be made?

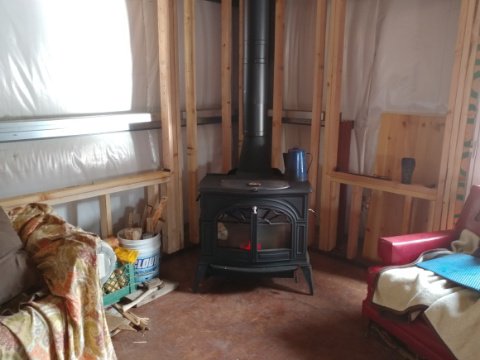
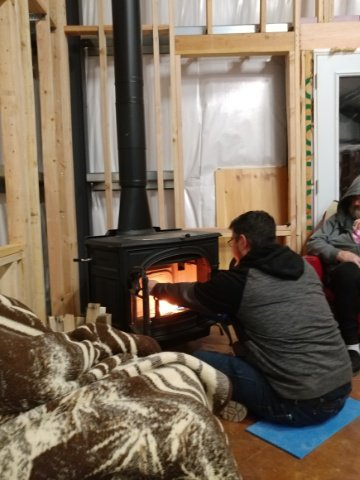
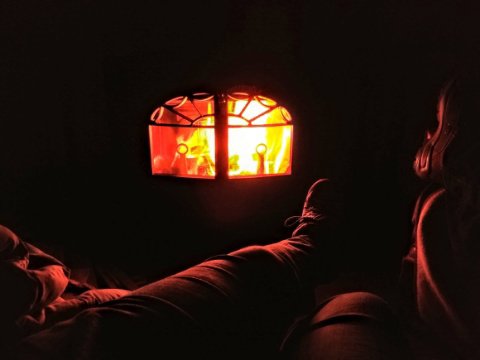
But, things are looking up. The sun has come back out (yay!) and, a huge piece of news, our wood stove is going to be installed next week! Yay! Yay! Yay! We will soon have a source of heat in the house, and will have no more excuses not to get rocking and rolling once more.

(Except…cookie baking, fudge making, present wrapping, feast eating…!)

We are so excited to get that stove in and have real heat in the house so we can keep on working (maybe after Christmas?). It’s going to be so. Very. Nice! What a great Christmas present!

House update: Floor staining

Starting near the beginning of October and lasting for a couple weeks, we worked on staining our concrete slab. We knew that it was going to be a whole heck of a lot easier to do the floors before any of the interior walls went up, and we had a run of really mild temperatures, so we decided to git ‘er done.

It took so long because we had no experience with acid staining concrete, and we did it in sections in order to test our procedures. So in some of the pictures below you might see areas that are already stained in the background.

The first step was to clean out the cut lines.

Flower Girl was very helpful in this since she liked to scrape out the cracks and vacuum up the mess.

Once the cracks were cleaned out, it was time to wash the floors.

Scrub, scrub, scrub

Brother and sis-in-law came to help and to learn the process. We really appreciated their help!

It felt really weird to run the hose in the house to rinse off the degreaser/cleaner (and later the stain). But with one person on the hose controlling the flow, and the other people using the squeegee and push brooms, we were able to keep the puddling to a minimum.

The next step was to make sure all the water was cleaned up. The easiest way to get all the water was to sweep and squeegee out the majority, then use the shop vacs for the remainder.

Once the floors were dry, it was time to apply the acid stain with a weed sprayer.

This was the easy part!

Once the stain had sat and developed for 8 hours, we neutralized it with ammonia water and then had to rinse all of that out the doors.

We had to run the big generator in order to run all three shop vacuums at once.

And then it was time to wait. Once the stain was neutralized and rinsed, we had to wait for it to thoroughly and completely dry before applying the sealer. Since we were testing procedures as we went, we needed to wait each time we did a section to get some sealer on it to see what the final result would look like. That’s why it took so long to get everything done.

But finally, we did get it all stained and sealed.

Applying the sealer

Before the seal

And that’s when we ran into problems. For whatever reason, when we applied the sealer in some areas, it turned a milky white when it dried.

After much trial and error and frustration, we discovered that a stiff scrubbing pad, water, and a LOT of plain old elbow grease would strip the sealer off the floor. So for two days we scrubbed those floors. We had to be careful since too much scrubbing would eventually strip the stain off the floor as well.

This job was too much like playing Cinderella.

But eventually we got the problem spots scrubbed off and once again waited a few days for everything to dry completely. Then applied the sealer, doing some experimenting in order to avoid the previous issues.

And just like that, our floors are finished! Of course now, one month and some more building later, and they are completely covered in dust and dirt. But that will sweep and mop up. We might have to touch up a couple areas, but for now, it feels good to have yet one more project done!

House update: miscellaneous jobs

You know when you have that big project on the horizon that you need/want to start working on, but for whatever reason you can’t yet but there’s a long list of projects to do so you gotta get them taken care of and when you finally do them you realize it actually feels good to be able to cross something off the list and you wonder why you procrastinated so long because, I mean, you’re not working on the “big project” right now anyway?

*Takes a deep breath after that extremely long run-on sentence.* 😉

Yeah, we’ve crossed quite a few need-to-do little projects off the list in the last couple of months since getting the septic finished. Some of them so small, I didn’t even bother to take pictures. But some of them were significant enough that they have made our life so much easier.

Like our garden hose hydrant. We dug a trench (more trenching!) from where our water line crosses the driveway over to where we wanted the hose faucet next to the landscaping rocks.

The trench.

Tee into the water main

Princess Girl got in on the action

The gravel in the bottom of the pit is to aid in drainage since this is a frost-free hydrant. That means that every time the water is shut off, the water that is in the top of the pipe drains out of a small hole at the bottom of the trench so there is no water up in the pipe or faucet to freeze in the winter. We did put in a shut-off valve just in case we ever need to shut the water off to the faucet for any reason, but theoretically, we shouldn’t ever have to use it.

We have water!

And it works like a charm! And made our water situation around here so much easier! Watering the gardens were a breeze with 1700 gallons on tap. Yep, that’s how big our cistern is. We fill it up from the well as needed (every couple of weeks at the end of summer) and it supplies all our outdoor and animal watering needs. Right now it is mid-November and we haven’t gotten any moisture all season long. Great for working outside, not so great for our fruit trees and perennial plants. So we’re still having to water the trees and gardens every once in a while. This hydrant also makes it super easy to re-fill our rain barrels (because, you know, no rain). We use the water in the rain barrels for the animals. Before having the hydrant, we would have to turn on the big generator and well in order to fill barrels, etc. Now, with 1700 gallons of water at our disposal, we only need to fire up the genny and well pump every…actually, we don’t know how long it will take us to go through that much water this time of year. Suffice to say, it will take a while. And since it’s all under ground, it won’t freeze during the winter. Yay!

Another project we were able to check off the list was to move the electrical conduit for the garage. We hired out having the garage built, and we ended up needed to scoot the whole building back a few feet, which means the place where we originally had the conduit coming up was no longer in the correct spot.

New perimeter lines drawn

You can see in the pic above that the conduit was now several feet away from the wall of the garage. So, once the construction crew dug the footers, we came in and extended the conduit so it comes up inside the garage near the wall where our solar power system will be installed.

Electrical conduit extended

Again, not a huge job, but it HAD to get done.

Another small job that made our life so much easier was installing shop lights in the house.

Let there be light!

Now that the days are shorter, we needed light in the house so we can keep on working after the sun goes down.

And speaking of the days being shorter, and therefore colder, we finally got our laundry room door ordered and then installed.

A real door!

We could have had this door in place since January since it’s frame is part of the steel building, not the interior wood frame like all the other doors will be. But last winter and spring we were on hold with the house and the house only had this one wall anyway. And over the summer it wasn’t needed because of the weather. It was only when it got cold enough that we needed to stop the breeze from blowing through the house that we got our butts in gear and got it done.

And yet another small job we got done recently was replacing the rain gutter on our mud room. We had scabbed together something when we first built it, but after two winters it needed to be replaced. So we got a real gutter system. And now we’re set for this winter. And hopefully we’ll get a lot of rain and snow this year. We need it!

Princess Girl is learning all sorts of skills living here on the homestead.

So much nicer than the old system.

And that’s about it for now. As I said, there were plenty of other odd jobs done that I just didn’t document. And in the middle of all that, there was one major project that we worked on over the course of a couple weeks…

The floors!

But that’s a post all on its own. For now I am going to sign off.

I gots things to do!

House update: Septic Phase 2

Finally, I feel like we’re making progress! In fact, I have so much to share, I’m putting it in several blog posts to keep it all straight. 😁

So, last I left off, we we’re just starting on our leach field. I naively stated that “by the end of the week” we hoped to have a completed system.

Ha!

It wasn’t that was hit any unexpected problems. It was more that the problems we did face we’re harder to overcome than we expected. Namely, we had no dirt with which to backfill the leach lines. It was mostly just rocks. So, we had to purchase and haul in dirt. Again.

But I’m getting ahead of myself.

First thing we had to do was dig the trench for the sewer pipe from the already buried septic tank, down the hill to where the leach lines were going to go.

Blessedly, Pops was on hand to dig once more.

My mom came to help, too!

We only ran into one huge Boulder which we just couldn’t budge with the small excavator we rented. But, a friend had a jackhammer that worked to get the boulder out of the way.

Our excavation crew. We are blessed with great friends who come to help us out.

Completed pipe from the septic tank down to the distribution box.

While we were working on the pipe, Pops was digging the trenches for the leach chambers. So once we got the pipe laid, it was time to bring down the chambers and start laying those.

We chose this system because the trenches only need to be 3 feet deep and no gravel is needed. And it’s very easy to put together. And handle. And transport. Etc, etc, etc.

Pajii finds a bit of shade inside a septic chamber 🤣

Leveling the ground in preparation for another chamber.

Making sure the previous chamber is level.

Prepping the ground for yet another chamber.

Once the chamber is in place, dirt is shoveled in on the sides to hold it in place. That’s where we ran into issues. We had trouble finding enough rock-free dirt to cover the chambers.

Digging the third and final trench.

Sometimes, the big tools had to come out to make the chambers level.

Pajii once again inside one of the septic chambers. 🤣

Each leach line was 80 feet long.

We got all three lines laid and partially buried, then had our inspection. Which we passed, no problem!

Here you see the leach field in relation to the house. What you can’t tell is just how steep that hill is.

Now it was time to backfill.

But again, how to get the backfill material from the trailer to the pipe when you’re dealing with steep, rocky terrain?

Buckets. Lots and lots (and lots and lots) of buckets full of sand.

If I never have to move sand by bucket again, I’ll be happy. 😉

Once we had a good layer of sand on top of the chamber, we could then push the native dirt (full of rocks) back over the top.

Goofball!

The hubby and I got real good at handling the mini-ex.

Aaaaand we’re done!

And that’s it. A completed septic system. It felt so good to know that we have another huge portion of our build completely done.

So now we have a fully functional septic system. But of course, nothing is hooked up to it. We have dumped the trailer sewer tanks in there a couple times since it’s been done, and that’s been great. Not having to go into town to empty those is a blessing indeed.

But let me tell you, that first toilet flush in our new house is going to be magical.

Once we finished the septic system, we turned our focus to the inside of the house. Primarily, the floors. But that is another post. I want to get this one sent off into cyber space and get back to working on the house rather than writing about it.