Tag Archives: Sustainable Lifestyle

Fostering chicks

So. We live in an off-grid tiny home (ie a 280 square foot camping trailer) and we’re busy building a house. Just the situation and time to bring home 17 baby chicks from the feed store, right?

No? You don’t think so?

I think you’re probably right. But we brought them home anyway. 

You see, we had a plan!

We had two hens go broody, and while we eventually decided that we didn’t want them to hatch any of our own eggs (we don’t want our rooster procreating), the idea of baby chicks had taken hold.

So, we put one of the hens in her own penthouse suite (ie, and old dog crate), and let the other sit in one of the egg laying nests in the main coop.

Broody hen in her kennel

Both hens were sitting on a few golf balls. These make excellent, cheap imitation eggs. 

Our plan was to let them sit on their “eggs” for a few weeks, then buy chicks from the feed store and do a little switcheroo and the hen will think her “eggs” hatched.

Or so the theory goes. 

And I’m here to tell you that it works! 

Kinda.

Here’s our story.

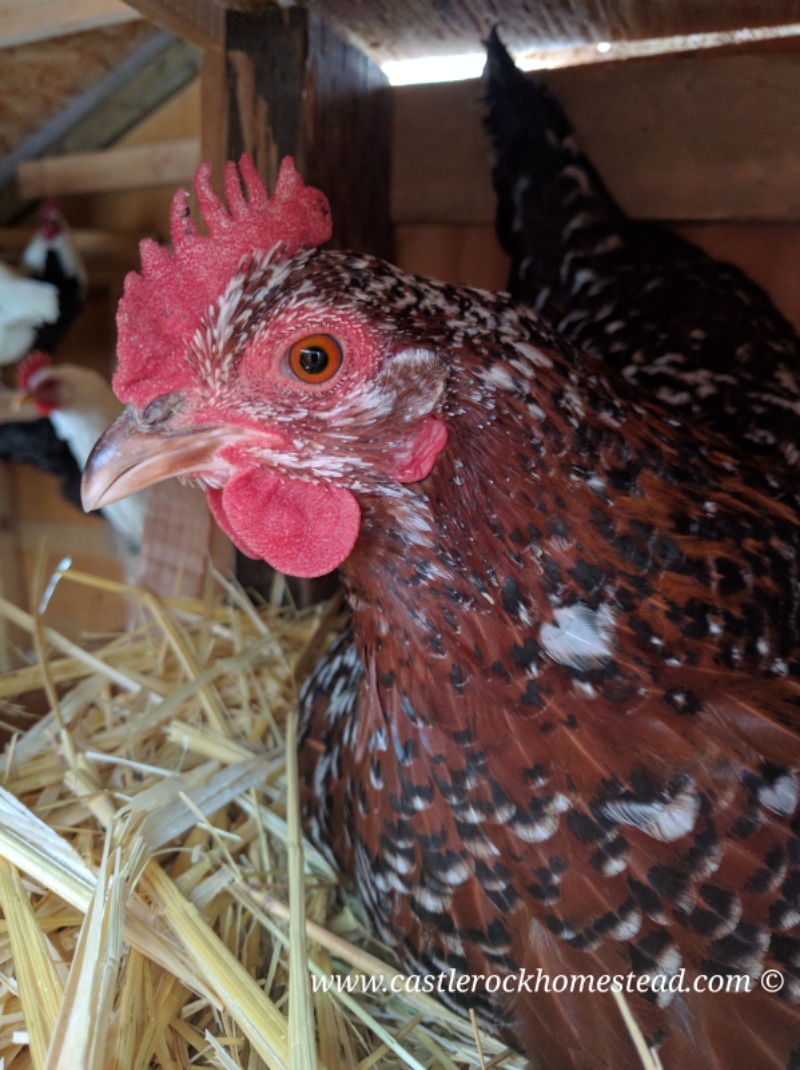
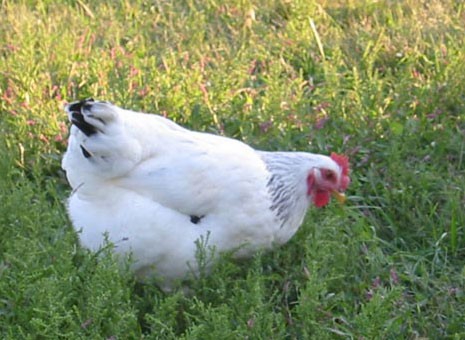
On Wednesday, April 19 we bought 9 chicks (4 Gold Sexlinks, 4 Ameracaunas, and 1 Golden Laced Wyandotte). We gave the chicks to our broody Austra White, “Bluebell” (so named because she has a blue band on her leg) at about 4pm. 

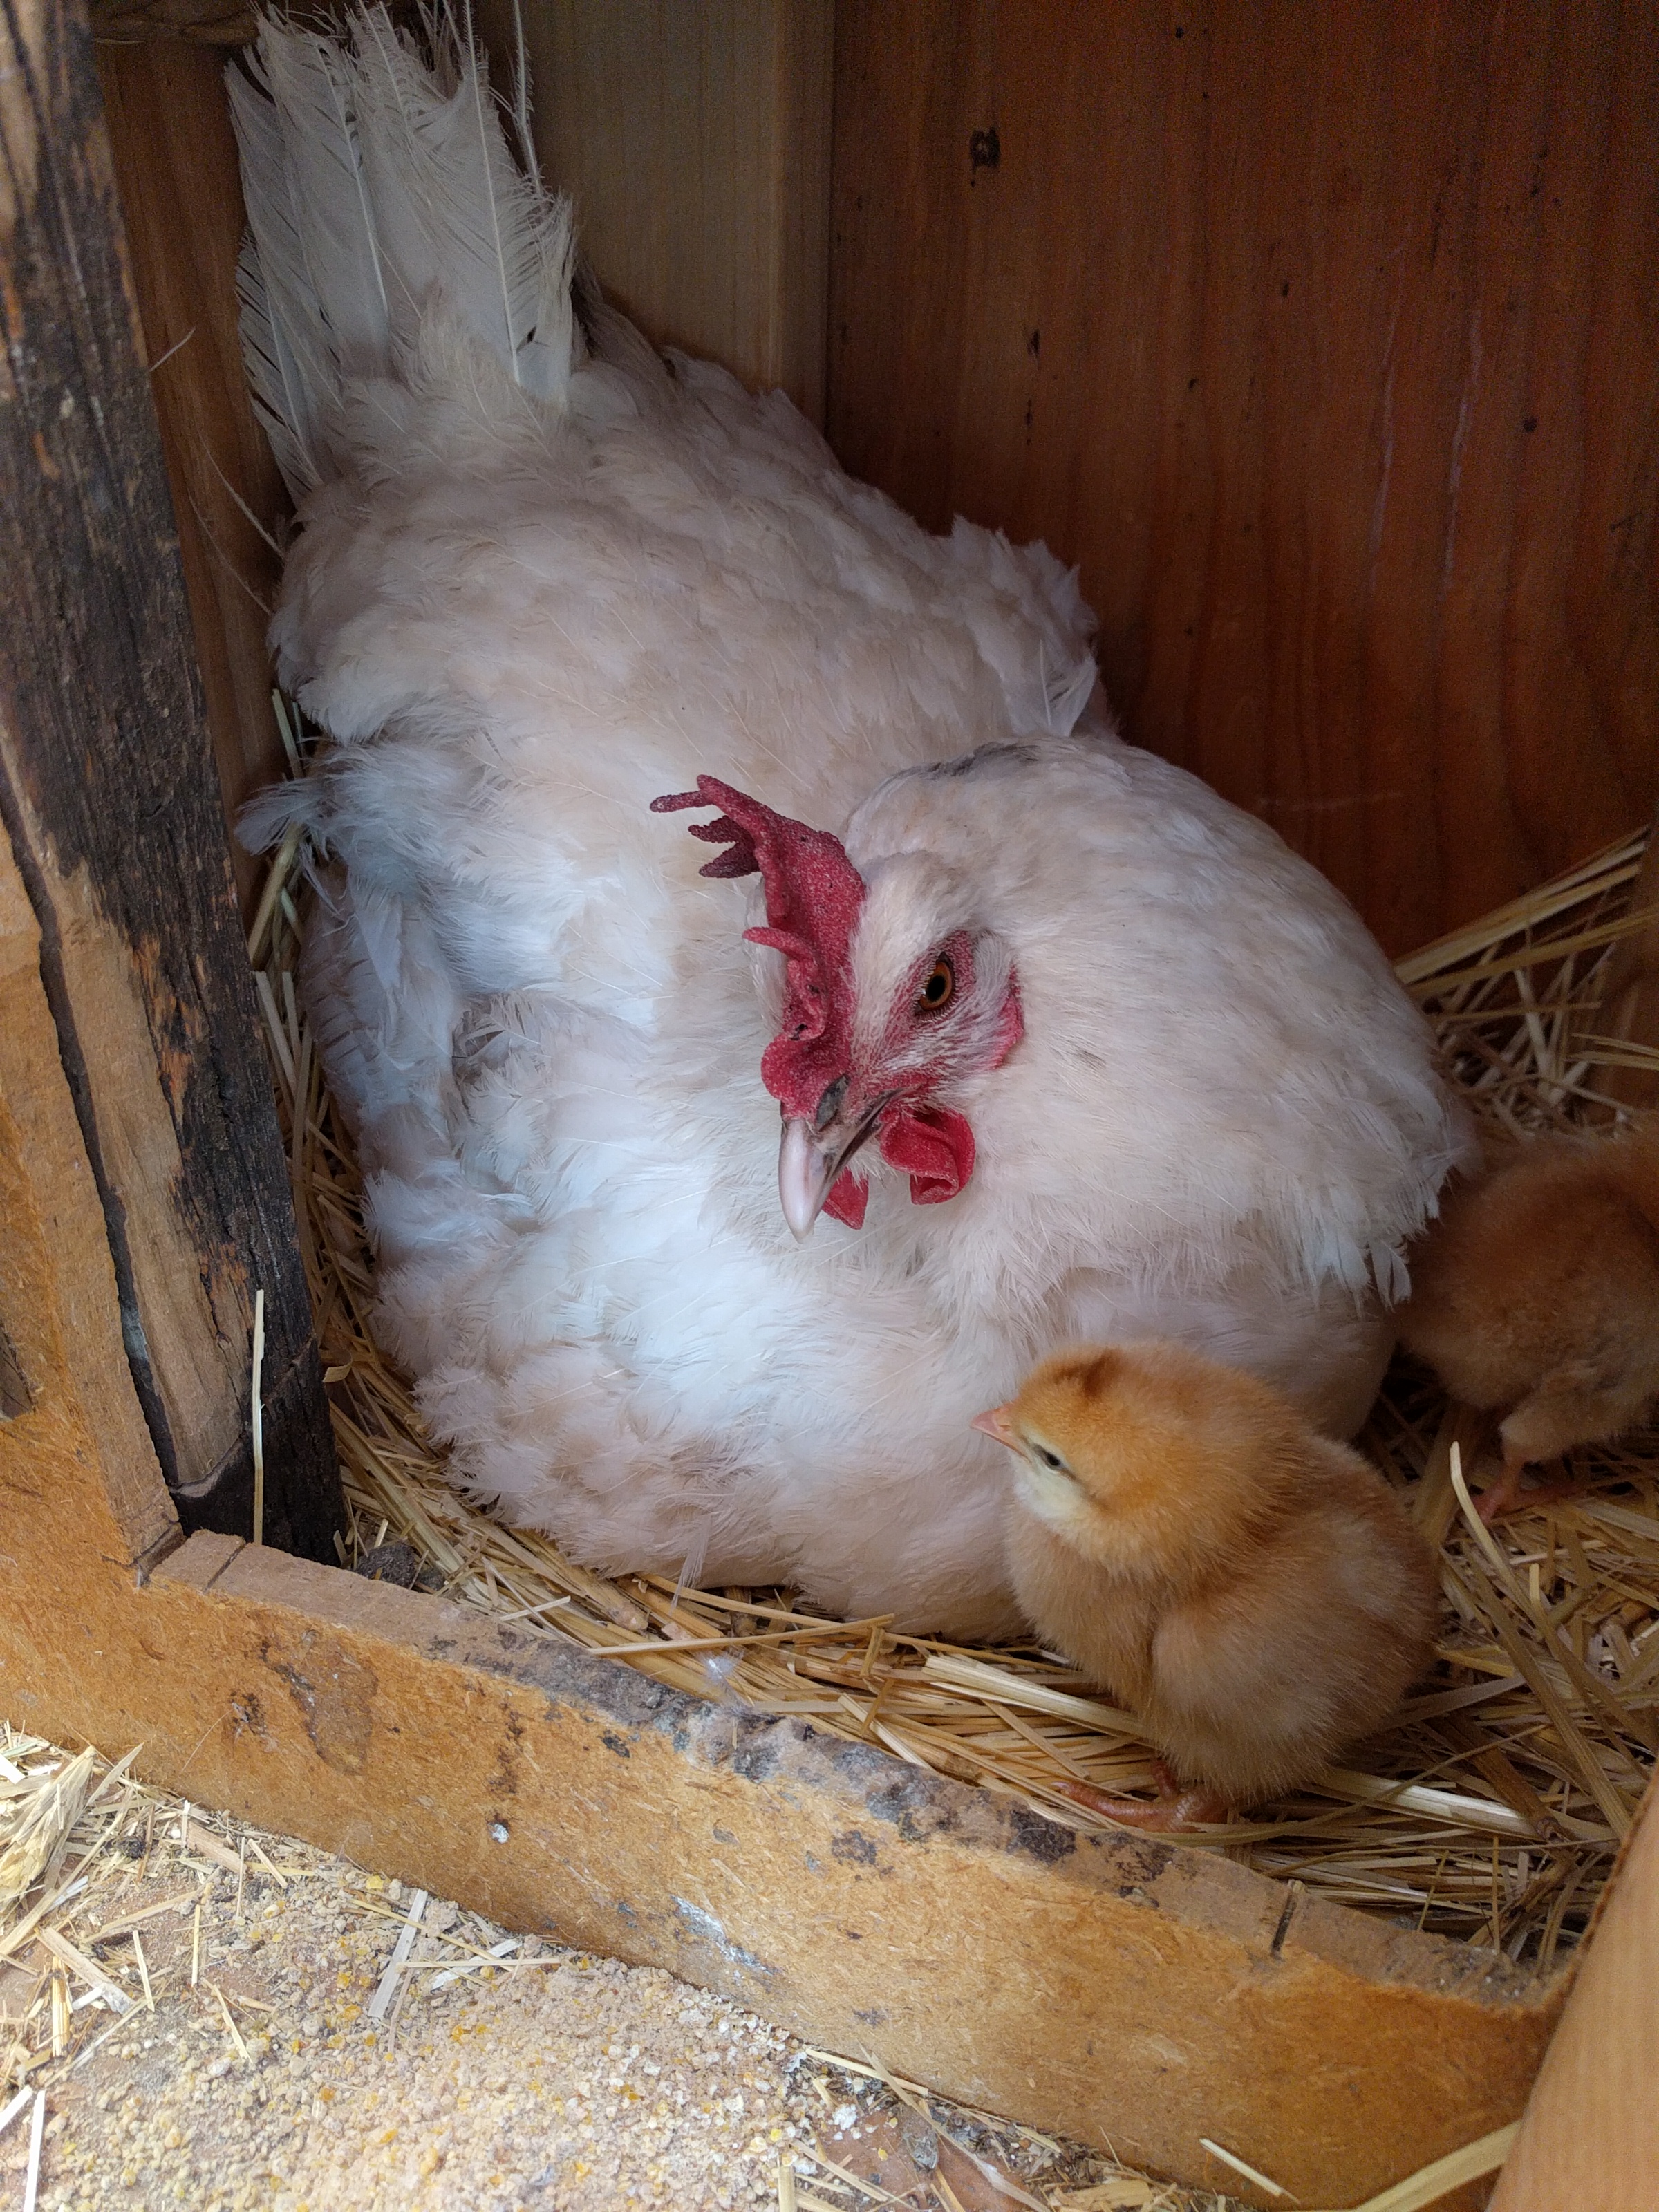
Bluebell and a couple of her new chicks

She was a bit confused at first, and the chicks didn’t know what she was, but within about 10 minutes, all the babies were snuggled up under their new mamma and she was happily clucking away to them.
The next morning, they were all out in the enclosure I set up inside the coop so that they had a bit of space to move around, but would be separated from the rest of the flock. They hung out in this space for a couple days. I figured by using crates, the other hens would be able to get used to the chicks so that by the time I started letting them out into the larger area and even out into the run, there shouldn’t be any problems.

Inside their enclosure inside the coop.

At this point, everything was going so well. I was exstatic that it was working out just as I’d read about. Bluebell was a good mamma. She kept the babies warm when needed, and was even careful how she stepped around them.

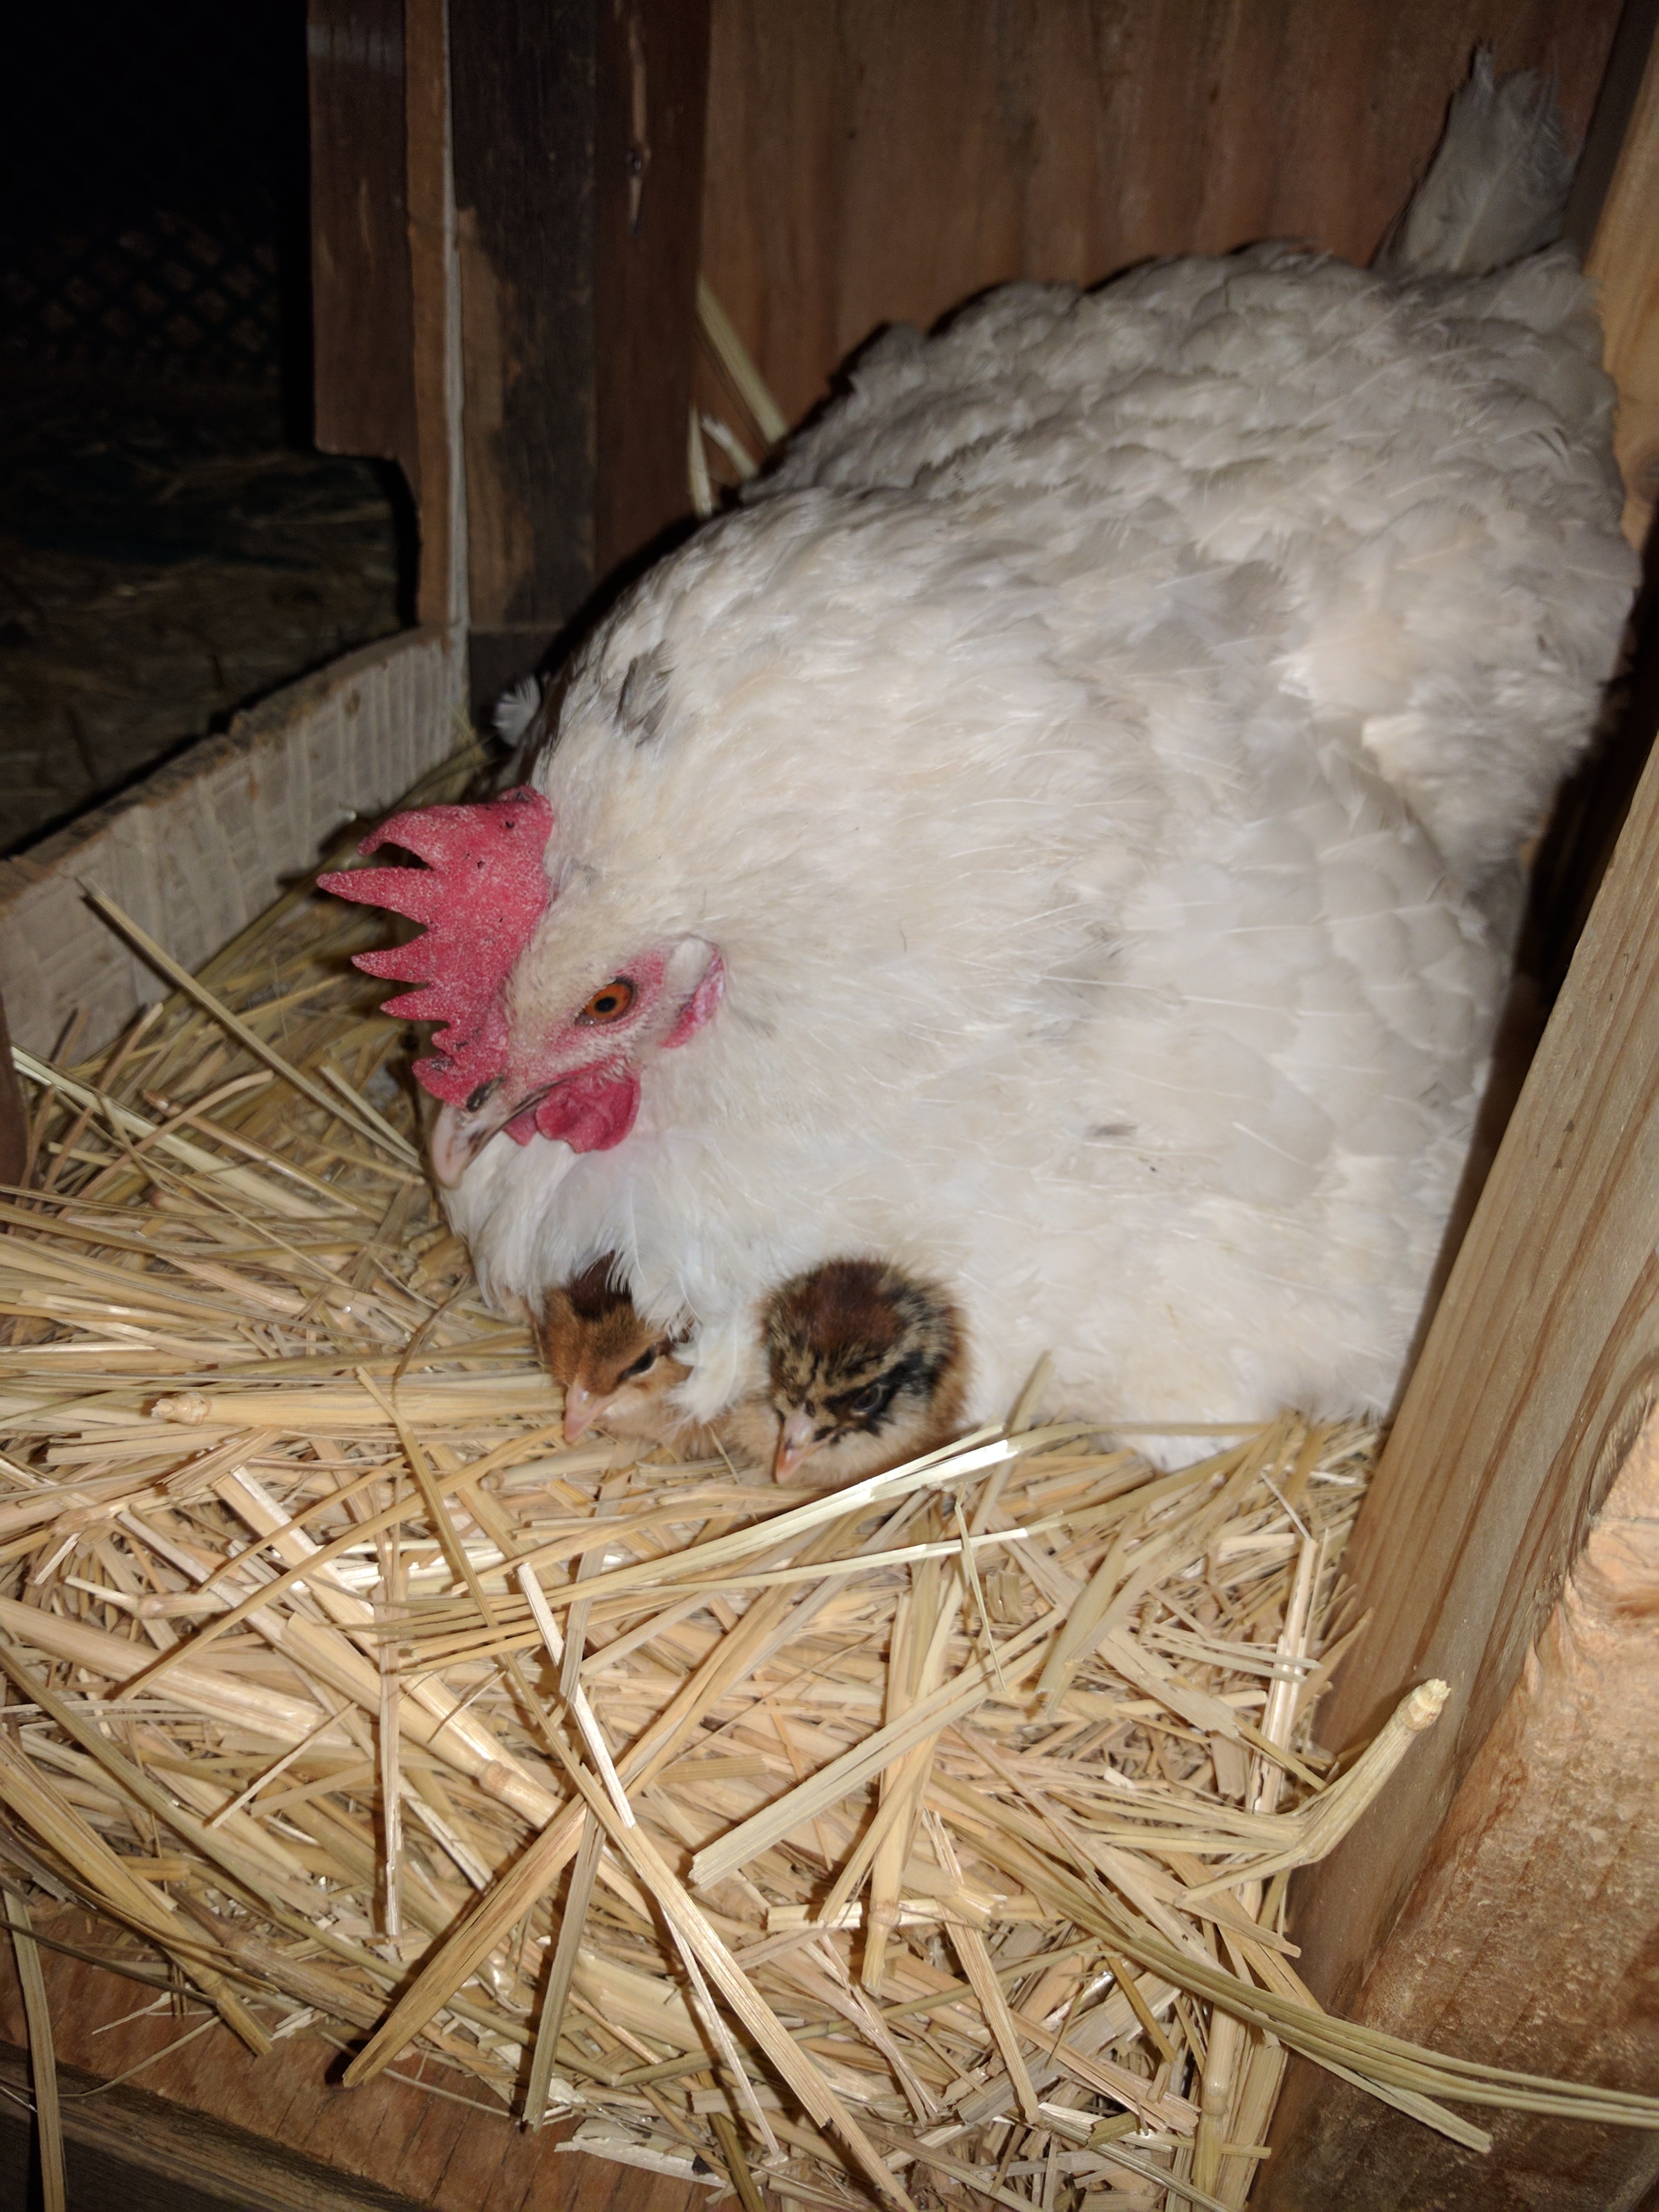
Good mamma, keeping her babies warm!

I was excited for Phase 2: more chicks to give to “Roadie”, our other broody hen.
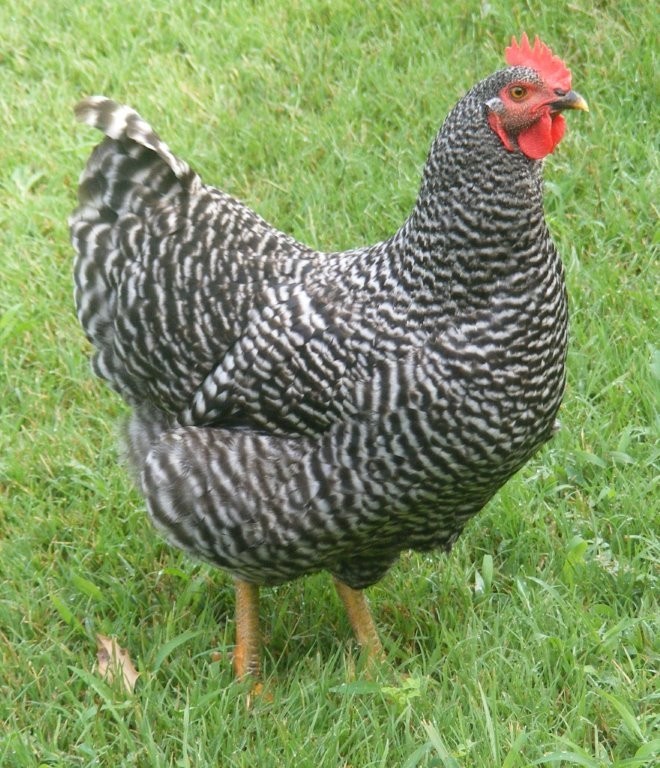
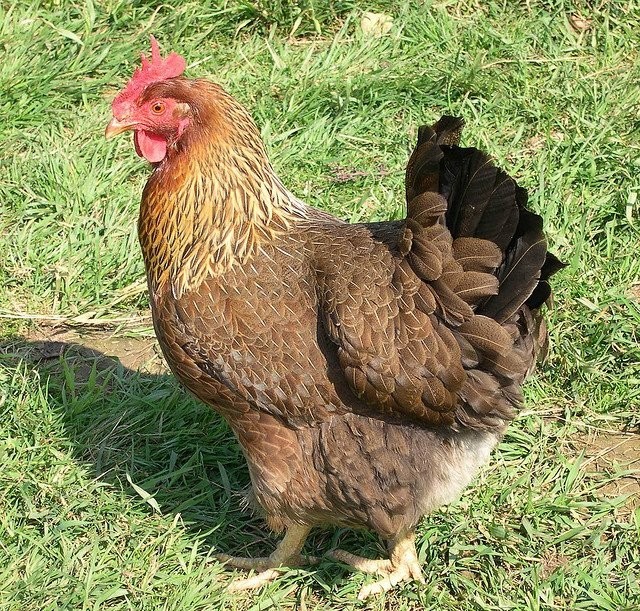
On Friday, April 21, we bought another 8 chicks (4 Welsummers, 2 Barred Rocks, and 2 Delawares.)

We attempted to repeat our success.

And that’s where everything went to pot.

Roadie rejected the chicks! 😞 She kept pecking them away. More on that later.

So now we had 17 chicks and only one mamma hen. I have heard stories of a hen hatching out and caring for a large brood, so I figured we’d try giving the other chicks to Bluebell and hope she could raise them. At least for the night until we got a brooder of some sort set up for some of them.

It worked. Kinda. 

On Saturday morning, I found a chick dead in the nest box. It had been crushed. 😢 Seems 17 was just too many. Go figure.

And a weird thing that morning is that Bluebell was pecking at two of the new chicks. Just the two Barred Rocks. None of the others. So we rescued those two and set up a brooder box for them. And we figured that since we had to do it for two of them, we’d pick out several others and lighten Bluebell’s load. 

So, besides the two Barred Rocks, we grabbed a Welsummer, a Sexlink, the Wyandotte, and one of the Ameracaunas. The Wyandotte and that particular Ameracauna are special to Flower Girl and Princess Girl. 

That left 10 chicks with Bluebell. Five of them are from the older group, and 5 are from the younger group. Two days age difference doesn’t make hardly any difference at all.

And she has been a great mamma. They are just over a week old now and have started roaming outside and even free-ranging with the flock. 

Mamma in the chicken run, babies small enough to free range through the fence. (But they never get too far from mamma!)

The other hens and the rooster leave the chicks alone, even Roadie who is back in with the flock. I have seen Bluebell run off the other hens if she doesn’t want them around, and she gets antsy if the chicks wander too far away from her, especially if they are on the other side of the fence from her!

It is great to have all those little chickies running around! 

I feel kinda bad for the ones in the brood box in our mudroom. They don’t get to run and scratch and play outside like Bluebell’s brood. Maybe I’ll have Flower Girl take them outside tomorrow and set up a little space where they can get some of the same experience. 😃

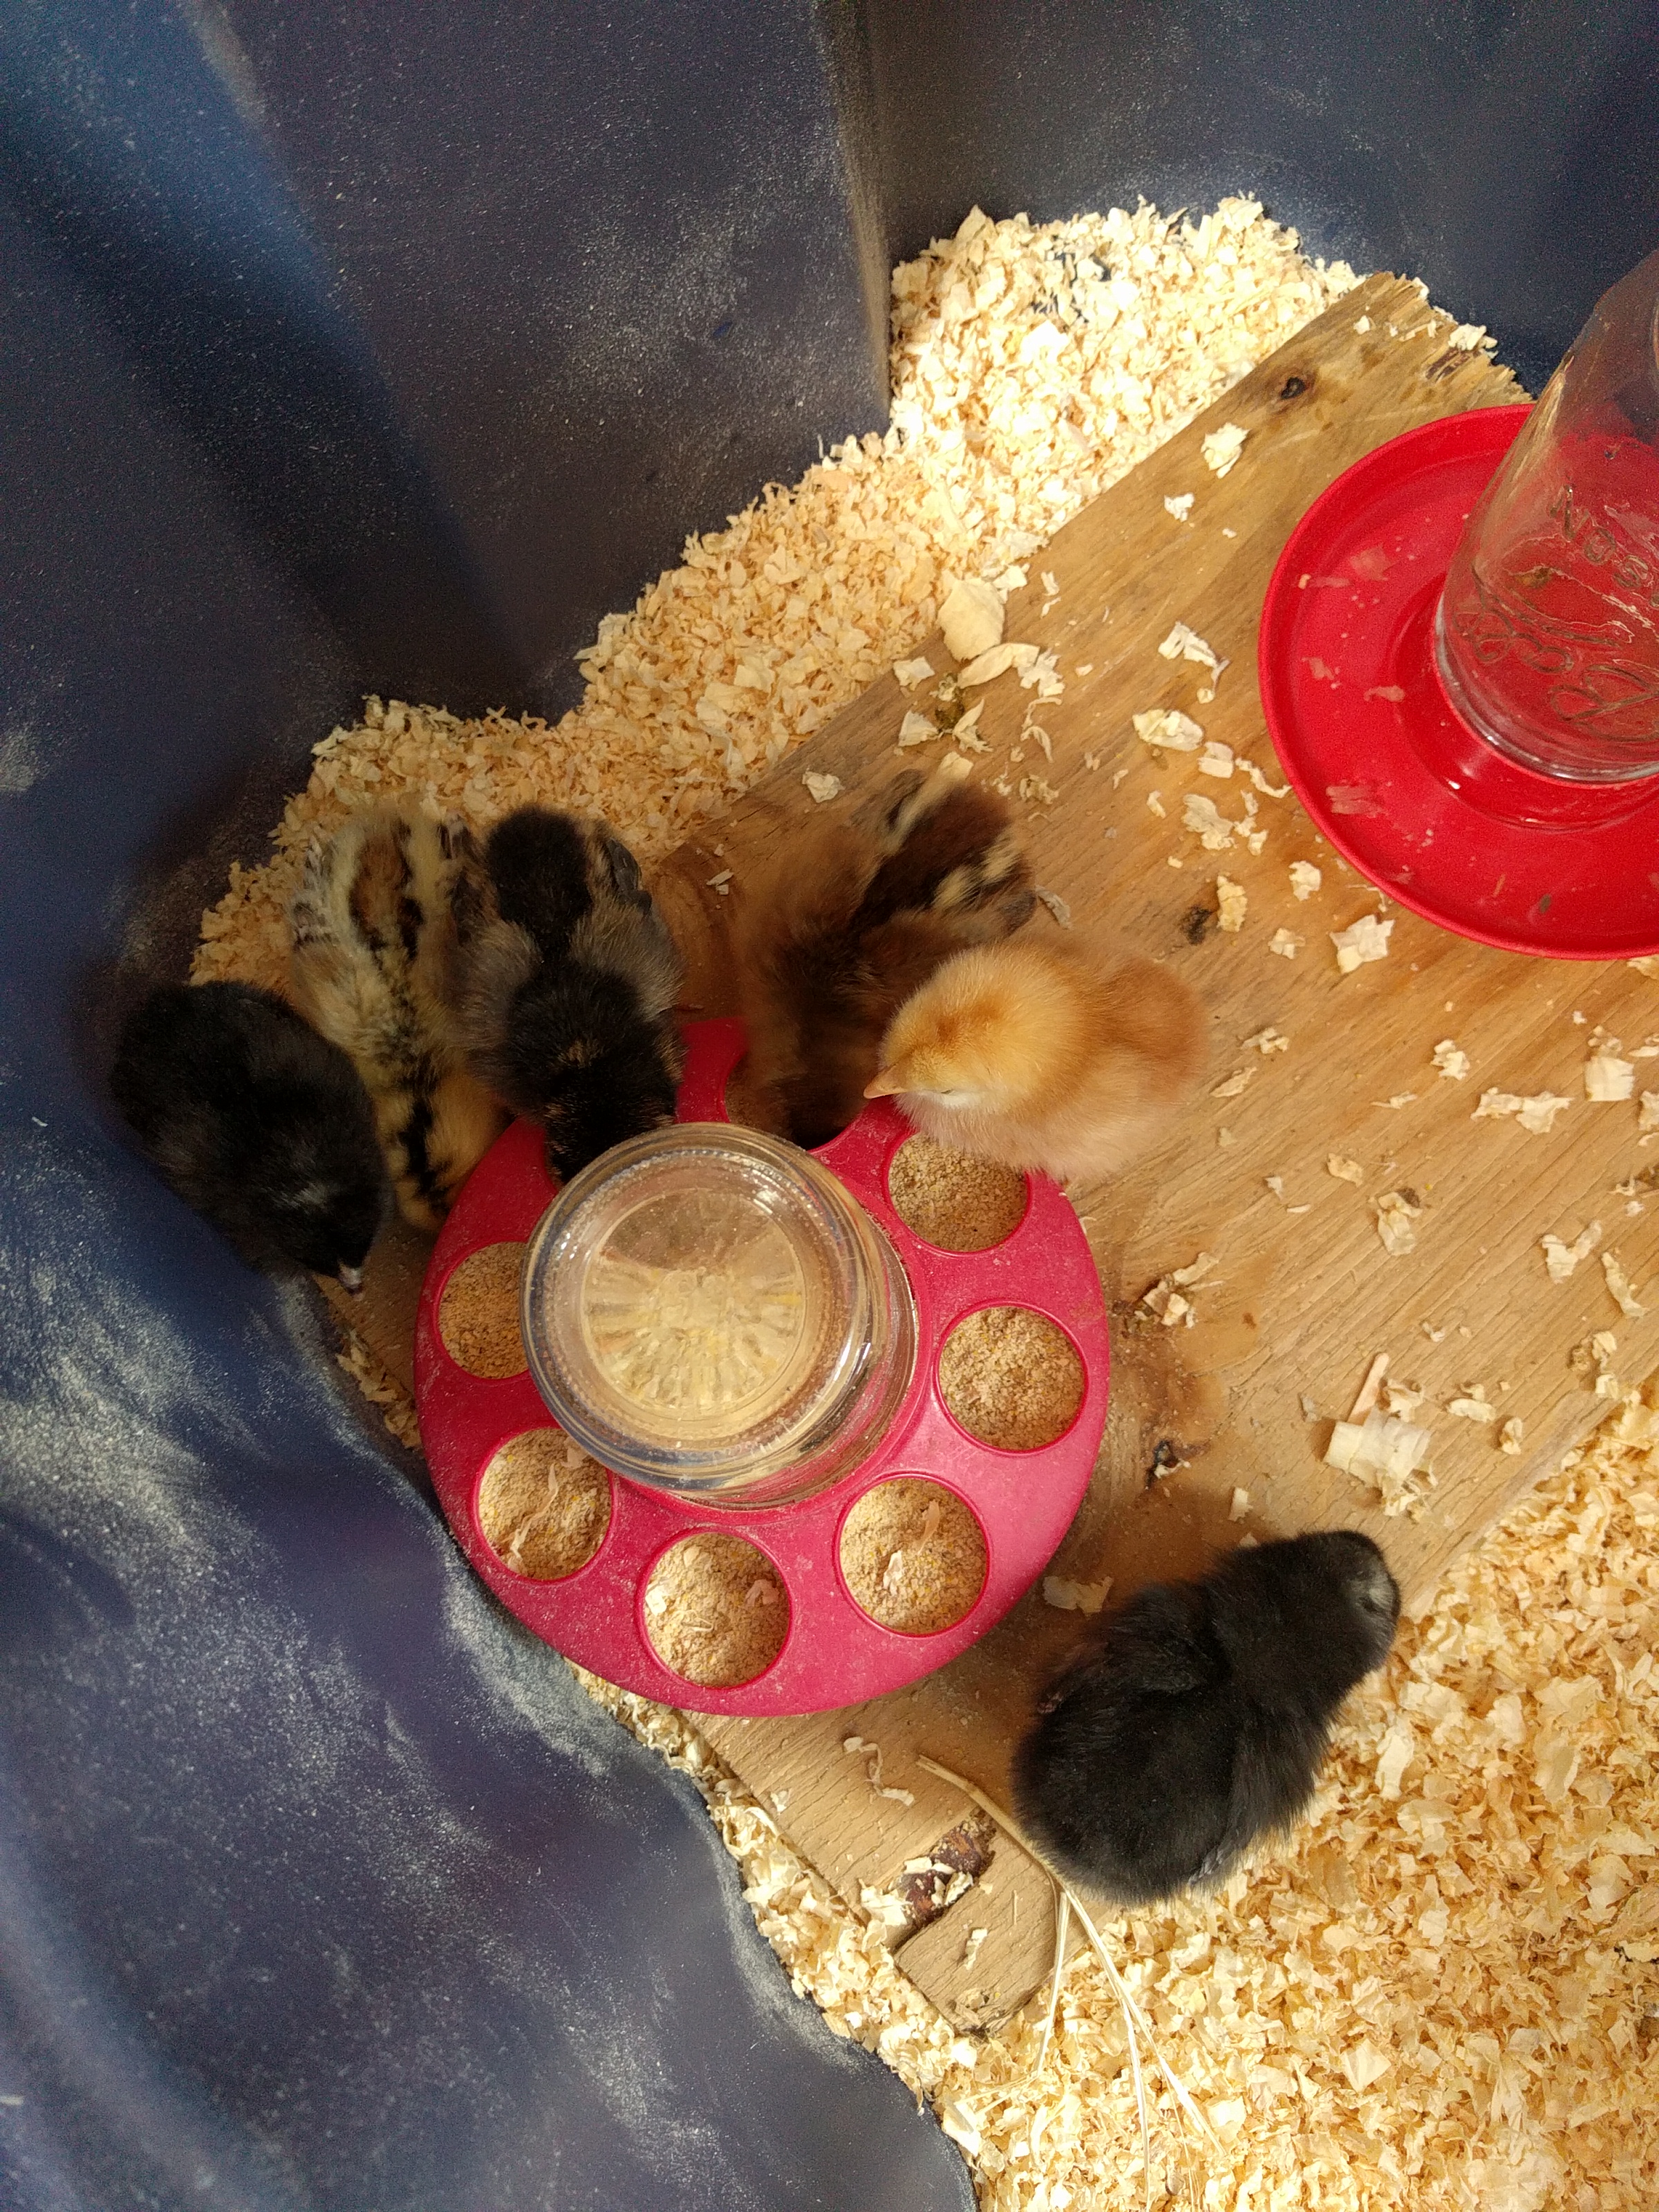
Chicks in the brooder box

So, remember when I mentioned that Roadie was pecking at the chicks and Bluebell pecked at only certain ones? I have a theory why that happened.

In Roadie’s kennel crate, I had noticed that mice were getting in to eat her food. Annoying, but I didn’t think to much of it till she started pecking at the chicks. I betcha that she didn’t know the difference between her babies and the pesky mice that would come to eat her out of house and home. And the Barred Rock chicks are black, so maybe Bluebell also thought they were mice since I see evidence of them in the coop from time to time. I dunno. I could be crazy. Roadie could just be a bad mom. And Bluebell could just not like the color black. Either way, I think before I try the kennel again for a broody hen, I’ll have to find a way to solve the mouse problem.

So that is our success story, and our failure. I learned a lot and hope you did, too. 

I’ll write up another post about how we have the brooder set up, and what we did until we got a heat source that would work on our off-grid solar system.

The BEST backyard chicken breeds?

I realized the other day that in our 4+ years of raising chickens, I have never actually researched and chosen specific breeds of chickens for our flock. Mostly this is because we have almost always been given free chickens over the years, and when they are free, you don’t really get to choose. 

I have only bought chicks once, and I basically just got whatever the feed store had that particular day. Back then, I had no idea about chicken breed temperments or egg laying capabilities or anything. The chicks were cute balls of fluff and I didn’t care what they were.

But things are quite a bit different now. I’ve learned a lot more, and we are finally ready to branch out into selling eggs and possibly even breeding our own chickens and eventually raising them for meat (once we’re no longer so focused on building a house, of course). And so even though we have more chickens than we have ever had before (17), we decided it was time to get more! (In case you’ve never been told, chickens are addictive and are a “gateway livestock” animal, or so says this YouTube video I saw years ago. She’s right! 😊)

Of course, this decision was helped by the fact that two of our hens are broody at the moment. We don’t want them to hatch any of our eggs because we don’t want our Silver Phoenix rooster’s genetics. So they are sitting on golf balls. When the time is right, I will get some day-old chicks from the local feed store(s) and that night will switch out the golf balls with chicks and the hens will think the “eggs” hatched and will raise the chicks as her own. 

So the question becomes, “Which breeds should I get?”

I’ve been doing a lot of research and here’s what I’ve come up with.

First of all, when deciding which breeds you want, you need to know what it is you want out of the hens.

For us, it’s primarily eggs. Therefore, any breed that lays less than 200 eggs a year on average are not even being considered.

Also, we like dual purpose breeds. While we don’t have a plan to raise the birds for meat yet we like knowing that our birds will have enough meat on them to make a decent meal if it comes to that. We’re trying to make it our practice here on the homestead that everything serves more than one purpose if possible.

We also like the idea of the heritage breeds, especially the older, established ones. That connection to history is cool. And also, if it’s a true breed and not a hybrid, then when we want to start breeding our own, we can.

They have to be cold hardy. This winter was fairly mild in temps but we can dip down to negative numbers (Fahrenheit) for a few weeks at a time, and I want to make sure our girls can weather the weather just fine. We have a bunch of Leghorns and Leghorn crosses right now, and their large combs did not like even the mild winter we had.

And last but certainly not least, I have to like the breed. There’s gotta be something extra about them to make me consider them. Thus why Rhode Island Reds did not make my list. When I read all over the place that they are an extremely popular bird and “everyone” has them, it immediately makes me not want them. Besides, I think they are kinda boring looking. 🙂

So here’s my list of chickens breeds that I think will be the best ones for us.

Ameraucana hen (image source)

Ameraucana – I have heard varying reports on the number of eggs they lay, but most websites say it is over 200. They are cold hardy, not prone to broodiness, are interesting to look at, and of course, they lay the coolest eggs ever! We have one hen now who has some Ameraucana or Araucana blood in her and I love her blue-green eggs! So while they may not be the most prolific layers, the Ameraucana made it to my list because they are just so darn cool!

Barred Rock hen (image source)

Barred Rock – the Plymouth Barred Rock is an American dual purpose breed that is cold hardy and lays a ton of eggs (up to 300 in ideal conditions!). It is also a beautiful bird. ‘Nuff said.

Speckled Sussex hen

Speckled Sussex – see Barred Rock description (Only they are from England) 😁

Delaware hen (image source)

Delaware – they are good layers (200-250), an American dual purpose breed, cold hardy, and beautiful.

Welsummer hen (image source)

Welsummer – again, a breed I want specifically for the egg color as they lay dark brown eggs. Not quite as dark as the Copper Marans lays, but the Welsummer is cold hardy, where the Marans are not. And the Welsummer is still a decent layer at 200+ eggs per year. They also have the added benefits of being a dual purpose breed that rarely goes broody.

Australorp hens (image source)

Australorp – these “Australian Orpington” chickens are almost last on my list because there’s not a whole lot to recommend them to me other than the fact that they meet nearly all the requirements. They lay 250+ eggs a year, are cold hardy, and a dual purpose heritage breed. But there’s nothing there that makes them “pop” for me. But if that’s all the store had, I’d take ’em! (Heck, if all I could find were Rhodes Island Reds, I’d take them, too, I guess. 😁)

Sexlink hens (image source)

Sexlink – so, if you’re a long time follower of ours, you might remember that in the fall of 2014, just a few months into our Portland Interlude, we were given  6 chicks. Three ended up being roosters and went bye-bye (some with larger consequenses than others). One of the remaining hens was killed by a neighborhood cat (we think). The other two matured into egg laying machines! Those two hens were the offspring of one of two roosters and any number of hens in a mixed flock. But the savy farmer who wanted more egg laying machines would try to figure out which rooster and hen combo produced these two hens. And then reproduce it. And hey, if you could tell at hatching which chicks were boys and which were girls, all the better, right? That right there is what a Sexlink chicken is. Roosters and hens of different breeds are selectively bred together to get an egg laying machine of a hen. And the cool thing about it is that the chicks are colored in such a way that there is a 100% accuracy rate in telling the boys and the girls apart. And that’s what makes the Sexlink hybrids at least somewhat appealing to me. You know  youre getting hens. No surprises. (Most hatcheries have a 90% accuracy rate at sexing the non-sexlink chicks correctly) But, they are not a heritage breed, meaning if you hatch one of their eggs, the chick will not necessarily have any of the good characteristics you are looking for. But the high volume of eggs, and the fact that you know what gender you’re getting means that I won’t discount them outright.

So that’s our plans. We’re looking to get about a dozen chicks for ourselves and about 4 for my parents. I’ll let you know which breeds we actually end up with when we get them.

Do you have chickens? What breeds do you have? Which are your favorites?

Maridy

Now is the time… Again

The Hubs and I went round and round discussing if we should do it.

On one hand, it’s a great deal.

On the other hand, it represents more work for us.

And yet, could we really pass it up?

Or should we wait till the opportunity rolls around again?

Who’s to say that we’d be any more ready then?

And really, by doing it right now rather than waiting, some parts will actually be easier.

But, ugh, the extra work. And all while trying to build!

And the whole time, this blog post’s message was running through my head. Now is the time!

So what did we do?

We bought the trees.

A local nursery was running a killer deal on fruit trees. We got 5 trees for the price of 2!

Eventually, we want to plant even more fruit trees, but we want to start with root stock and do some grafting, etc. Hubs has been learning all about that stuff. But THAT is definitely a project for later down the road.

For right now? Let’s get some trees in the ground, man! Yes, it means more work, just one more thing (or rather, 5 more things) to take care of. On the other hand, we’re going to have equipment up here soon that will easily and quickly dig the holes for planting, so that will actually make it easier. And we’ve brainstormed a way to make watering a simple task. When we get it set up, we’ll let you know how it works.

When you’re developing property from the ground up and want to end up with a bona fide orchard, you gotta get started ASAP. Fruit trees take a couple years to mature and start producing. As I said in the article I linked to above, if we had actually planted trees when we first started talking about it many years ago, we would have gotten to enjoy those trees for several years before we moved. As it was, we never planted. There was always some excuse. 

And the opportunity was wasted.

And when we finally DID plant a couple trees on our homestead? We up and moved away for two years. But even then, buying and planting those two trees was worth it. We have since moved our house location away from where they are planted, but they are still there and doing well. And they have now had two years in the ground. Two years head start on everything else we plant now.

So when we learned about the sale, we debated and hemmed and hawed, and then we remembered the lessons from three years ago. 

And we bought the trees.

Now is the time. 

Maybe not the perfect time. But it is THE time. 

Because it is never going to be perfect. There will always be some excuse. 

You just gotta make it happen.

So for now, our five little trees (three apple and two cherry) huddle together near the house pad, waiting for us to decide where is the best place to plant them. 

These, the beginning of our orchard.

Oh, the hopes and dreams wrapped up in those few sticks growing out of the dirt in some buckets.

Maridy

Baby bunny watch, Feb/Mar 2017

February 28, 2017 (UPDATED (for the final time) March 31 @ 2:40pm (updates below original post)

In light of April the Giraffe gaining so much popularity as she approaches the birth of her baby, I thought I’d do a little baby watch myself.

We bred our two female rabbits 30 days ago, which means they are due to kindle (have their babies) today or tomorrow. Rabbits are quick like that (whereas giraffes are pregnant for 15 months!)

April (yes, same name as the giraffe) is our oldest rabbit at almost 6 years old. We bred her to our white and black male, Ollie, in the hopes of producing a solid white bunny or two. We weren’t expecting much, since she’s so ancient (in rabbit breeding years), but she seems to be preparing for birth by lining her nest box with fur.

Rabbits do this since the kits (baby rabbits) are born hairless. Mamma’s fur insulates them and keeps them warm. Mamma rabbits do not set on the nest to keep the kits warm as chickens do, so it is essential that there is plenty of fur in the box. April is an experienced mamma, so I’m hoping this means that her kits are going to make an appearance today or tomorrow.

Switch is our other, younger, doe (female rabbit). We bred her to our solid black male, Vader, in the hopes of getting a solid black bunny or two. She has not stripped her fur yet, but some rabbits don’t prepare for birth until just before it happens, so we’re still hopeful that she is indeed pregnant. 

Some of our regular followers might remember that we were expecting bunnies at Christmas since the boys and girls got to play together for several days. I put in the nest boxes a couple days before their due date, but nothing ever happened. Not even any fur lining. It’s disappointing when you are so eager for something like the birth of baby bunnies only to find out it’s not gonna happen.

And as a homesteader, who wants to depend on the breeding program for food as part of our ever increasing sustaniable lifestyle, it can also be downright frustrating. And hard to wait a full month just to know if it even worked or not.

On the other hand, at least they are not cows or sheep or giraffe who all take nearly a year or more to have a baby! I guess waiting 30 days is not all that bad in the grand scheme of things.

I will keep you updated over the next day or two. Hopefully we’ll have some good news to tell soon!

UPDATES:

9:45PM – Heading toward bed and shutting down the animals for the night and still nothing. Actually there is something.

Poop.

That’s what there is.

Poop.

I have never known a mamma to foul up her nest box and then have babies in it. Usually they keep it very clean if they are going to kindle in it. I’m beginning to think we have two non-pregnant rabbits on our hands. Grrrr…

March 1, 5:15pm – Still nothing…. really beginning to doubt… 😦

Much later update: March 31, 2:40pm – much like April the Giraffe, our rabbits never did have babies. UNLIKE the giraffe, who may still give birth at any moment, once a rabbit passes about day 34 gestation, you can be assured that she will not give birth (either never was pregnant or miscarried). So, once we were sure they were not indeed pregnant, we had the girls visit their boyfriends again. “April” and “Switch” are due in a couple days, so if you want to follow along, here’s Baby Bunny Watch, April 2017 

Daily Life #14 – Candles

February 8th

I made candles!

Yes, I have made candles in the past. The waaaaaaay past. Like, I was a kid and it was a school project.

And as I mentioned last week, I wanted to try making candles from scratch, including the wicks. So today’s project was to finish the wicks, and get the candles made so that I can do the burn test tomorrow.

Over the last week or two, I’ve been soaking and drying string in several different solutions. Today I dipped them in wax, let them dry, cut them to size, made little feet for them out of aluminum foil (worked with mixed results), put them in labeled jars, and poured in the hot wax.

image

Waxing the wicks

image

Homemade wick with homemade stand

A couple of these little feet fell off the string when they came in contact with the hot wax being poured into the jar. I have and idea of how to fix it next time.

image

Homemade candles - I used the aluminum foil to hold the wicks in the middle of the candle.

It’s a good thing to put down some sort of protection on the counter, because candle making is messy!

I’m excited to see how they do tomorrow. When I get the results of the burn tests I will post a full report.

As for today, we enjoyed some rare sunshine and warm weather. So nice to get outside and soak up some vitamin D.

image

Maridy

“I lift up my eyes to the hills, where does my help come from? My help comes from the Lord, the maker of heaven and earth.” Psalm 121

Daily Life #2 – Chicken Run Repairs

Earlier today I posted a picture on our Facebook page about doing something very homesteaderly today. I think I was inspired by yesterday’s post!

I finally went out and bought the supplies I needed to fix the chicken run roof.

image

Yup, some clear corrugated roofing.

When we built the chicken run last year, we put up a cheap tarp to keep an area of the run dry (because it rains here ya know. A lot!). As you can imagine, after a year out in the elements, that tarp was rather worthless.

image

So, I prepared my tools, strapped on my belt, and got to work.

image

First I cut down the ratty old tarp.

image

Then I measured, marked, and cut the plastic roofing.

image

image

While I was working on that, Princess girl was being a great help by removing the nails from some boards I took out down from the chicken run.

20160127_115223_resized

And yes, that is Flower Girl up in that tree. She has just discovered that she can climb it with no help.

20160127_115145_resized

Look at that face!

20160127_115205_resized

Meanwhile, back in the chicken run… I then screwed the cut panels in place, making sure to overlap the edges so that the rain won’t drip through. And, voila! new roof on the chicken run!

image

This post is proof that you don’t need a bunch of fancy equipment to get work done around the homestead. My toolbelt is not a fancy or totally expensive one, but it gets the job done, and I’ve had it for years and not even absolutely necessary. The drill I used to screw the panels up is a simple little cordless thing, that we again have had for years. And if I didn’t have it, I could have used a hammer and nails. The only specialty tool I used was the tin snips, but again, I could have just used a sharp knife. I didn’t even have a ladder(because it was too big for the job and I didn’t want to drag it into the muddy, mucky chicken run)! I used a combination of a step stool and a sturdy plastic chair we had in the back yard.

With a little ingenuity and the willingness to get dirty, you can accomplish a lot.

And speaking of getting dirty, I decided that since I was already icky from working in there and because it needed to be done, I would clean out the coop and spruce things up.

image

It looks so nice and bright with the clear panels. I’m looking forward to having dry space in the run again.

We already have to take measures to keep their food dry.

image

We put their food in a tray to keep it off the soggy ground.

And give them sand to “bathe” in.

image

I keep their water out in the open rather than under the cover. This serves two purposes. When I fill it and if they spill it, it doesn’t get the protected area all wet. Also, since it is exposed to the rain, God often fills it up for me. 🙂 By elevating it on a cinder block, the girls don’t fowl it nearly as often (pun intended). 😉

image

Hubby and I are rather proud of our chicken run and coop. We hardly spent any money to put it together. And I realized that I’ve never really shown it off. The coop itself is a cabinet we bought at the Habitat for Humanity Re-store for $2.50. Yup, two dollars and fifty cents!

image

As you can see from the above picture, I cut a hole in the bottom of one of the doors for the chickens to enter. Inside there are a series of levels and ladders and roosts for the hens to sleep.

image

There is also a cut out at the middle level where they access the nest box, which is the brown box attached to the side.

We keep the food in a kitchen trash can with a lid. It is the perfect size for a 50lb bag of feed. We also keep a bale of straw wrapped in a tarp under the eve of the house.

image

Other than the straw, cabinet, and nails and screws (and now the clear roofing panels) we didn’t spend anything to build our run and coop. It is nearly all recycled materials. Even one of the doors is an old screen door.

image

So, now the coop and run are clean and dry once more.

Do you think the hens care?

Nope.

They are over in the compost corner.

image

You do what you can with what you have. You start where you are. And nearly everyone, if they’ve got any land at all and it’s legal where they live, could find enough space in their life for a few chickens.

Maridy

“I lift up my eyes to the hills, where does my help come from? My help comes from the Lord, the maker of heaven and earth.” Psalm 121

The daily life of an urban homesteader

I’ve been thinking about doing this post for a while now. But several things have stopped me. It never seemed to be the right time and I didn’t know if I was the right person. Half the time I feel like somewhat of a homesteading sham. I don’t live on a farm, and much of my life here in the suburbs is normal, mundane things that don’t have much to do with homesteading. Maybe that’s why I don’t post very often, because I don’t feel like I have very many homesteaderly-type things to write about. But here’s the deal, not everyone can be the type of homesteaders they want to be right away, maybe never. But that shouldn’t stop anyone from doing what they can with what they’ve got. I have a vision in my head of what a homesteader is and does and looks like. Don’t you?

Stop for a moment, if you will. Picture in your mind what is your ideal homestead situation. Mine looks something like this:

0_69803_36451c5d_XL (1)

Source unknown

The thing is, I don’t think I fit any of the “perfect homesteader” requirements in my own brain. Especially living here in our normal little house on our tiny little lot in our very suburban neighborhood. And yet, I still identify as a “homesteader”. No, I’m not where I want to be yet. But I am working to get there.

And that’s truly what the homestead journey is all about. It’s about doing more for yourself, being more sustainable, and living a healthier lifestyle,

It really is a journey and you start where you are and you move forward from there.

There’s a great quote out there by Maya Angelou, “Do the best you can until you know better. Then when you know better, do better.”

Do the best you can - CR sunset (Small)

So here we are on our journey which we’ve been on for several years now. We started out in 2007 by planting our first garden. Our garden expanded every year and we branched out into raising animals. We got our first meat rabbits in 2012 and our first chickens in 2013. We purchased and moved onto our homestead land in 2014. Things were going great and we were on the fast track to being “real” homesteaders! And then we took what seemed a huge step backward just two months later when we moved to the suburbs in Oregon. The only thing worse I could think of is if we were in an apartment/condo with no yard. And yet we are still homesteaders. We make our own chicken bone broth and bacon lard. Though it is small we do have a garden. We have some chickens. We even butchered our own meat. Once. Our diet has taken a radical turn toward whole foods (not the grocery store!) and eating a more sustainable diet. We’ve started the process of building our own house. I’ve taught myself how to make soap, deodorant, carpet deodorizer, and various other cleaning and beauty products (which I will blog about one of these days). And I’ve dabbled in 3 season / year round gardening (two posts about that #1  #2). Sounds like numerous other “legitimate” homesteaders I know.

So, yes, even though I don’t fit my ideal vision of a homesteader, I am one.

And thus the idea for this blog assignment was born.

I am going to post every day (or as close to it as possible) for a month about my daily life.

I’m going to get real.

And along the way, I hope to debunk some myths people might be about what it takes to be a homesteader.

wp-1453846512858 (Small)


So for my first day in my Daily Life posts, here’s me on my daily walk (I try to get out at least 5 times a week). I really didn’t want to post this pic since my hair is all crazy because it’s humid outside (it’s the Pacific Northwest go figure). But this is me being real. Thus, a picture showing overweight me with my flyaway hair.

So do I look like your vision of a homesteader? I don’t to me. Other than the flannel of course. 😉 In my mind, homesteaders are skinny because they eat right and get lots of exercise. You know, somewhat like Shaye Elliot over at the Elliott Homestead. I mean have you seen her? They just moved their farm and are in the midst of a total home renovation on the new place. And she’s, like, 6 months pregnant!

One day I would love to be skinny and totally in shape (and have great hair). But that’s not where I am on my journey. And I may never be. But that doesn’t stop me from doing what I can now to further my journey in homesteading. So I go for walks in order to stay in shape at least a little so that one day, when we are living and working on the homestead, I might have the strength to survive it.

Because homesteading isn’t about the way we look or the piece of land we live on or the number of animals we have. It’s about the choices we make along the journey to become the people we want to be.

Maridy

“I lift up my eyes to the hills, where does my help come from? My help comes from the Lord, the maker of heaven and earth.” Psalm 121

Bacon Lard

I’m nearly out of bacon lard and need to make some more, so I figured it was a opportune time to write a tutorial on just how I do that.

Just a word about using lard: if you are vegetarian or subscribe to the low-fat-everything-is-healthy-for-you way of eating, then this is not a post for you. If you’d like to learn more about the philosophy I believe when it comes to using saturated fats for our family’s diet, read this article, it sums up my beliefs quite well.

Now, I’ll be the first to say that the lard which comes from processed bacon is not the healthiest fat on the planet. But I use it because 1.) saturated fats are not the evil fats they have been made out to be, and 2.) (most importantly) it’s free! As with almost everything in this world, moderation is key. I suppose it would be more healthy if we used healthier bacon (yes, there is such a thing.) But we haven’t made that switch yet. One of these days…

So, what is bacon lard anyway, and how do you make it?

I’m so glad you asked. ‘Cause I’m gonna tell you. 🙂

Whenever you make bacon, there’s all that grease left over, right? I know some people dump that grease into a grease pot and leave it on the counter and use it just like that. But, my modern food handling mind just can’t get past that. And I know people who simply pour their bacon grease in a container and keep it in the fridge and use it as needed. I don’t like that either because then you have all those little burned bits of bacon fond mixed in with the grease and an overpowering bacon flavor. I know, I know, there are those of you asking, “What’s wrong with that???”(My Hubby is included in your ranks, for sure!) But depending on what I’m using it for, I don’t want it to taste so much like bacon. And those little burned bits just make the grease look “dirty”. Turning your bacon grease into bacon “lard” makes it nice and clean and less bacony in flavor. It is a long, but very simple process. Most of the time you’re not doing anything but waiting for the grease to harden.

Ok, you you’ve just made your bacon and you want to clean the pan. What do you do with the grease? Well, you simply pour it into a container and put it in the fridge.

But wait! Didn’t I just say I don’t like doing that? No, I said I don’t like using that grease as-is. I do something extra with the grease to make it more like lard.

First of all, I like to strain my grease through a paper towel as I put it in the jar.

20151007_105634_resized

This step is not totally necessary, but makes the cleaning process go faster.

Cleaning process? You “clean” your lard?

Yep. Yep I do.

20151007_105726_resized

Anyway, once your container is full (or nearly so – this make take a while depending on how often you eat bacon), simply melt your grease…

20151113_105316_resized

Yes, that’s bacon grease – with all the dirty bits still inside.

…I use the microwave.

Then you add the grease and about the same amount of water into a pot and put it on the stove to boil.

20151113_110332_resized

Once it just starts to boil, turn it off and set it aside. You can put in some cold water to help it cool off faster. As I’m sure you know, oil and water do not mix. The lard (oil) will float to the top of the water, and the impurities which were in the grease (the dirty bits) will sink or be washed out by the water.

The next step is where the length comes in. You have to let this oil and water concoction cool enough that the fat will solidify. If the temps are cold enough outside, I often secure the lid on the pot, and put it outside in the cold. This makes the process go faster. However, if the temps outside are too high, I let it cool to room temperature, then stick it in the fridge, usually overnight.

Once the fat has solidified, scoop it out with a slotted spoon and put it into a bowl.

20151113_214701_resized

scoopable-solid again

20151113_214751_resized

Look how dirty the water is

Once you get all the chunks of fat out (I use a small mesh strainer to get all the little bits), you’ll be left with dirty water which you can pour down the drain.

I usually “wash” the grease a couple more times by following the above steps, until the water is clear underneath the solidified fat.

20151114_181548_resized

Clear water

But you could certainly skip the subsequent washings if you wanted. I find that by filtering the grease through a paper towel first, it takes fewer “washings” to get the lard as clean as I like it.

Once it’s as clean as you want it, you scoop the grease into a bowl with a slotted spoon or mesh strainer (try to let as much water drip from it as possible).

20151114_182121_resized

Clean lard

Melt the lard just until pourable and pour into mason jars*.

20151114_182937_resized

Notice the color change from the first time I microwaved it near the top of the post.

I suppose there’s probably some way to process this so that it is shelf stable. But I have never researched it. I just stick it in the fridge once it’s cooled off a bit (or freezer if I have extra).

Note: once it has solidified, you might find that there is some water in the bottom of the jar.

20151121_121609_resized

If this happens, slide a knife along the glass into the lard in two spots on opposite sides of each other. Then pour the water out one of the holes (the other hole is to allow air into the bottom cavity so the water flows easier.)

20151121_121643_resized

If you prefer, you can heat the grease again so it melts and fills the holes back in.

*I always use wide mouth pint jars because they are the perfect size for our favorite spatula to fit in to scoop out a bit of lard (not an affiliate link – we just really like the style. In fact, we happened to find some at the dollar store!).

So there you have it. Now that your bacon grease has become lard, you can use it in much the same way you do regular lard. I do find it still has a bit of a bacon flavor/odor, but it is only objectionable to use it in things that are naturally bland themselves. I have even made soap with it!

I always feel so frugal when I use my bacon lard. I mean, it is basically free since you’re gonna eat the bacon anyway, right? So now you have something useful to do with the left over grease.

Seamstresses in the making

Why, yes. I do let my nearly-three-year-old play with my sewing pins.

image

Just as I let her sister before her when she was young. And now Princess Girl loves designing.

image

Sewing is a big part of a sustainable lifestyle. When purchased thriftily, buying fabric can be much cheaper than buying ready-made items if you have the know-how. But sewing is so much more useful than making your own clothing from scratch.

image

Mending a blanket.

Being able to repair those things which you already own is a first step toward living sustainably.

And you don’t need to tons of fancy gadgets and gizmos. A simple machine and a rudimentary knowledge of a few techniques will get you a long way. I myself have a rather simple machine.

image

I only ever use a couple of the available settings. But it serves me well.

If you have a machine but learning to use it is a daunting task, find a friend who can help you. (It’s hard to learn sewing from the internet unless you already know how to handle your particular machine since they are all a bit different.) As stated above, you don’t need to know how to use every setting on your machine. You basically just need to know how to thread it, how to load and refill the bobbin, how to do the straight stitch and zig zag stitch, and what the length, width, and tension dials do. You can do an awful lot of sewing with those basic skills. And as you practice more and become more comfortable, you can start learning all the other things your particular machine can do.

image

If you don’t have a sewing machine and can’t afford even a basic one, at least learn how to hand sew. Knowing a few easy stitches can be the difference between repairing that blanket and buying a new one, or paying someone to hem your pants or doing it yourself. And hand sewing is easy to learn from videos on the internet.

And remember, if children can learn to do it, you can, too!

Let’s hear you chime in. Do you think that sewing is an important skill to know? Do you know how? Wanting to learn?

Maridy

“I lift up my eyes to the hills, where does my help come from? My help comes from the Lord, the maker of heaven and earth.” Psalm 121