Tag Archives: Homesteading

How do we…stay warm

It snailed today.

Yes, you read that right. It’s not a typo.

And, no, it doesn’t have anything to do with slimy little creatures with shells on their backs.

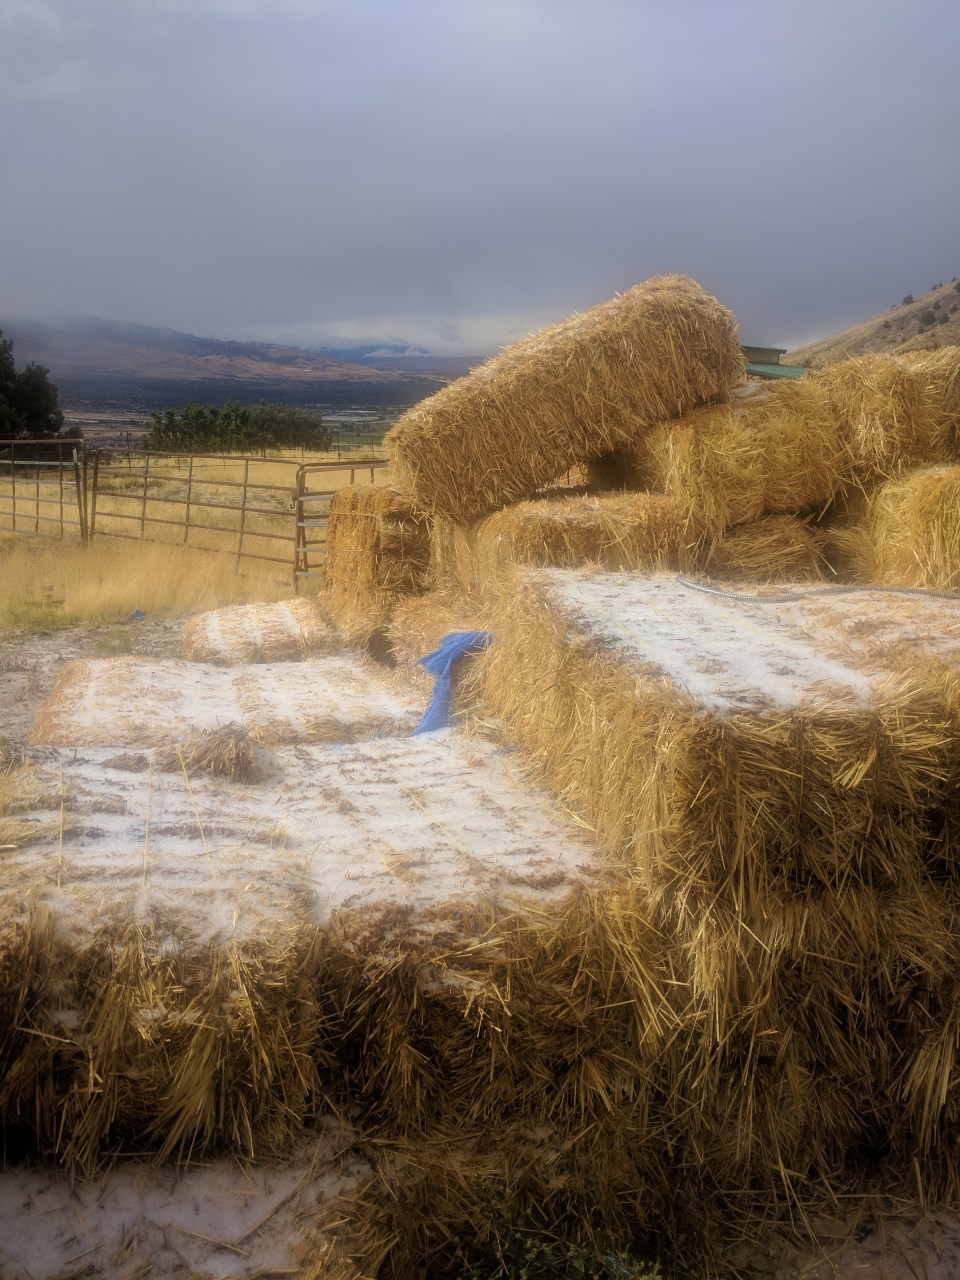
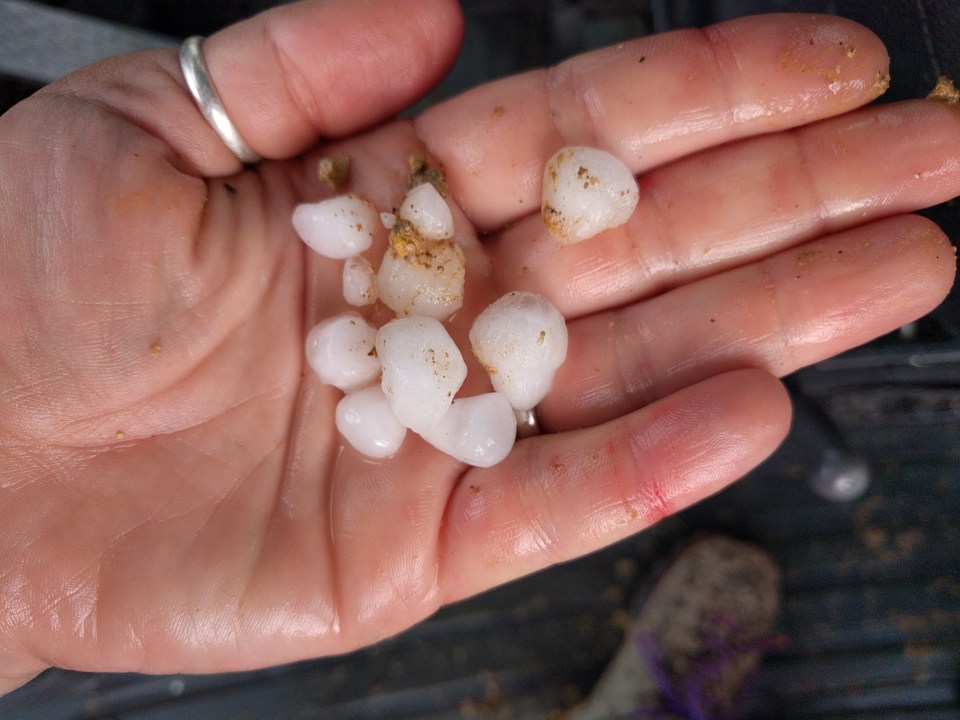
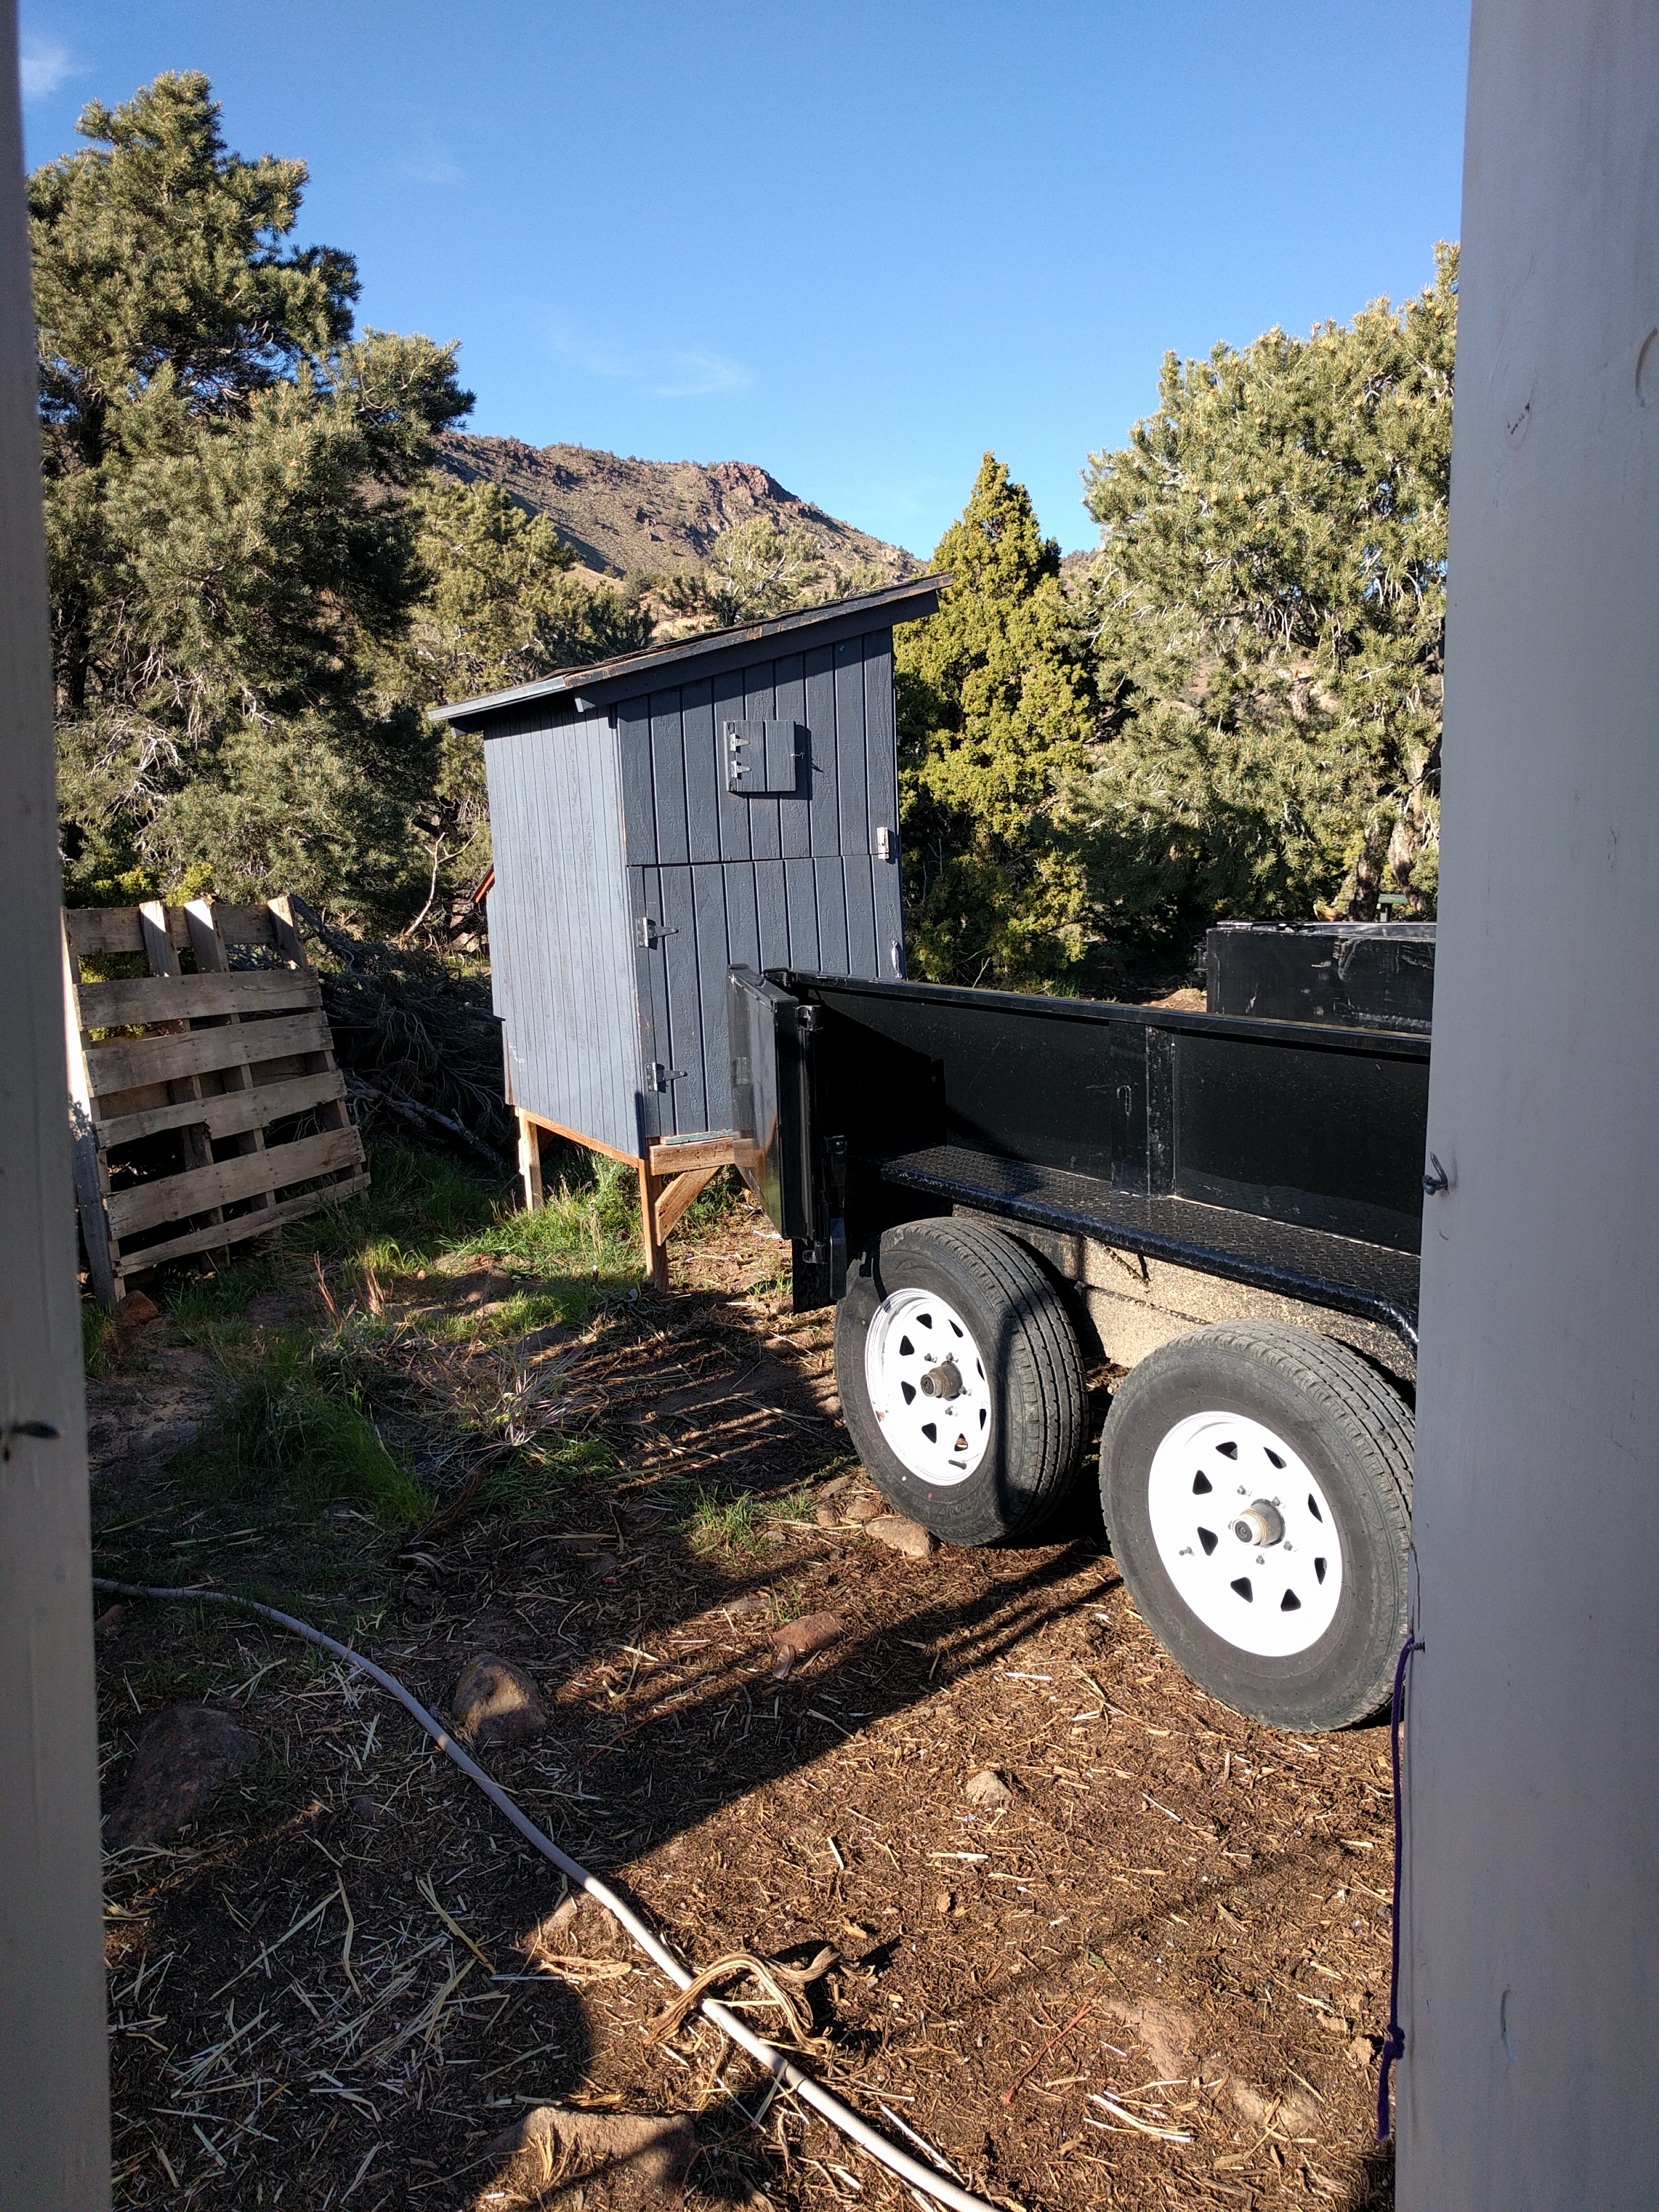
See that “snow” on the straw bales? It’s actually hail.

Get it? Snow + hail = snail. I’m so puny.

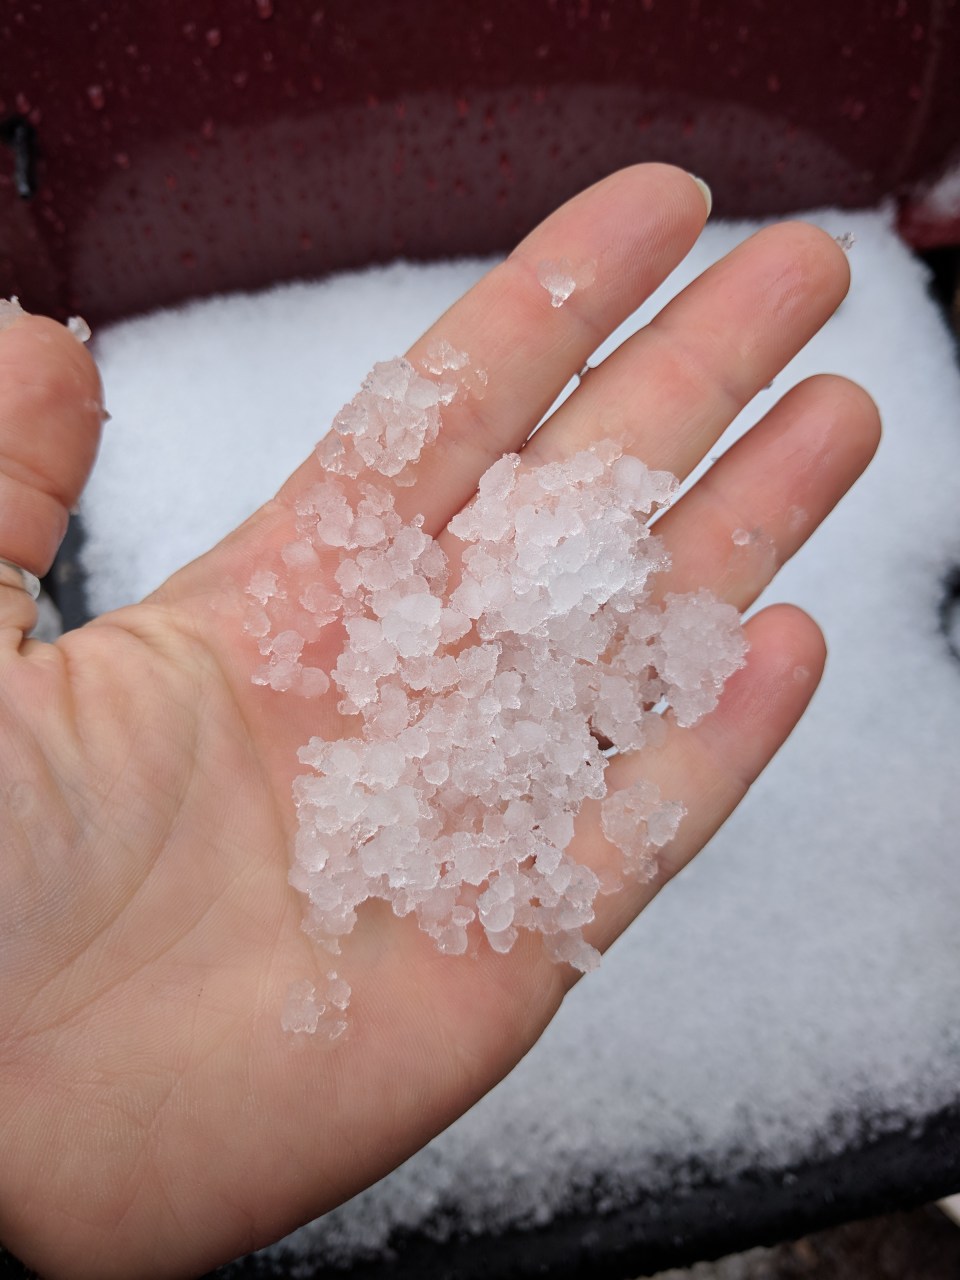
See? Little tiny hailstones. But it was cold enough today for it to have been snow.

Never even made it to 50° outside. Probably going to have our first freeze tonight.

The weather brings to mind a question we get asked every time the temperatures plummet. And since we turned on our heater today for the first time this season, I figured it was a good time to answer everyone’s most pressing question.

Do we stay warm enough in the winter?

The answer is, “Of course!”

The the real truth of the matter, however, is that YOU might not think so, but we stay plenty warm. Relatively.

Yes, it’s a relative answer. WE think we stay plenty warm, but most people who live in climate controlled comfort would be rather uncomfortable at times. Case in point, as I sit here this evening and write this post, the thermometer is showing that it is 59° in the trailer. Now that is pretty chilly, I will admit. And I am about to turn on the heater to take off the chill before we turn in for the night. However, if we were not headed into a sub-freezing night, I wouldn’t bother. I’m just about perfectly comfortable as I sit here and type. How? I’ll share with you some of our tips to stay warm in the winter.

Tip #1: Your attitude affects your temperature. Ok, so I don’t know for sure if having the right attitude can actually physiologically affect how warm you feel, but it sure seems that way. We CHOOSE to live closer to the changing seasons. By having a cooler house in winter and hotter house in summer, not only are we saving money on heating and cooling bills, but we are more connected to the outdoors and the seasonal changes around us. We LIKE the changing seasons and don’t want to insulate ourselves from them too much. And honestly, you get used to it after a little while. I’m sure you’ve all heard of those people who live in Alaska coming down to the lower 48 and thinking it feels like summer when everyone else is all bundled up? Yeah, it’s like that. You can get used to anything. We chose to get used to colder temperatures in the winter.

Tip #2: Layers! I nearly roll my eyes every time I hear someone complaining that it’s cold at 65° when all they are wearing is shorts and a t-shirt. Unless you are one of those people from Alaska that I just mentioned, or you are doing physical work, yeah, you’re going to get chilled at that temperature. Go put some more clothes on. Throw a blanket around your shoulders. Something to help your body stay warm. And remember that your blood circulates through your whole body. So even if your legs themselves don’t feel particularly cold in shorts, your blood is getting cooled as it travels through them and contributing to your feeling of chilliness. Most people that I know just go bump up the heat a few degrees if they feel cold. We choose to put on more layers of clothing. It’s kinda nice having a whole different wardrobe in the winter. “New” clothes every 6 months. Woo-hoo! Oh, and this goes for night clothes as well. In cold weather, we bundle up to go to bed, often wearing a hoodie to keep our heads warm as well. I even made Flower Girl a sleep sack so that she stays warm enough, even if she kicks the covers off. It is basically a fleece nightgown that is long enough that it has a closure at her feet. Kinda like a combination nightgown and fleece sleeping bag. I am hoping she hasn’t grown out of it yet.

Tip #3 – Get moving! Want to warm up quick? Do some physical exercise. When we lived downtown, I would run up and down the stairs several times to warm up in a hurry. Even light housework like picking up toys, etc will get the blood flowing and warm you up.

Tip #4 – Auxiliary heat source. When we lived on the grid, I used to keep space heaters strategically located around the house so that when I got chilled, I could cuddle up in front of one. Living off-grid in a camping trailer now, that is not really an option. But you know what works great? Hot water bottles.

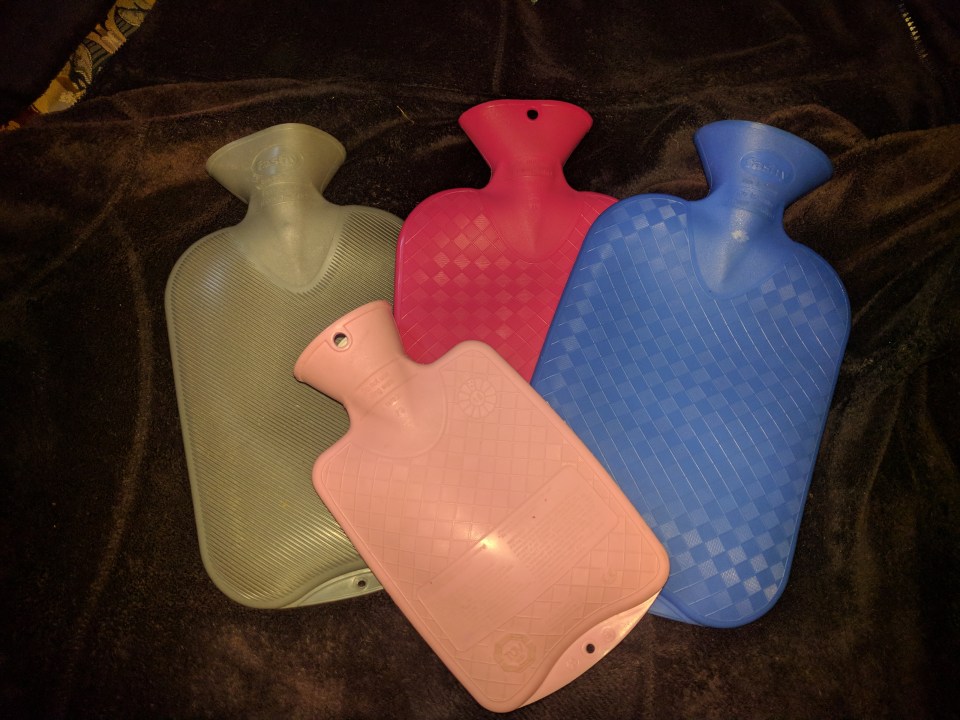
We got these last fall and Christmas and we use them All. The. Time. when the temps are cold. I have a problem with my feet getting cold before bed. And when my feet are cold, I just can’t feel warm. So I heat up my hot water bottle, put it at my feet in bed, and drift off to sleep in cozy warmth. They also work well to sooth sore muscles and relieve monthly cramping.

Tip #5 – Turn on the heat when you need to. So yes, we have a heat source in our trailer. And yes, we do use it when it gets cold. It is a propane fueled catalytic heater made by Mr Heater. The one we have is the Big Buddy.

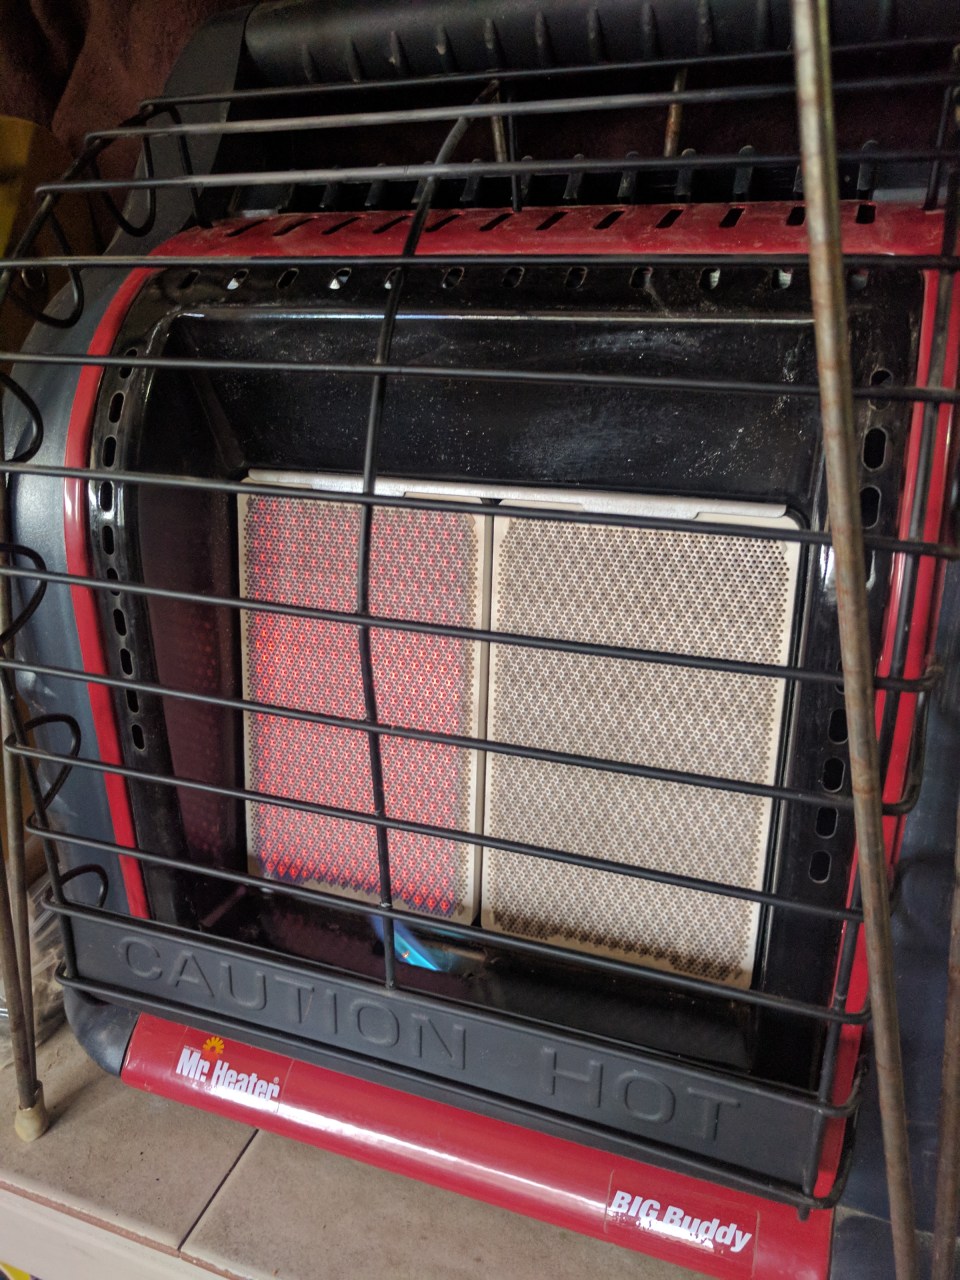
Rarely do we ever have to turn that baby up on high. When we do, we have to turn it back down to low real soon or get heated out of the trailer. Even on low, it is capable of keeping us too warm – see the picture of our temperature reading earlier in this post. It was 74° inside because I was busy and hadn’t turned off the heater.

And in case you were worried, yes, we have a carbon monoxide detector. And no, we do not typically run the heater at night while we are sleeping. These heaters are supposed to be safe to run inside, but we’d rather be safe than sorry.

So yes, we stay plenty warm here in our little trailer on our mountain homestead. And if it’s chilly inside, it’s because we choose to have it that way. Because we’re different like that. But then, you probably already knew that.

Stay warm, my friends. And thanks for reading.

Even more weather related delays

So, it rained a couple days ago, causing us to button down the hatches and close up shop early. We ended up spending a rare evening together just hanging out. It was great.

But the next day we decided to hit it hard and get some actual work done.

In the morning Flower Girl and I worked on marking out our under-slab plumbing.

First I made a copy of our plans so that I could mark on them.

Then we started transferring the measurements to the ground with paint.

This four year old’s got some skills!

After a trip to take Pajii to a doctor appointment, we were back at it.

It was nice that for this phase, the measurements don’t have to be exact. That will come next as we are laying the pipe.

For now, we will cut our plumbing trenches with the backhoe since that’s what we have. We are not going to rent something else when we already have something that will work. So our trenches will be wider than absolutely necessary. But then again, they are gonna be pretty deep, so we need room to maneuver around in them with the pipes, so maybe it will be fine. All that to say that we don’t have to be very precise with our measurements at this stage because the trenches will be wide enough for some adjustment of the placement of the pipes. Whew!

Just two tools needed for this job. Nice to not have to lug around a bunch of heavy tools.

Consult the Book of the House. Chapter 2 verse 3, “Thou shalt mark thy plumbing upon the subfill with the paint color of thy choosing providing thou doth chooseth a color which doth show brightly upon the ground.”

We got the lines all drawn. Red for plumbing and orange for interior footers.

We excitedly started destroying some of our hard work that we put into compacting all that dirt. And then this happened:

Yes, that’s rain and hail, and Princess Girl and I were stuck inside the backhoe. Thankfully it is an enclosed one so we had good protection and didn’t have to try to make a mad dash through this:

So, again, we were stopped from working by the weather.

This morning, I went out to start back up again and found this:

That’s one big soupy mess, right in the middle of our house. So I decided to let it dry out some and work on one of our other projects that need to get done while we have the backhoe.

So I cleaned out the drainage next to a potion of our driveway. It’s kinda hard to see, but there wasn’t a real ditch here before I started. The water would run down the side and the middle of the road and eventually spread across the drive near the highway, leaving all the mud as a parting gift as it found an edge on the other side and headed on down the canyon.

Flower Girl helped move rocks for a time, then started pretending she was a prairie dog. I just love her imagination.

By 2:30, we were done with the drainage for the day (still need to put in a culvert pipe). The girls and their grandfather were preparing to head off to gymnastics class, and I headed in town to run an errand and hoped that the sun would continue to dry out the pad.

When I got back and Hubby was home from work, we still had several hours of light left, so we decided to try working on the pad despite the remaining puddles of water.

I was amazed at how hard it was to dig by hand through the compacted dirt. Guess we did a good job compacting it.

Hubby worked on digging down to where our sewer pipe will exit the building (pictured above), while I worked on unearthing the rebar that will join into the footer for the interior load bearing wall.

I am well please at how well this backfill is staying neat and tidy as we dig. That’s exactly what we were hoping for. Now, if the rain will just stay away long enough for us to get the slab poured, that would be amazing!

You know what else is amazing? One of Pajii’s kittens, Lilly.

She’s so cuddly. And just look at that face! Almost makes me want another cat. Almost. But not quite. Maybe when we have a barn and they can be barn cats. Maybe we’ll get some kittens then. For now, I enjoy playing with Lilly and Midnight whenever I’m in Pajii’s trailer.

So anyway, that’s our last few days. The rain has put a damper on our progress a bit, but it also means we get some of these other important projects done as well.

And that’s how life goes. God’s got a plan for everything. We just have to trust that he knows what he’s doing.

House update – MORE backfill! (And other stuff)

This was a very productive weekend.

We completed a bunch of the finish work on the well shed.

Including painting the shed floor.

While the paint was drying, we continued backfilling inside the house footers. Once we added another layer of dirt, we couldn’t do much else because the equipment rental shop was out of the compactor we needed, so we had to wait till Monday. So we found another project to work on.

This rather steep hillside is going to be terraced, but needs a set of stairs.

We have a large pile of 5ft railroad ties that were on the property when we bought it. So we set to work cutting them in half.

Princess Girl and I are standing on the tie to steady it while Hubs finishes the cut.

We stopped periodically throughout the weekend to put another coat of paint on the shed floor. Doesn’t it look good?

Then we went back to building the stairs.

Digging in Nevada requires the use of some heavy duty digging tools.

Today, the Hubs took the day off work to help out with the house. And we got all the preliminary backfill filled in and compacted!

The red chicken scratch marks on the ground is my code to see where we were still low. We string a line across the forms (which is slab level) and measured down from the line. Then if put a mark if it was on grade or low. It was not “real” grading marks, I’m sure. But it worked for us.

As my wonderful hubby stated on a Facebook post, it’s been great to be able to work such a productive few days with my best friend. Sad that he goes back to work tomorrow. Happy that he got the day off.

And then tonight as I was closing up the chickens, I found this.

Our first egg from our pullets that hatched this spring! Guess I need to put more bedding in that nest box, eh?

Yeah, it was a good weekend!

How was yours? Did you get lots of work done? Our maybe it was more about relaxation. I’d love to hear from you.

The end is coming

It rained yesterday. I mean, a good ol’ gully washer! Rain coming down in sheets. Hail. Overflowing rain barrels (which we coincidentally had just filled up with well water because we use them to water our animals and they were getting low and who knew it was going to pour?) It was glorious.

And this morning I am reminded that the end is near.

The end of summer.

Because of the rain yesterday, the air is cooler than usual this morning, and fresh. The cheatgrass all around me is doing its usual end of summer imitation of fall colors. And September is right around the corner.

Normally I love Autumn. It’s my favorite season. However this year, we’re feeling the heat (haha) to get our house dried in before the cold weather hits.

But things keep delaying us. Last week it was that we couldn’t find any delivery drivers to bring in backfill for us. This week, we got the dirt to put into the inside of the footers, only to be stopped by the weather (can’t do anything on the house pad when there’s 3 inches of mud).

So we take it as a sign that we need to work on other things.

Hubs and I have been working fairly steadily getting our well shed finished off this past week.

Pajii graciously plunked down the money to get a shed for us so that we can put a water system in there so we can have water on site for the winter.

We had it made with 2×6 walls so we could put thicker insulation in it (R-19). We also had them beef up the floor since we are going to put heavy totes of water in there.

Then Hubs and I added windows (we could put them in for cheaper than having the shed company put them in), a loft, wiring, insulation, and we are working on the wall panels and trim now.

It might seem like a departure from our true goal of building our house, but we see it as necessary for several reasons.

The first is that it’s become glaringly obvious that we’re going to be spending another winter in the trailers. Last winter, the water situation was rough. We only had as much water on hand as could be stored in jugs inside the trailers. Anything that was stored outside in barrels or totes was almost always a solid block of ice. By insulating the shed and putting a heating source in there, we can store totes of water in there and keep them from freezing. It also gives us a chance to go ahead and get our water filtration system up and running so we can actually drink our well water. The shed will also give us a place to put a washing machine on the homestead which we haven’t had since last summer (been hauling laundry to the laundromat).

The second reason why we are pushing to get the well shed finished is because, well, we can’t do anything on the house right now anyway.

And thirdly, it’s giving us, especially my hubby who’s never built a house before, some crucial experience that will be extremely useful when we do finally get around to building the house.

So we work on the shed. And the “end” is in site. I’d say by the end of this week we should be pretty much finished.

And then, Lord willing, we start back up on the house again.

For now, here’s pics of our progress with finishing out the shed.

Putting up the 2×6 boards as floor joists for the loft.

We sheeted the floor of the loft with some of the 3/4″ plywood we had left over from building our house footings forms.

We framed out three new windows (two upstairs in the loft and one downstairs).

Hubs cutting out the hole for the south facing window in the loft.

Hanging out the tiny window like that makes it look like a child’s play house.

Once we had the floor in for the loft and the two windows put in up there for ventilation, we worked on insulating the downstairs floor. This 2″ thick rigid foam is the same stuff we put around the outside of our house footers. With the two sheets of 3/4″ plywood (one under and one over) it adds up to about R-12 on the floors. Not a lot of insulation, but it is better than having an uninsulated floor for sure.

Got the flooring down.

What could go wrong? And yes, that’s me. Working on trimming the windows.

Wiring. We’ll have one light on the ceiling of the downstairs, a GFCI outlet on each wall, and two outlets upstairs, one of which will be controlled by a light switch.

Flower Girl actually was a big help running the wiring through the holes in the loft.

She’s getting old enough that she’s becoming an actual help at times.

Insulation time! We wanted to get the loft insulated first so that it would cut down on the heat transfer to the whole shed. What a difference!

Insulation is all done, time to start putting up paneling. We decided to go with natural wood bead board for a couple reasons. First of all, we like the look. Second of all, when you factor in things like tape and texture and paint, the bead board was not much more expensive than sheetrock, especially for a small project like this. Thirdly, we like the look.

Paneling all installed in the loft. Just gotta put in trim to hide the seams. In retrospect, we could/should have done things a bit different to have fewer seams, but we learned a ton and will do better in the downstairs.

Besides, the girls don’t know it yet, but the loft is going to become their playroom (and a play room doesn’t need to have perfect paneling). That’s what these colorful foam flooring pieces that we got from a friend which are drying out after being washed off are for. (Was that a confusing sentence or what! Too tired to fix it, though.) Those will be the flooring for the loft to cushion it for the girls. At the moment, they think it’s going to be a storage room. But as I said, it’s become obvious that we are going to spend another winter in the trailers. It will be nice to have a space that the girls can go play where we’re not all right on top of each other. And we can see Princess Girl using it a lot this school year as a quite place to go to do her school work. She is easily distracted and when we live in such a tiny space, it’s hard to find somewhere to concentrate.

Insulating the ceiling of the downstairs. Since we are going to have our water system in there, we want it as insulated as possible so it’s easy to heat so nothing freezes.

Downstairs insulation finished and starting on the paneling.

And that’s as far as we’ve gotten. I’ll post more as we progress.

House update – footers poured!

I haven’t written much lately because I feel like there’s not much to update you on. We’ve been working a lot the last several weeks to get our forms ready for concrete, but you couldn’t​ really see the progress. Besides that, I’ve been exhausted working all day in the heat. On top of that, I’ve had to work my regular summer job here and there, and have had a couple of migraines. All that together, and nothing got written here on the blog (though I do a better job updating Instagram and Facebook). However, we did pass our first inspection no problem (yay!) And then had to wait a week for schedules to line up. But we finally got a permanent part of the house built today! We got our footers poured!

It was an exciting day, let me tell you! This is the first thing we’ve done so far that is actually a part of the house. 

And I feel rather validated, because not only did the inspector not have a single issue with the work we had done building the forms, he said it looked good, and several of the concrete guys we’ve had out lately to give us bids have said that the forms looked amazing. 

And they performed marvelously today as we pumped the concrete into them.

And it’s all due to this guys right here:

Gary is a family friend who is a retired contractor and has volunteered hours and hours to help us get this far on the house. He is generous, loving, knowledgeable, and helpful. We could not have done nearly as well or as quickly as we have without his expertise and willingness to help us out.

And he’s not just a supervisor type guy either. He is right there in the mix, getting his hands dirty with the rest of us.

Today we had a large crew here helping. Not only was it Gary and the Hubs and I, but we had Princess Girl, our highered hand (a young friend who’s working for us for the summer), a brother-in-law of sorts, and a couple the dads. In fact, the Dads put together the forms for the patio we poured out of the left over concrete.

Everyone had a job and did it well. There were times of rushed activity, and times of standing around not doing much.

All told, it took about 4 hours to do both the footers and the little patio.

Its been amazing hour much help our hired hand has been. And Princess Girl is learning fast and is able to help with more and more.

At the end of the day, it was amazing to just sit and take it all in. To reminisce about all the work that’s gone into the project thus far. To be proud of what our hard work has accomplished. And to realize that this is just the beginning.

Actually that last part scares me a bit. 

Ok. A lot.

We’ve worked so hard already. And we are just getting started. We have so far to go.

But I know we’ll get there. In God’s timing, and in His will.

And when it’s all built, and we are sitting there of an evening, admiring the work of our hands, we’ll know it was all worth it.

And in the mean time, we just do the next step. Which tonight is wetting down the ground inside the footers so that it will settle and compact.

And now we’re off to bed. Its been a big day.

Raising chicks while living off-grid

So yeah. I’m a sucker for chicks. That is a fully established fact.

Yup. That’s two MORE chicks to add to our menagerie.

I was not planning on buying more chicks. But the feed store I was in had these 5 week old Ameraucanas for sale for only $2 more than they were selling brand new chicks.

And two of our four Ameraucana chicks had died (being crushed) within the first week. I really wanted more Ameraucanas. So when I saw these 5 week old chicks, who are almost the same age as our original chicks, and at a reasonable price?

Well, how could I resist?

[Did I mention that I went to that feed store, miles out of my way,  because I heard they had 5 week old Ameraucanas? No? Oh, well, that will be our little secret, k?]

So as Flower Girl sat in the parking strip grass next to the laundromat today, cuddling one of the new chickies, I figured it was high time to detail out how we have raised our chicks while living off-grid in a camping trailer.

She’s the chicken whisperer for sure!

On April 19, we brought our first chicks home and fostered them to a broody hen who had been sitting on golf balls for about 6 weeks. It worked great. You can read that post HERE

A few days later we tried again with another broody hen. It didn’t work at all. So we had to implement our backup plan.

We knew we needed to raise these chicks in a brooder. We had just emptied a large plastic tote, so that would work perfect. But there was no way that our solar power system could run a traditional heat lamp.

As the weather warmed up, we were able to use the warmth of the sun during the day. 

Solar powered warmth for the chicks – at least on sunny days 😊 (PS, this pic was take  after we got our bantams – the original chicks were about 10 days old, and the bantams ranged from less than a week old to about 2ish weeks old)

But what about at night? Or when it was overcast or cold? Sure, their brooder box would be in the mud room, out of the elements, but April in Northern Nevada is still pretty chilly. Too chilly for newly hatched chicks.

I had seen some warming plates online that advertised that they only use 15watts, but even with Amazon’s 2-day shipping, it would still be several nights before we could get one and set it up. 

So, to keep our little chickies warm, we built a little hut out of some reflectix we had laying around. (Reflectix is a insulative mylar and bubble wrap material, basically what a lot of car windshield shades are made from.)

Reflectix hut inside the brooder box

We cut a hole just big enough for the chicks to get in and out.

So we had the hut made, but we still needed a heat source. So, we heated some water and put it in a quart size canning jar and placed it in the warming hut, making sure that the door was not blocked so the chicks could get in and out.

The hut was sized just right so that a quart size jar and 6 chicks could all fit in the hut together.

This worked great, except that the water needed to be reheated every 4 hours. Even in the middle of the night. Which meant that for three nights, I was getting up at 2am to reheat the water for the chicks. 

It reminded me of middle of the night feedings of the girls when they were babies. 😄

So after three nights of getting up at 2am, I was very glad to see this come in the mail. (This is not an affiliate link. I am not being paid or reimbursed or compensated by Amazon or Premier. I’m just giving an honest review of a product I actually bought.)

Warming plate for chicks

The under side gets to be about 110°F, just a bit warmer than a mamma hen. It’s easily adjustable in height to accommodate growing chicks, and advertised that it only takes 15 watts to run. 

Considering we are set up on solar power, and this would be running all night, a minimal power draw was essential. But we were skeptical, especially seeing that it was designed for a 220volt system (maybe because it’s made in Germany?) and we are running 110 through our inverter.

But we plugged it in and gave it a go. 

And it worked as advertised. Actually, the power consumption was even less. We hooked it up to our power meter, and it never drew more than 12watts. It and the refergerator could run all night long on our battery bank no problem. Providing the batteries were fully charged, of course.

When the chicks were about 3 weeks old, we got a new (to us) little coop and decided to put the chicks out there. The warming plate went with them, of course.

See the orange extension cord going through the closed window? That’s for the warming plate​ inside.

(Edited to add this photo since I finally found it.)


When they were between 4 and 5 weeks old, I noticed that they were no longer sleeping under the plate at right, rather preferring to cuddle up in a corner. After several nights of that, and with overnight lows expected to hold steady for a while, I turned off the warming plate. They haven’t needed it since. Even our smallest chick, our bantam frizzle, who is still so very tiny, would snuggle her way into the middle of the pile to stay warm. I thought for sure she’d be crushed. But she’s a tough little thing. (As a side note, at 4 weeks was also about the time our mamma hen stopped mothering the chicks in the other flock. Seems 4-5 weeks is the magic age for chicks to be mature enough to “be on their own”.)

The chicks are now between 6 and 7 weeks old (except for our newest ones who are 5ish weeks). They recently got a small run to roam around in outside.

New small run on the Brooder Coop

Soon we’ll start letting them free range in the afternoons with all the other hens and chicks (and Cogburn the Rooster). And this week, the bantams are going to their new home at my parents’ house (that’s been the plan all along), so there will be more room for everyone as they continue to grow. 

So there you have it. How we raised chicks in a brooder while living in a camping trailer off-grid. 

And now the question begs to be asked. Which way do I prefer – letting a mamma hen raise the chicks or raising them in a brooder? Honestly, I can’t decide. There are pros and cons to both systems, especially the way we have things set up here. Let me think on it and get back to you, k? 😉

Chicken news – in pictures

I wanted to share with you all the excitement that’s been going on here on the homestead regarding our chickens. Our flock(s) have multiplied significantly recently ( we are apparently the victims of #chickenmath 😃). So here’s a bunch of pictures of all things chickens.

1st of all, here’s how we keep food and water reserved for the chicks in with the rest of the flock (otherwise the adults eat it all and the chicks don’t get any). The handle holes in the crates are just big enough for the chicks, but keep the adults out.

Our new flock of Rhode Island Reds that we inherited (and one Barred Rock). They are all pretty old, but we’re still getting about a dozen eggs a day out of 20 hens. We’ll keep them for the summer.

Our new rooster, “Cogburn”. He’s a real sweetheart.

Yes, as in Rooster Cogburn 😃

We re-homed our mean rooster, Mr Darcy, back to his original owner.


We impulsively brought home 5 Asian Black chicks…


…and 7 miscellaneous bantams. And, yes, most of the bantams will not be kept. I have no use for “ornamental” breeds


Except for possibly this one. She’s soooo adorable! She might get to stay.

And this one, the smallest of the lot, who’s​ feathers are just starting to curl up. It’s a Frizzle! Even though I have a suspicion it’s a boy, I still wanna keep him!

We are letting the Asian chicks free-range during the day since we don’t really have another place set up for them yet. They are doing great and starting to get braver. Before they start ranging too far, we will put them in the new coop we were given.

Speaking of the new coop, here it is, just getting off the trailer. We have the most amazing friends!

We’ve started bringing the brooder chicks out to get some sun. This means that we don’t have to run their warming plate all day and our batteries have a better chance of charging during the day.

Here’s the coop and run we made out of pallets

The cute sign my mom my made for our coop.

That’s it for now. Tons going on. Life is full.

Fostering chicks

So. We live in an off-grid tiny home (ie a 280 square foot camping trailer) and we’re busy building a house. Just the situation and time to bring home 17 baby chicks from the feed store, right?

No? You don’t think so?

I think you’re probably right. But we brought them home anyway. 

You see, we had a plan!

We had two hens go broody, and while we eventually decided that we didn’t want them to hatch any of our own eggs (we don’t want our rooster procreating), the idea of baby chicks had taken hold.

So, we put one of the hens in her own penthouse suite (ie, and old dog crate), and let the other sit in one of the egg laying nests in the main coop.

Broody hen in her kennel

Both hens were sitting on a few golf balls. These make excellent, cheap imitation eggs. 

Our plan was to let them sit on their “eggs” for a few weeks, then buy chicks from the feed store and do a little switcheroo and the hen will think her “eggs” hatched.

Or so the theory goes. 

And I’m here to tell you that it works! 

Kinda.

Here’s our story.

On Wednesday, April 19 we bought 9 chicks (4 Gold Sexlinks, 4 Ameracaunas, and 1 Golden Laced Wyandotte). We gave the chicks to our broody Austra White, “Bluebell” (so named because she has a blue band on her leg) at about 4pm. 

Bluebell and a couple of her new chicks

She was a bit confused at first, and the chicks didn’t know what she was, but within about 10 minutes, all the babies were snuggled up under their new mamma and she was happily clucking away to them.
The next morning, they were all out in the enclosure I set up inside the coop so that they had a bit of space to move around, but would be separated from the rest of the flock. They hung out in this space for a couple days. I figured by using crates, the other hens would be able to get used to the chicks so that by the time I started letting them out into the larger area and even out into the run, there shouldn’t be any problems.

Inside their enclosure inside the coop.

At this point, everything was going so well. I was exstatic that it was working out just as I’d read about. Bluebell was a good mamma. She kept the babies warm when needed, and was even careful how she stepped around them.

Good mamma, keeping her babies warm!

I was excited for Phase 2: more chicks to give to “Roadie”, our other broody hen.
On Friday, April 21, we bought another 8 chicks (4 Welsummers, 2 Barred Rocks, and 2 Delawares.)

We attempted to repeat our success.

And that’s where everything went to pot.

Roadie rejected the chicks! 😞 She kept pecking them away. More on that later.

So now we had 17 chicks and only one mamma hen. I have heard stories of a hen hatching out and caring for a large brood, so I figured we’d try giving the other chicks to Bluebell and hope she could raise them. At least for the night until we got a brooder of some sort set up for some of them.

It worked. Kinda. 

On Saturday morning, I found a chick dead in the nest box. It had been crushed. 😢 Seems 17 was just too many. Go figure.

And a weird thing that morning is that Bluebell was pecking at two of the new chicks. Just the two Barred Rocks. None of the others. So we rescued those two and set up a brooder box for them. And we figured that since we had to do it for two of them, we’d pick out several others and lighten Bluebell’s load. 

So, besides the two Barred Rocks, we grabbed a Welsummer, a Sexlink, the Wyandotte, and one of the Ameracaunas. The Wyandotte and that particular Ameracauna are special to Flower Girl and Princess Girl. 

That left 10 chicks with Bluebell. Five of them are from the older group, and 5 are from the younger group. Two days age difference doesn’t make hardly any difference at all.

And she has been a great mamma. They are just over a week old now and have started roaming outside and even free-ranging with the flock. 

Mamma in the chicken run, babies small enough to free range through the fence. (But they never get too far from mamma!)

The other hens and the rooster leave the chicks alone, even Roadie who is back in with the flock. I have seen Bluebell run off the other hens if she doesn’t want them around, and she gets antsy if the chicks wander too far away from her, especially if they are on the other side of the fence from her!

It is great to have all those little chickies running around! 

I feel kinda bad for the ones in the brood box in our mudroom. They don’t get to run and scratch and play outside like Bluebell’s brood. Maybe I’ll have Flower Girl take them outside tomorrow and set up a little space where they can get some of the same experience. 😃

Chicks in the brooder box

So, remember when I mentioned that Roadie was pecking at the chicks and Bluebell pecked at only certain ones? I have a theory why that happened.

In Roadie’s kennel crate, I had noticed that mice were getting in to eat her food. Annoying, but I didn’t think to much of it till she started pecking at the chicks. I betcha that she didn’t know the difference between her babies and the pesky mice that would come to eat her out of house and home. And the Barred Rock chicks are black, so maybe Bluebell also thought they were mice since I see evidence of them in the coop from time to time. I dunno. I could be crazy. Roadie could just be a bad mom. And Bluebell could just not like the color black. Either way, I think before I try the kennel again for a broody hen, I’ll have to find a way to solve the mouse problem.

So that is our success story, and our failure. I learned a lot and hope you did, too. 

I’ll write up another post about how we have the brooder set up, and what we did until we got a heat source that would work on our off-grid solar system.

Building update – and a great wood cutting tip!

For those of you who do not follow us on Facebook or Instagram, you probably don’t know that we actually started building our house! 

Finally!

After months and months of permit delays. And more and more months of weather delays, we finally “broke ground” on Easter weekend.

Bringing in “DG” (decomposed granite) to level out the house pad.

The perimeter of the house outlined in compacted and leveled DG

Once the pad was leveled, it was time to build the footing forms. We decided to build the forms up and backfill rather than try to dig down into our very bouldery ground. 

Yes. “Bouldery.” See all those huge boulders in the above pictures? That’s what lies just below the surface up here!

The first day’s progress.

Yup, that’s me, putting one of the pier footing forms together.

We have a family friend who is a licensed contractor who is helping us get all this right (that’s him in the red plaid shirt). We couldn’t do it nearly so well or as easily without his help. As with many things in life, it’s not what you know, it’s who you know. And we are so very glad to know him (and that he is so generous with his time) ’cause we don’t know much!

Princess Girl, “Mom, I need ‘more cowbell’!” So proud of my girl. Not only was she a huge help putting all those “cowbells” on the forms, but she also quoted a Saturday Night Live skit. Yep, we’re raising her right! 😃

Building: a family affair

The perimeter of the house footings – almost completely built. Now to do all the leveling and put in rebar, etc.

It’s so wonderful to see the progress after waiting for so long. 

And today I learned something new. Something that makes me say, “No way!” A new way to use a skill saw!

I’ve used a skill saw for 20+ years and just today learned something new. I’ve seen the pros (building contractors, etc) use a skill saw in a certain way but never knew why. Today, I tried it and was blown away with the results!

The old way: you lay the 2×4 flat on the sawhorse(s) and hold it with one hand while pushing the saw across the wood. All the while, the force of the saw pushes against the board and it is hard to hold it still. 

The old way.

Close up – old way

In order to hold the wood still, you can use a clamp, but that takes a while to put in place and remove, and when you’re making a bunch of cuts as I was today, they are too cumbersome to use.

I’m not sure what made me think to try something new, but I figured, what could it hurt?

The new way: So, I turned the 2×4 up on it’s long edge at about a 45 degree angle and the saw cut through so easily, I was shocked. I had no trouble keeping the saw on the cutting line, and the weight of the saw pushed it’s own way though the wood. 

The new way: turn that wood up on it’s edge!

Close up – the new way

The wood rests on the sawhorse and the force of the saw is pushing downward rather than across, so the board doesn’t move around.
So easy!

This technique will make the thousands of cuts I’ll be making over the coming months that much easier. 

Just goes to prove that it’s never too late to learn something new.

Change of plans

First, we had to delay starting our house because we had to move to Portland for almost 2 years to help care for the Hubby’s mom. 

We ended up needing to plan a bigger house than we originally thought in order to accommodate Hubby’s folks moving in with us.

Then we had to completely move the location of the house from one side of our 40 acre property to the other because the original site didn’t have a good spot for septic.

We planned to get more work done over the winter, but the weather did not cooperate.

And here we are, having to change some of our house plans. 

Yet again.

Plotting the original corner of the house

It wasn’t a major change, we just changed the directional orientation of the house a few degrees. It amounted to moving the house about 15ft. Not that big of a deal, except that it really cuts down on the amount of driveway and parking area we’ll have. It was just feeling…Well, cramped. 
And yes, we do have 40 acres, but only about 3 of those are not on the side of a steep hill. And the house pad is carved out of the side of one of those hills. So we are kinda limited on space in some ways. 

But I digress. Since we changed the angle of the house, we had to look at where the detached garage is going to be built and how to get more space.

Which made us consider doing some earth moving in a area where we planned to put our orchard.

Which would give us much more space on the house pad, but where to put the orchard instead? 

Which made us look around and decide that the other logical place for the orchard is actually better. 

Which made us realize once again that when plans have to change for one reason or another, there’s usually a silver lining. I could go down the list at the beginning of this post and show how  because we had to do it differently than originally planned, we’re actually better off now than we would have been had our original plans gone through. 

In the Bible, James tells us that when we make our plans we need to realize that God is the one who is ultimately in control and we can only follow through with our plans if it is his will (James 4;13-15). Similarly, Proverbs 19:21 says, “Many are the plans in a man’s heart, but it is the Lord’s purpose that prevails.”

We try to remember these truths when making our plans, and realizing that when plans change, it’s all for the best, in one way or another.